The secret to a great bacon bomb isn’t just the ingredients; it’s the structure. By omitting breadcrumbs, we create a protein-packed bite that is incredibly juicy. When you bite through the caramelized BBQ glaze and the crispy bacon, you’re met with pure seasoned beef and a molten core of sharp cheddar cheese. It’s simple, rustic, and absolutely delicious.
Table of Contents
Why You’ll Love This Recipe
If you are looking for a dish that delivers high-impact flavor with very little stress, this is it. These Cheddar-Stuffed BBQ Bacon Bombs are a favorite for several reasons:
- The Ultimate Texture Contrast: You get the crunch of the bacon, the tender bite of seasoned beef, and the creamy, molten surprise of melted cheddar all in one mouthful.
- Naturally Hearty (No Fillers!): By skipping the breadcrumbs, we’ve created a meatier, richer flavor profile that is naturally satisfying and great for those watching their carb intake.
- Simple Pantry Staples: You don’t need exotic ingredients. Everything on the list is a household staple, making this a great “last-minute” hero recipe for busy weeknights.
- Mess-Free Cleanup: Thanks to the aluminum foil and wire rack method, the grease is contained, and your oven stays clean.
- Total Crowd-Pleaser: Whether you’re serving picky eaters or hungry adults, these “bombs” are visually impressive and taste even better than they look.
Essential Kitchen Tools & Equipment
Before you start, make sure you have these basic tools ready to go. Having everything organized (mise en place) makes the process much smoother.
- Large Baking Sheet: To catch any drips and hold the bombs.
- Wire Cooling Rack: This is crucial. Placing the rack on top of the baking sheet allows hot air to circulate under the meat, ensuring the bacon gets crispy all the way around.
- Large Mixing Bowl: For combining the meat and seasonings.
- Sharp Knife & Cutting Board: To cube the cheese and prep any garnishes.
- Pastry Brush: To evenly coat the bombs with BBQ sauce.
- Aluminum Foil: For lining your baking sheet (this makes cleanup a breeze).
- Meat Thermometer: The best way to ensure the beef is safely cooked without overdoing it.
The Recipe: Cheddar-Stuffed BBQ Bacon Bombs
This version of the recipe relies on the egg and the natural proteins in the beef to bind everything together, resulting in a richer flavor profile.

Ingredients
- Ground Beef: 1.5 lbs (Look for 80/20 or 85/15 lean-to-fat ratio for the best moisture).
- Bacon: 10–12 slices of standard-cut bacon. (Thick-cut is harder to crisp up in the oven).
- Cheddar Cheese: 1 block of sharp cheddar, cut into 1-inch cubes.
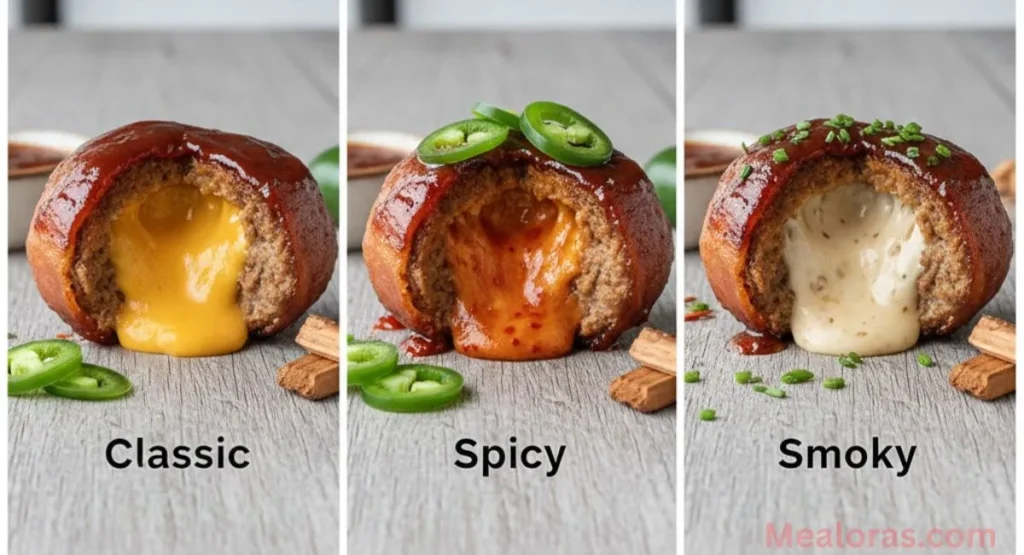
- Barbecue Sauce: 1 cup of your favorite BBQ sauce (Smoky, Sweet, or Spicy).
- Egg: 1 large egg (this acts as the primary binder since we aren’t using breadcrumbs).
- Garlic Powder: 1 teaspoon.
- Onion Powder: 1 teaspoon.
- Smoked Paprika: ½ teaspoon.
- Salt and Black Pepper: To taste (be conservative with salt as bacon is naturally salty).
Step-by-Step Instructions
1. Prep the Oven and Pan
Preheat your oven to 375°F (190°C). Line your baking sheet with aluminum foil and place the wire rack on top. This setup is the “pro-tip” for avoiding soggy bacon bottoms.
2. Season the Beef
In your large mixing bowl, combine the ground beef, the egg, garlic powder, onion powder, smoked paprika, salt, and pepper. Use your hands to gently work the ingredients together. Tip: Don’t over-mix; you want the meat to stay tender, not become a tough paste.

3. Cube the Cheese
Cut your cheddar block into uniform 1-inch cubes. If the cubes are too large, the meat wall will be too thin; if they are too small, you won’t get that satisfying “cheese pull.”
4. Form the Bombs
Take a small handful of the meat mixture (about the size of a large meatball) and flatten it in your palm. Place a cheese cube in the center and wrap the meat around it. Roll it between your palms to ensure a smooth, spherical shape with no visible cracks. If the cheese can see the light, it will leak out.

5. The Bacon Wrap
Wrap a slice of bacon tightly around each beef ball. You can start the wrap on the bottom, go over the top, and tuck the end back underneath. The weight of the bomb will usually hold the bacon in place, but you can use a toothpick if the bacon feels slippery.
6. The First Bake
Place the bombs on the wire rack, leaving space between each one. Bake for 20–25 minutes. The bacon should start to look golden and the fat will begin to render.
7. Glaze and Finish
Remove the tray from the oven. Use your pastry brush to coat each bomb generously with BBQ sauce. Put them back in the oven for another 5–10 minutes. This allows the sauce to “set” and turn into a sticky, delicious glaze.
8. Rest Before Serving
Let the bacon bombs sit for at least 5 minutes. This prevents the melted cheese from scalding your mouth and allows the juices in the meat to redistribute.
Looking for More Bold Flavors? If you enjoy recipes that combine a crunchy exterior with a decadent, melted center, consider trying these Hot Cheetos Boudin Balls (Crispy, Cheesy, Spicy Cajun Snack). Much like the bacon bombs, they offer a unique twist on traditional comfort food by incorporating a vibrant, spicy coating and a rich, savory filling.
Helpful Cooking Tips and Variations
- Temperature Matters: Use cold beef. It sticks to itself better and makes the “stuffing” process much easier.
- Avoid the “Leak”: If you’re worried about cheese leaking, try double-wrapping the cheese cube with a very thin layer of meat first, then adding the rest of the meat ball.
- Swap the Cheese: While cheddar is classic, Monterey Jack or even a small piece of Pepper Jack adds a lovely kick.
- The Broiler Finish: If your bacon isn’t quite as crispy as you’d like after the glaze step, turn the oven to “Broil” for 60 seconds. Stay right there and watch it—it goes from perfect to burnt very quickly.
Common Mistakes to Avoid
- Over-handling the Meat: This makes the beef dense and dry. Mix just until the egg and spices are incorporated.
- Using a Flat Pan: If you don’t use a wire rack, the bacon bombs will sit in their own grease, making the bottom half mushy.
- Too Much Salt: Between the bacon and the bottled BBQ sauce, there is plenty of sodium. Only add a small pinch of salt to the raw beef mixture.
Storage and Serving Suggestions
These are best served fresh, but they make great leftovers for lunch. Store them in a sealed container in the fridge for up to 3 days.
Serving Ideas:
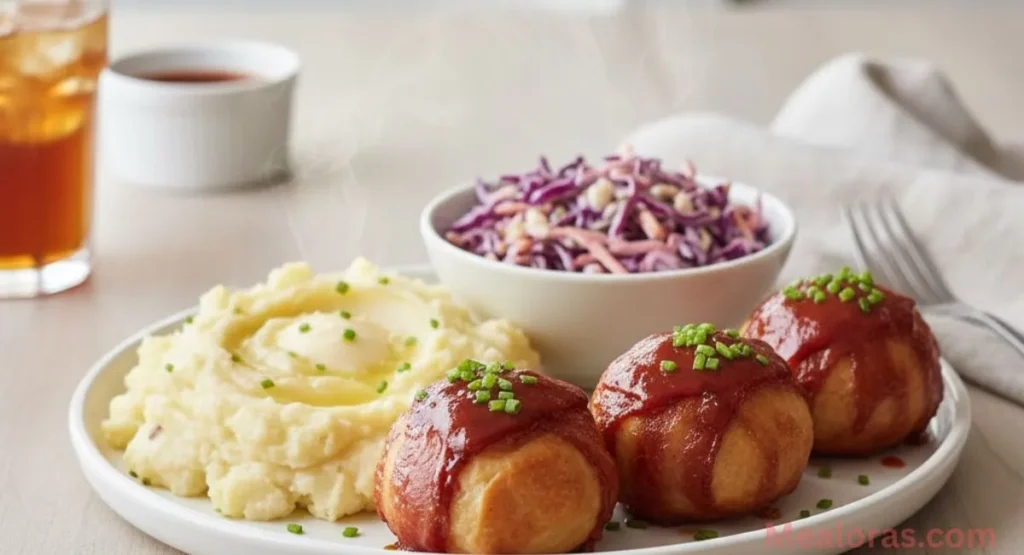
- Serve atop a bed of creamy mashed potatoes.
- Pair with a crisp apple and cabbage slaw to cut through the richness.
- Place them inside a toasted slider bun for a “Bacon Bomb Slider.”
Frequently Asked Questions (FAQs)
1. Can I make these without breadcrumbs? Yes! This recipe is specifically designed without them. The egg and the protein in the beef provide plenty of structure.
2. What if I don’t have a wire rack? You can bake them on a foil-lined tray, but you may want to carefully flip them halfway through to help the bacon cook evenly.
3. Can I use ground turkey? Yes, but ground turkey is leaner, so be careful not to overcook them or they may become dry.
4. How do I prevent the bacon from unrolling? Tuck the ends of the bacon underneath the meat ball so the weight of the bomb keeps it secure during baking.
5. Is a specific BBQ sauce better? Thicker sauces generally glaze better. Thin, vinegar-based sauces might run off before they have a chance to caramelize.
6. Can I freeze these? It is best to freeze them before baking. Thaw them completely in the fridge before putting them in the oven.
7. Why is my bacon still chewy? This usually happens if the oven wasn’t hot enough or if the bacon was too thick. Stick to standard-cut bacon for the best results.
8. Can I add onions to the meat? Yes, but make sure they are very finely minced so they don’t create gaps in the meat that allow cheese to leak out.
9. Can I use frozen ground beef for this recipe? Yes, but you must thaw it completely in the refrigerator before starting. If the meat is still icy, it won’t bond properly with the egg, and the excess moisture might prevent the bacon from getting crispy. For the best results, pat the thawed meat dry with a paper towel before mixing in your seasonings
Final Thoughts
Cooking doesn’t have to be complicated to be impressive. These Cheddar-Stuffed BBQ Bacon Bombs prove that with just a few quality ingredients and the right technique, you can create a meal that looks and tastes like it came from a high-end smokehouse. The absence of breadcrumbs makes the beef flavor more intense and the texture more tender. Give this recipe a try for your next family night—it’s a simple joy that everyone will remember.

Cheddar-Stuffed BBQ Bacon Bombs
Ingredients
- Ground Beef: 1.5 lbs 80/20 or 85/15 lean-to-fat ratio
- Bacon: 10–12 slices regular-cut
- Cheddar Cheese: 1 block of sharp cheddar cut into 1-inch cubes
- Barbecue Sauce: 1 cup your favorite flavor
- Egg: 1 large egg
- Garlic Powder: 1 teaspoon
- Onion Powder: 1 teaspoon
- Smoked Paprika: ½ teaspoon
- Salt & Black Pepper: To taste
Instructions
- Prepare the Baking Station Begin by preheating your oven to 375°F. Line a baking sheet with aluminum foil to catch any drippings and place a wire cooling rack on top of the sheet. This setup allows the heat to reach the bottom of the bacon, ensuring a crispy finish all around.
- Season the Beef Mixture In a large mixing bowl, combine the ground beef with the egg, garlic powder, onion powder, smoked paprika, salt, and pepper. Use your hands to gently mix the ingredients together until just incorporated, being careful not to overwork the meat to maintain a tender texture.
- Stuff with Cheese Take a small portion of the beef mixture and roll it into a ball about the size of a golf ball. Press a deep hole into the center with your thumb and insert a cube of sharp cheddar cheese. Pinch the meat carefully back over the cheese, rolling it between your palms to ensure there are no cracks or gaps where the cheese could leak out.
- Wrap in Bacon Take a slice of bacon and wrap it tightly around the beef ball. Start at the bottom, wrap it over the top, and tuck the ends underneath the ball. The weight of the meat will hold the bacon in place during the cooking process.
- Bake and Glaze Arrange the bombs on the wire rack and place them in the oven to bake for about twenty minutes. Once the bacon begins to brown, remove the tray and use a pastry brush to apply a thick layer of BBQ sauce to each bomb. Return them to the oven for a final few minutes until the sauce is caramelized and tacky.
- Rest and Serve Transfer the tray to a heat-safe surface and allow the bacon bombs to rest for at least five minutes before serving. This short wait ensures the melted cheese settles and the juices stay inside the meat when you take your first bite.
Notes
- Storage: Keep leftovers in an airtight container in the fridge for up to three days.
- Reheating: Use an air fryer or oven at 350°F for a few minutes to crisp the bacon back up.

Mealoras your go-to for simple, flavorful recipes! From quick weeknight dinners to sweet treats and family favorites, we make cooking easy, fun, and delicious for everyone in the kitchen.