Honeycomb Pie Recipe: No-Bake Custard Dessert with Bubble Wrap Texture
A creamy no-bake Honeycomb Pie with custard filling and a beautiful honeycomb top — perfect for parties and easy make-ahead desserts.
Ingredients
- Ingredient Amount Substitution / Notes
- Graham cracker or shortbread crust 1 pre-made crust or 1 ½ cups crumbs + 6 tbsp melted butter Use gluten-free cookies for GF version
- Elderberry or blueberry preserves ½ cup Any fruit jam works apricot, raspberry, or honey jam
- Egg yolks 3 large Can substitute with ¼ cup pasteurized yolk liquid
- Elderflower syrup ⅓ cup plus ½ cup for drizzle Replace with honey + lemon juice for similar taste
- Unflavored gelatin 2 tsp 1 packet Use agar powder (½ tsp) for vegetarian option
- Whole milk 1 cup Use coconut or almond milk for dairy-free
- Lemon juice 1 tsp Helps stabilize whipped egg whites
- Egg white 1 large Adds airiness and structure
- Heavy cream ½ cup Coconut cream for dairy-free
- Honey 1 tbsp optional For stronger honey flavor
- Food-safe bubble wrap As needed For creating honeycomb texture
- Edible candy bees or flowers Optional For decoration
Instructions
- Step 1: Prepare the Crust and Filling Base
- If you’re using a homemade crust, bake and cool it completely before filling.
- For a store-bought crust, skip baking and spread a thin, even layer of elderberry preserves on the bottom — this adds a fruity sweetness that pairs beautifully with the honey-custard flavor.
- Step 2: Make the Custard Mixture
- In a saucepan, whisk together egg yolks, a little elderflower syrup, gelatin, and a pinch of salt.
- Warm the milk until just simmering, then slowly pour it into the yolk mixture while whisking constantly — this gently tempers the eggs.
- Cook the mixture over medium heat for 4–5 minutes, stirring until it slightly thickens and coats the back of a spoon.
- Strain the hot custard through a fine sieve to remove any lumps, then cool it over an ice bath until smooth and creamy.
- Step 3: Whip and Fold for Airy Texture
- Beat egg white with lemon juice until stiff peaks form.
- In a separate bowl, whip heavy cream until soft peaks appear.
- Gently fold both into the cooled custard using a spatula — this makes the filling light, airy, and mousse-like.
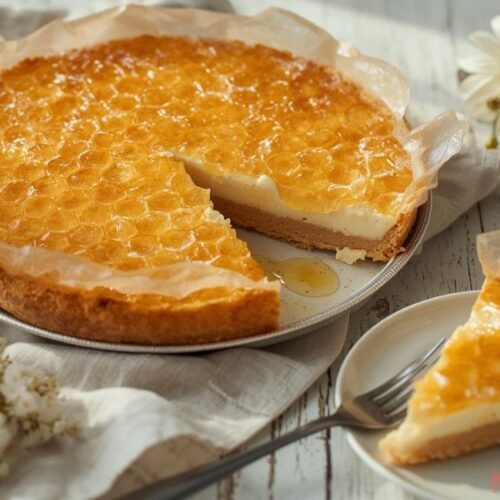
- Step 4: Add the Honeycomb Pattern and Set
- Pour the creamy mixture into your prepared crust and smooth the top.
- Lay a clean, food-safe bubble-wrap sheet (bubble side down) over the surface to create that signature honeycomb texture.
- Freeze for at least 3 hours, or overnight for a firmer, sliceable pie.
- Step 5: Drizzle, Decorate, and Serve
- Peel off the bubble wrap to reveal the beautiful honeycomb pattern.
- Simmer the remaining elderflower syrup until slightly thickened, then let it cool and drizzle over the pie.
- Thaw in the fridge for about 1 hour before slicing.
- For a bakery-style finish, decorate with edible flowers, gold dust, or sugar bees — perfect for special occasions!