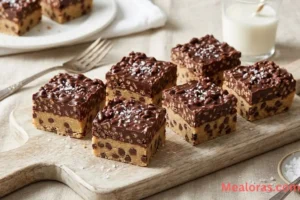
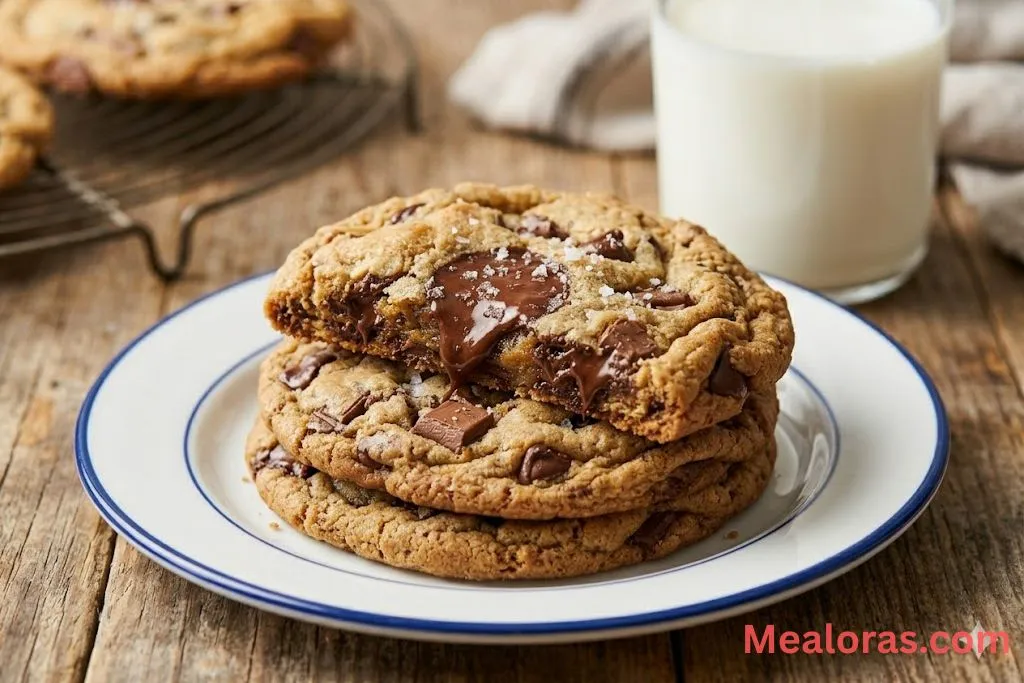
There is something truly special about walking into a high-end bakery and seeing those massive, golden-brown cookies sitting behind the glass. They have a certain look thick, crinkly on top, and absolutely loaded with pools of melted chocolate. Achieving that same result in a home kitchen is entirely possible with the right techniques and a few specific ingredients. This guide breaks down how to make a bakery-style chocolate chip cookie that features a crisp outer edge and a soft, almost gooey center.
Table of Contents
These cookies are designed to be substantial. Unlike standard thin cookies, these use a specific chilling process and a combination of different chocolate types to create a complex flavor profile. Whether looking for a comforting treat or a reliable recipe to share with others, this method delivers professional results every time. For those who enjoy experimenting with different flavor profiles in their baking, trying an espresso chocolate chip cookies recipe is a wonderful way to add a sophisticated coffee note to a classic treat.
Ingredients for Success
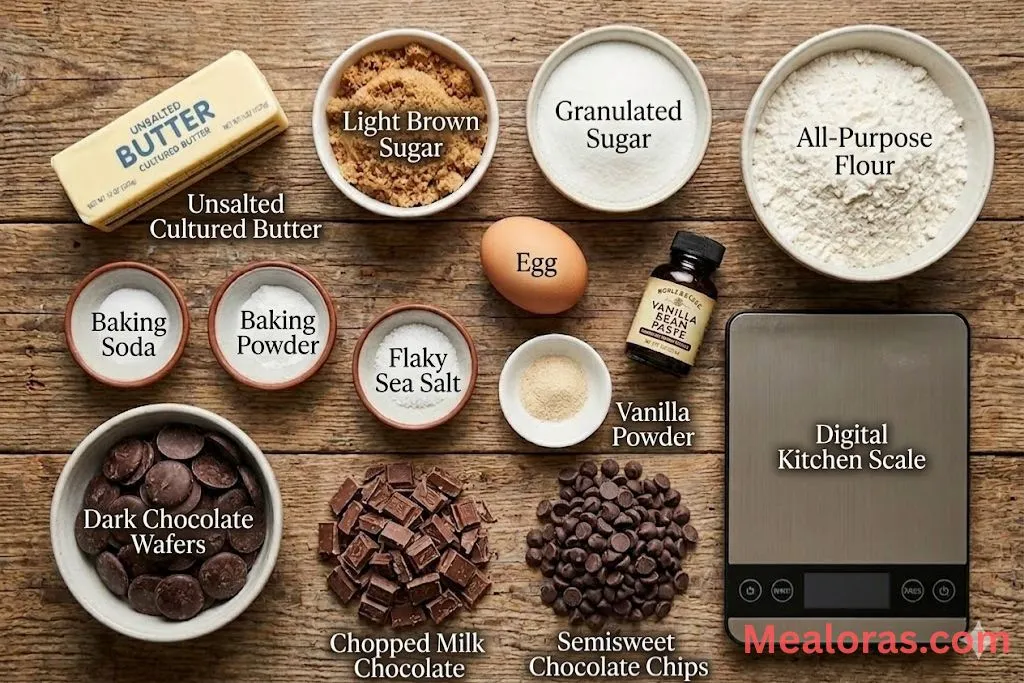
To get that authentic bakery texture, using quality ingredients is essential. Each component plays a vital role in the structure and taste of the final product.
The Ingredients
- Unsalted Cultured Butter: 1 cup (226g), kept at a cool room temperature (around 64-68°F).
- Brown Sugar: 3/4 cup (150g), firmly packed.
- Granulated Sugar: 1/4 cup (50g).
- Large Egg: 1, at room temperature.
- Vanilla Bean Paste: 1 tablespoon (provides those beautiful dark specks and deep flavor).
- All-Purpose Flour: 1 3/4 cups plus 2 tablespoons (240g).
- Baking Soda: 3/4 teaspoon.
- Baking Powder: 1/2 teaspoon.
- Fine Sea Salt: 3/4 teaspoon.
- Vanilla Powder: 2 teaspoons (optional, but adds an extra layer of bakery aroma).
- Dark Chocolate Wafers: 3/4 cup (100g).
- Milk Chocolate Bar: 2/3 cup (80g), roughly chopped.
- Semisweet Chocolate Chips: 1/4 cup (40g).
- Flaky Sea Salt: For finishing (optional).
Essential Tools
- Digital Kitchen Scale: Highly recommended for accuracy.
- Stand Mixer or Hand Mixer: For proper creaming of the butter and sugars.
- Large Cookie Scoop: Aim for a 5-ounce capacity for that oversized bakery look.
- Baking Sheets: Heavy-duty pans work best for even heat distribution.
- Parchment Paper: Prevents sticking and helps with even browning.
- Wire Cooling Rack: Essential for stopping the cooking process at the right time.
Instructions
1. Cream the Butter and Sugars
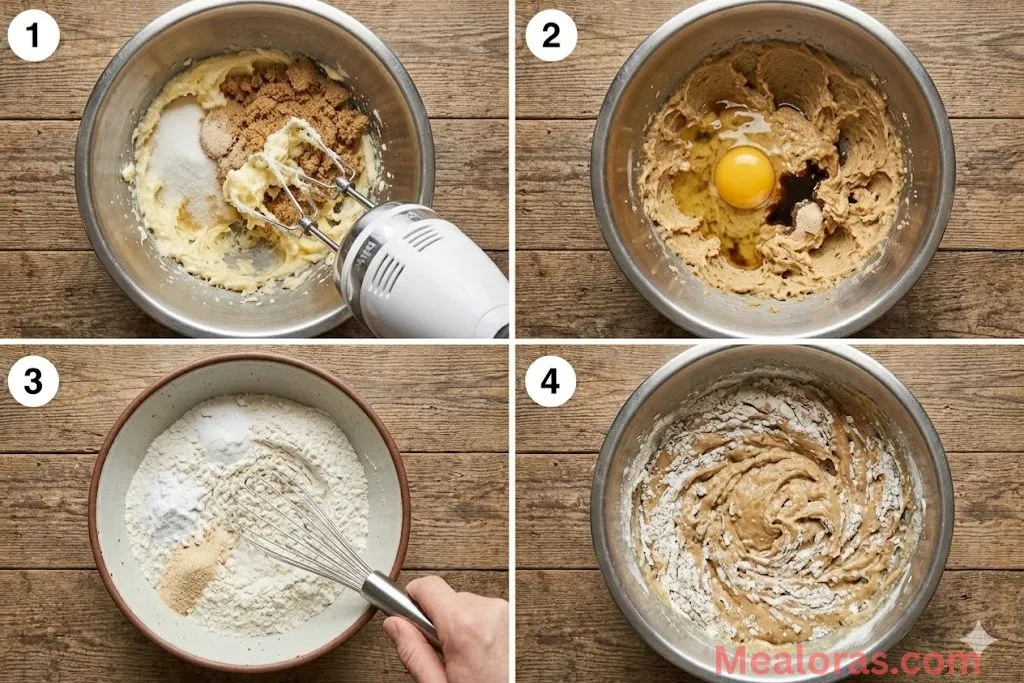
In the bowl of a stand mixer fitted with the paddle attachment, combine the cool room temperature butter, brown sugar, and granulated sugar. Beat the mixture on medium-high speed for about 3 minutes. The goal is to reach a light, fluffy consistency where the sugars are well-incorporated into the butter. Scrape down the sides of the bowl halfway through to ensure everything is mixed evenly.
2. Add the Wet Ingredients
Lower the mixer speed and add the egg and the vanilla bean paste. Continue to mix until just combined. It is important not to overbeat at this stage; the mixture should look smooth but not liquidy. If the dough seems too warm, the final cookies may spread too much in the oven.
3. Incorporate the Dry Ingredients
In a separate small bowl, whisk together the all-purpose flour, baking soda, baking powder, sea salt, and vanilla powder. With the mixer on its lowest setting, gradually add the flour mixture to the wet ingredients. Mix until only a few streaks of dry flour remain visible. Over-mixing the flour can lead to a tough cookie, so stopping just before it is fully blended is the secret to a soft texture.
4. Fold in the Chocolate
Using a sturdy spatula, gently fold in the dark chocolate wafers, the chopped milk chocolate, and the semisweet chips by hand. This variety of chocolate ensures that every bite has a different texture and sweetness level. Once the chocolate is evenly distributed, the dough is ready for portioning.
5. Scoop and Shape
Using a large scoop or a kitchen scale, portion the dough into 5-ounce balls. This recipe should yield approximately six very large cookies. Instead of rolling them into perfect spheres, keep them somewhat tall—roughly 2 inches in height. This height helps the centers stay soft while the edges crisp up. Place the dough balls onto a tray lined with parchment paper. If desired, press a few extra chocolate pieces onto the tops for a more visual appeal.
6. The Essential Chill
Cover the tray tightly with plastic wrap and place it in the refrigerator. The dough must chill for at least 6 to 8 hours, though letting it sit overnight is best for flavor development. Chilling the dough solidifies the fats, which prevents the cookies from spreading into thin puddles during baking.
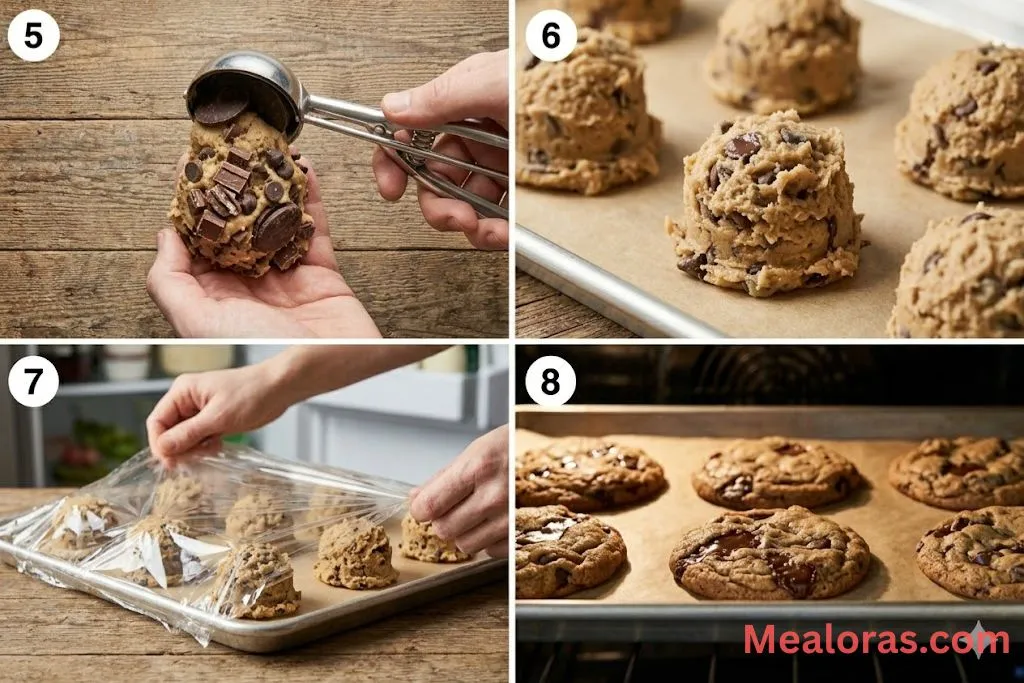
7. Bake to Perfection
Preheat the oven to 350°F (180°C). Line a fresh baking sheet with parchment paper. Place only 2 or 3 chilled dough balls on the sheet at a time, as they will expand significantly. Bake for 16 to 18 minutes. The edges should be a light golden brown, but the centers will still look slightly soft and underbaked. This is exactly what is needed for a chewy result.
8. Cool and Finish
Remove the tray from the oven and immediately sprinkle the tops with a pinch of flaky sea salt if desired. Allow the cookies to rest on the baking sheet for at least 10 minutes. They are very fragile when hot! Once they have set slightly, move them to a wire rack to finish cooling completely. While waiting for these to cool, it is often helpful to browse other citrus-based treats like a soft lime sugar cookies recipe to plan the next baking session.
Tips & Variations
- Butter Temperature: The most common mistake is using butter that is too soft. It should be cool to the touch and hold an indentation without feeling greasy.
- Chocolate Quality: Since chocolate is the star, using high-quality bars or wafers rather than just standard chips makes a massive difference in how the chocolate melts.
- Measuring Flour: If a scale is not available, use the “spoon and level” method. Never pack the flour into the measuring cup, or the cookies will be dry and cakey.
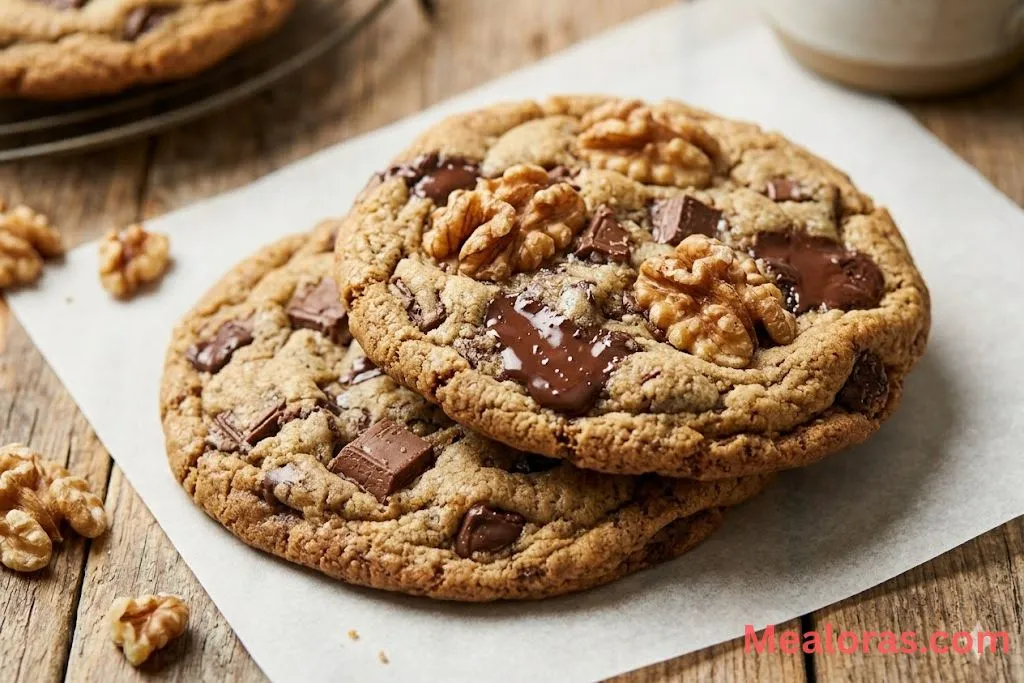
- Nutty Addition: For extra crunch, add 1/2 cup of toasted walnuts or pecans during the folding stage.
- Salt Balance: Don’t skip the sea salt in the dough. It balances the sweetness of the milk chocolate and enhances the dark chocolate notes.
- Size Adjustment: While these are designed to be large, the dough can be scooped into smaller 2-tablespoon portions. Reduce the bake time to 9-11 minutes for smaller cookies.
- Avoid Overbaking: The cookies will continue to firm up as they cool on the tray. If they look completely done in the center while in the oven, they will likely be too hard once cooled.
Storage & Serving
To keep these cookies fresh, store them in an airtight container at room temperature. they will remain soft and delicious for about 3 to 4 days. For longer storage, the baked cookies can be wrapped individually and frozen for up to two months. Simply thaw at room temperature before eating.
When serving, these are best enjoyed slightly warm. If they have been sitting out, a quick 5 to 10 seconds in the microwave can revive those melty chocolate pools. They pair perfectly with a tall glass of cold milk or a hot cup of herbal tea.
Frequently Asked Questions
1. Can the dough be baked immediately without chilling? Baking immediately will cause the cookies to spread significantly and lose their thick, bakery-style structure. At least 6 hours of chilling is required.
2. What if vanilla bean paste is unavailable? Standard pure vanilla extract can be used as a 1:1 replacement, though the flavor will be slightly less intense.
3. Why use three types of chocolate? Combining wafers, chips, and chopped bars creates different melting points and textures, leading to a much more professional finish.
4. Is it possible to use salted butter? Yes, but if using salted butter, reduce the added sea salt in the recipe to 1/2 teaspoon to avoid an overly salty flavor.
5. How can I get perfectly round cookies? Immediately after removing the tray from the oven, place a large circular cutter or bowl over a cookie and gently scoot it in a circular motion to pull the edges into a perfect circle.
6. Can I freeze the raw dough balls? Yes. After the initial chill in the fridge, the dough balls can be moved to a freezer bag. Bake directly from frozen at 325°F for a few extra minutes.
7. My cookies came out flat. What happened? The most likely cause is the butter being too warm during the mixing process or skipping the refrigeration step.
8. Can I use gluten-free flour? A high-quality 1:1 gluten-free baking flour can usually be substituted, though the texture may vary slightly from the original.
9. Why is brown sugar important? Brown sugar contains molasses, which provides moisture and chewiness, whereas granulated sugar helps with the crisp edges.
10. Do I need to grease the baking sheet? No. Parchment paper is much better than grease or cooking spray, as it prevents the bottoms from browning too quickly.
Conclusion
Creating professional-grade treats at home is a rewarding process that relies on patience and quality ingredients. By following this method—especially the cooling of the butter and the long chill time—anyone can produce cookies that look and taste like they came from a high-end shop. These chocolate chip cookies are sure to become a favorite for anyone who appreciates a deep chocolate flavor and a perfect texture.
Sharing a batch of freshly baked cookies is one of the simplest ways to bring a smile to someone’s face. If this guide was helpful, consider sharing it with friends or family members who enjoy spending time in the kitchen. Happy baking!

Bakery Style Chocolate Chip Cookies
Ingredients
- 1 cup 226g Unsalted Cultured Butter, cool room temperature
- 3/4 cup 150g Brown Sugar, packed
- 1/4 cup 50g Granulated Sugar
- 1 Large Egg room temperature
- 1 tablespoon Vanilla Bean Paste
- 1 3/4 cups + 2 tablespoons 240g All-Purpose Flour
- 3/4 teaspoon Baking Soda
- 1/2 teaspoon Baking Powder
- 3/4 teaspoon Fine Sea Salt
- 2 teaspoons Vanilla Powder optional
- 3/4 cup 100g Dark Chocolate Wafers
- 2/3 cup 80g Milk Chocolate Bar, chopped
- 1/4 cup 40g Semisweet Chocolate Chips
- Flaky Sea Salt for finishing
Instructions
- Cream the cool room temperature butter with the brown and granulated sugars until the mixture is light and fluffy.
- Mix in the egg and vanilla bean paste on low speed until the wet ingredients are just combined.
- Whisk the flour, baking soda, baking powder, salt, and vanilla powder together in a separate bowl.
- Gradually add the dry ingredients to the butter mixture, mixing until only a few streaks of flour remain.
- Gently fold in the dark chocolate wafers, chopped milk chocolate, and semisweet chips by hand.
- Portion the dough into large five-ounce balls and place them on a tray, keeping them tall rather than flat.
- Cover the tray and refrigerate the dough for at least six to eight hours to develop flavor and prevent spreading.
- Preheat the oven and bake the chilled dough balls on parchment paper until the edges are golden but the centers remain soft.
- Allow the cookies to rest on the hot baking sheet for several minutes before transferring them to a wire rack to cool completely.
Notes
• Don’t Skip the Chill: The long refrigeration period is essential for the signature bakery thickness.
• Carry-over Cooking: These cookies will look underbaked in the center when removed from the oven; they will firm up as they cool.

Mealoras your go-to for simple, flavorful recipes! From quick weeknight dinners to sweet treats and family favorites, we make cooking easy, fun, and delicious for everyone in the kitchen.