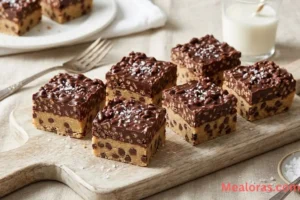
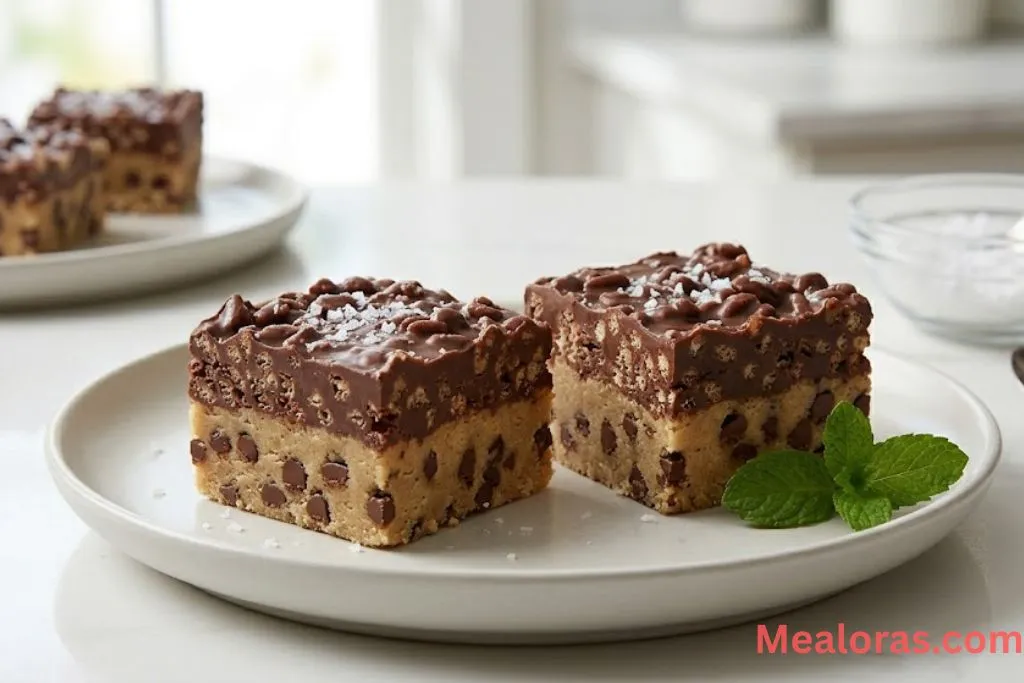
Finding the perfect treat that combines a soft, melt-in-your-mouth base with a satisfyingly crispy topping is a culinary win. These Cookie Dough Crunch Bars offer exactly that. They feature a rich, egg-free dough that is safe to eat without baking, topped with a decadent layer of chocolate mixed with light, airy cereal. Whether preparing a snack for a busy week or a sweet surprise for a family gathering, these bars are incredibly simple to assemble and always disappear quickly.
Table of Contents
The beauty of this recipe lies in its contrasting textures. The bottom layer is dense and creamy, reminiscent of the best part of making cookies. Meanwhile, the top layer provides a snap that keeps every bite interesting. Because this is a no-bake style dessert, it is a fantastic project for those who want to avoid the oven or are just beginning their journey into creating sweets. If you enjoy the satisfaction of a layered dessert, you might also find inspiration in these spiced carrot cake bars with a cream cheese swirl, which offer a different but equally delightful texture.
Ingredients
To ensure the best results, it is helpful to have all your components measured and ready before you start. This recipe uses standard pantry staples that combine to create something extraordinary.

Edible Cookie Dough Base
- All-Purpose Flour: 2 cups + 2 tbsp (Must be heat-treated for safety)
- Salted Butter: 12 tbsp (Softened to room temperature)
- Granulated Sugar: 1/2 cup + 2 tbsp
- Light Brown Sugar: 1/2 cup (Packed)
- Vanilla Extract: 1 tbsp
- Whole or 2% Milk: 1 tbsp
- Heavy Cream: 2 tbsp
- Semisweet Chocolate Chips: 1/3 cup
- Mini Semisweet Chocolate Chips: 1/3 cup
- Fine Sea Salt: 1/2 tsp
Chocolate Crunch Topping
- Semisweet Chocolate Chips: 1 1/2 cups
- Heavy Cream: 1/3 cup
- Vanilla Extract: 1/2 tsp
- Rice Crispy Cereal: 1 1/2 cups
- Flaky Sea Salt: 3/4 to 1 tsp (For the final garnish)
Essential Tools
- 8×8 inch square baking pan
- Parchment paper
- Large mixing bowl
- Electric hand mixer or stand mixer
- Rubber spatula
- Microwave-safe bowl
Instructions
Creating these bars involves a few simple stages: preparing the flour, mixing the dough, and adding the crunchy chocolate finish. Following these steps ensures a safe and delicious result.
1. Preparing the Flour
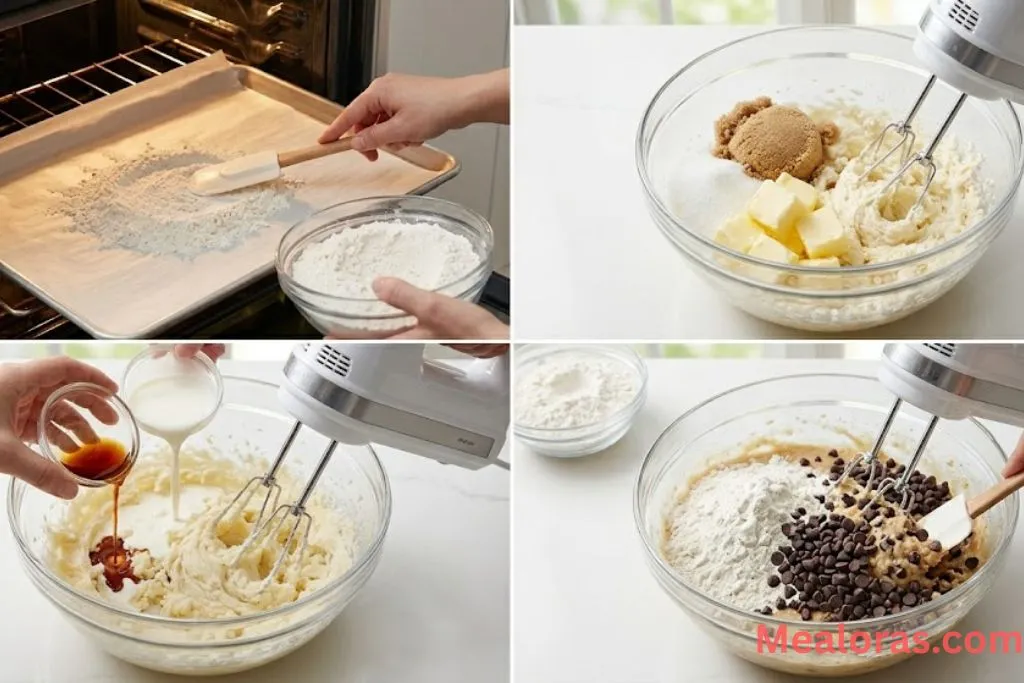
Raw flour can contain bacteria, so it must be heat-treated before being used in no-bake recipes. Spread the flour in an even layer on a baking sheet and bake at 350°F (180°C) for about 5 minutes. Alternatively, heat it in a microwave in 30-second bursts for about 2 minutes, stirring in between. Allow the flour to cool completely before using it; if it is still warm, it will melt your chocolate chips.
2. Preparing the Pan
Line an 8×8 inch square pan with parchment paper. Leave a bit of an overhang on the sides. This “sling” makes it much easier to lift the entire block of bars out of the pan once they have set.
3. Creaming the Butter and Sugars
In a large bowl, combine the softened salted butter, granulated sugar, and light brown sugar. Use an electric mixer on medium-high speed for about 2 to 3 minutes. You are looking for a texture that is light, pale, and very fluffy.
4. Adding Liquid Ingredients
Pour in the vanilla extract, milk, and heavy cream. Continue mixing until the liquid is fully incorporated and the mixture looks smooth.
5. Incorporating Dry Ingredients
Add the heat-treated flour and fine sea salt. Mix on a low speed just until the flour disappears. Over-mixing at this stage can make the dough too tough, so stop as soon as it looks uniform. Using a spatula, fold in both the regular and mini chocolate chips.
6. Setting the Base
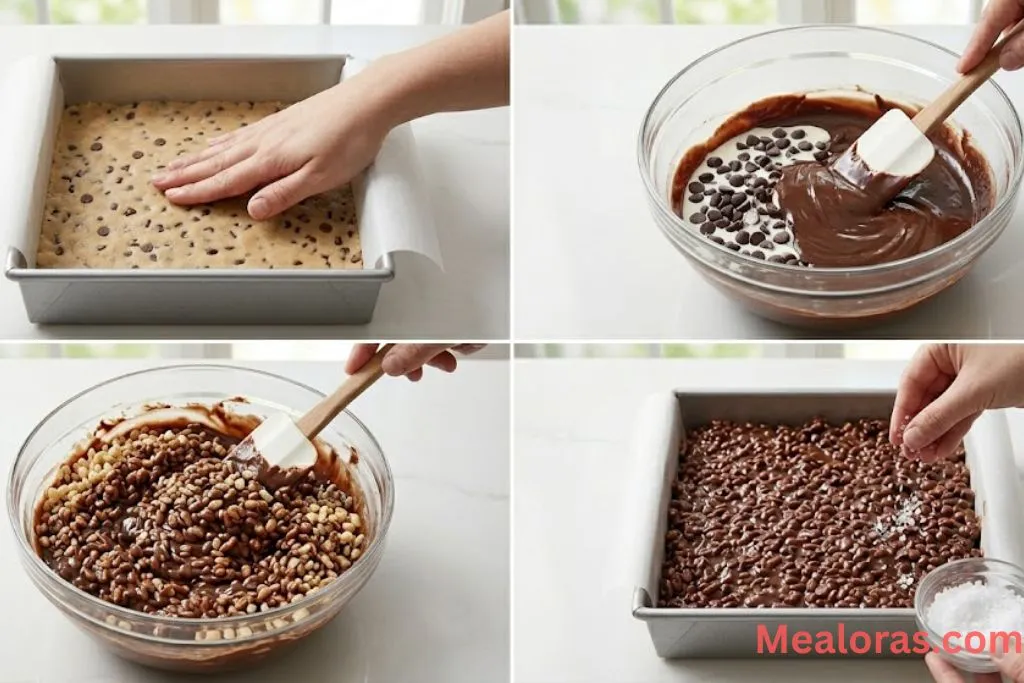
Transfer the dough into your prepared pan. Use a spatula or the back of a clean spoon to press it into a flat, even layer. Once smooth, place the pan in the refrigerator to chill while you prepare the topping.
7. Making the Crunch Topping
Place the 1 1/2 cups of chocolate chips and 1/3 cup of heavy cream in a microwave-safe bowl. Heat in 30-second intervals, stirring each time, until the mixture is completely smooth and glossy. Stir in the vanilla extract. Finally, gently fold in the rice crispy cereal until every piece is coated in chocolate.
8. Final Assembly and Chilling
Spread the chocolate cereal mixture over the chilled cookie dough layer. Use a spatula to ensure it reaches the corners. Sprinkle the flaky sea salt over the top for a professional finish. Place the pan back in the fridge for at least 3 hours, or ideally overnight, to let the layers firm up completely.
Tips for Success
- Sift the Flour: After heat-treating, flour can sometimes become lumpy. Sifting it ensures your cookie dough is perfectly smooth and creamy.
- Temperature Matters: Make sure the butter is soft but not greasy. If the butter is too cold, the sugars won’t cream properly; if it’s too hot, the dough will be oily.
- Clean Cuts: To get perfectly sharp edges when slicing, run a sharp knife under hot water, wipe it dry, and then make your cut. Repeat this for every single slice.
- Scale it Up: If you are feeding a larger group, this recipe doubles easily for a 9×13 inch pan. These treats are just as fun to make as banana donuts with a brown sugar glaze, providing a variety of textures for any dessert spread.
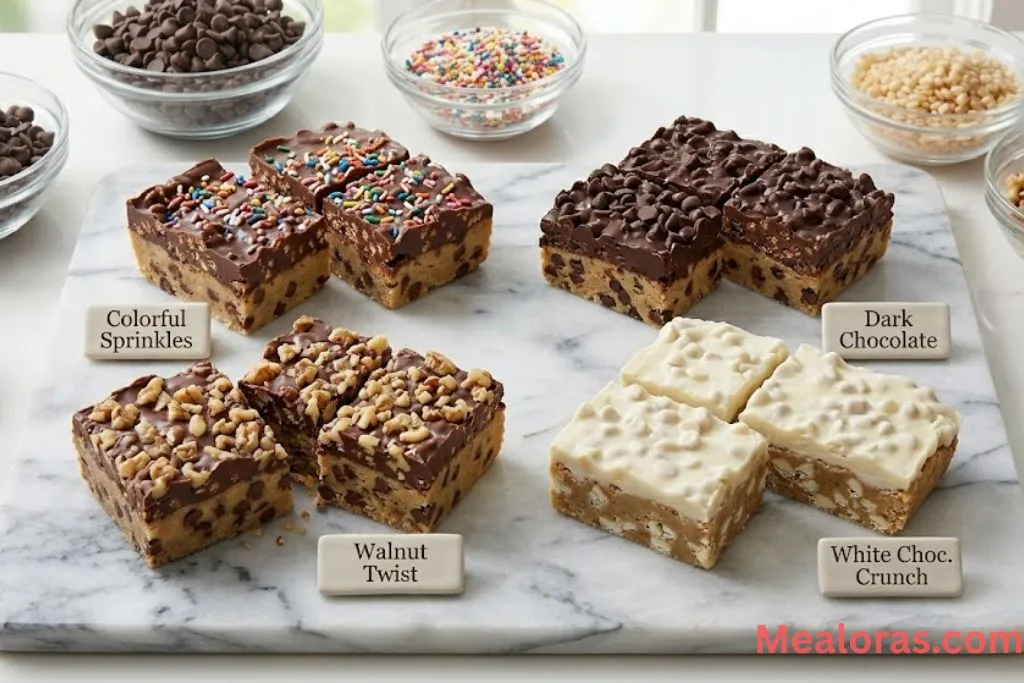
Variations and Easy Swaps
- Chocolate Variety: While semisweet chips are classic, you can use dark chocolate for a less sweet version or white chocolate for a creamier finish.
- Cereal Swaps: If rice crispy cereal isn’t available, crushed cornflakes or even toasted oats can provide a nice alternative crunch.
- Nutty Twist: Stir in a tablespoon of peanut butter or almond butter into the dough for an extra layer of flavor.
- Color Pop: For a festive look, add a handful of colorful sprinkles into the dough or on top of the chocolate layer.
Storage and Serving
Proper storage keeps these bars fresh and ensures the topping stays crispy.
- Refrigeration: Store the bars in an airtight container in the fridge for up to one week. The cool temperature keeps the dough firm and the chocolate snappy.
- Freezing: These bars freeze exceptionally well. Wrap individual squares in plastic wrap and store them in a freezer-safe bag for up to 3 months. Thaw in the fridge before enjoying.
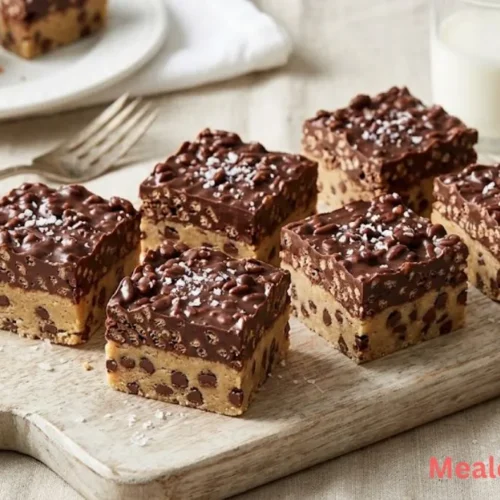
- Serving Ideas: Serve these chilled. They are quite rich, so cutting them into smaller squares or bite-sized rectangles is usually best. They pair wonderfully with a cold glass of milk or a hot cup of tea.
Frequently Asked Questions
1. Is it safe to eat the flour without baking the bars?
Yes, as long as you heat-treat the flour first. Heating it to 160°F kills any potential bacteria, making the raw dough safe to consume.
2. Can I use unsalted butter?
Yes, but you should add an extra 1/4 teaspoon of salt to the dough to balance the sweetness.
3. Why is my cookie dough crumbly?
This usually happens if the flour wasn’t measured correctly or if the butter wasn’t creamed long enough. Ensure you use the “spoon and level” method for flour.
4. How long do these need to chill?
They need at least 3 hours to set. If you cut them too early, the layers may separate or the dough may be too soft.
5. Can I use a different size pan?
An 8×8 pan provides the best thickness. A 9×9 pan will work, but the bars will be thinner and may set faster.
6. Do I have to use heavy cream?
The heavy cream makes the chocolate topping more like a ganache, which stays slightly soft and easy to bite through. You can use milk, but the topping will be firmer.
7. Can I make these gluten-free?
While this specific recipe uses all-purpose flour, many readers have success using a 1:1 gluten-free flour blend, though the texture may vary slightly.
8. What if I don’t have a mixer?
You can cream the butter and sugar by hand with a sturdy whisk or wooden spoon, though it will take more effort to get it truly fluffy.
9. My chocolate seized while melting. What happened?
Seizing usually happens if a drop of water gets into the chocolate or if it is overheated. Ensure all tools are dry and use short heating bursts.
10. Can I add nuts to the dough?
Absolutely. Chopped walnuts or pecans make a great addition to the dough layer for extra texture.
Conclusion
These Cookie Dough Crunch Bars are a fantastic addition to any collection of easy desserts. They offer the nostalgic flavor of cookie dough without any of the risks or the wait time of a traditional oven-baked cookie. The combination of the smooth base and the crisp chocolate topping creates a balanced treat that satisfies any sweet craving.
Give this recipe a try next time you need a simple, no-fuss dessert that looks and tastes impressive. It is a wonderful way to bring a little extra joy to the table. If you find these bars as delicious as expected, feel free to share the details with your friends and family so they can enjoy this easy treat as well.
Cookie Dough Crunch Bars
Ingredients
- Edible Cookie Dough Base
- 2 cups + 2 tbsp All-Purpose Flour Heat-treated
- 12 tbsp Salted Butter Softened
- 1/2 cup + 2 tbsp Granulated Sugar
- 1/2 cup Light Brown Sugar Packed
- 1 tbsp Vanilla Extract
- 1 tbsp Whole or 2% Milk
- 2 tbsp Heavy Cream
- 1/3 cup Semisweet Chocolate Chips
- 1/3 cup Mini Semisweet Chocolate Chips
- 1/2 tsp Fine Sea Salt
- Chocolate Crunch Topping
- 1 1/2 cups Semisweet Chocolate Chips
- 1/3 cup Heavy Cream
- 1/2 tsp Vanilla Extract
- 1 1/2 cups Rice Crispy Cereal
- Flaky Sea Salt For garnish
Instructions
- Heat-treat the flour by baking it or microwaving it until it reaches a safe temperature, then allow it to cool completely.
- Line a square pan with parchment paper, leaving an overhang on the sides for easy removal.
- Cream together the softened butter, granulated sugar, and light brown sugar until the mixture is light and fluffy.
- Stir in the vanilla extract, milk, and heavy cream until the liquids are fully incorporated.
- Fold in the heat-treated flour and sea salt, followed by the regular and mini chocolate chips.
- Press the dough firmly and evenly into the bottom of the prepared pan and place it in the refrigerator.
- Melt the chocolate chips with the heavy cream in the microwave, stirring until smooth, then stir in the vanilla.
- Gently fold the rice crispy cereal into the chocolate mixture until every piece is well coated.
- Spread the chocolate cereal mixture over the chilled dough and sprinkle with flaky sea salt.
- Refrigerate the pan for several hours until the layers are completely firm before slicing into squares.
Notes
• For the cleanest slices, use a warm knife wiped dry between each cut.
• Store these bars in the refrigerator to maintain the best texture and crunch.

Mealoras your go-to for simple, flavorful recipes! From quick weeknight dinners to sweet treats and family favorites, we make cooking easy, fun, and delicious for everyone in the kitchen.