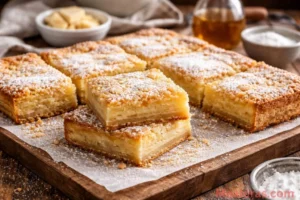
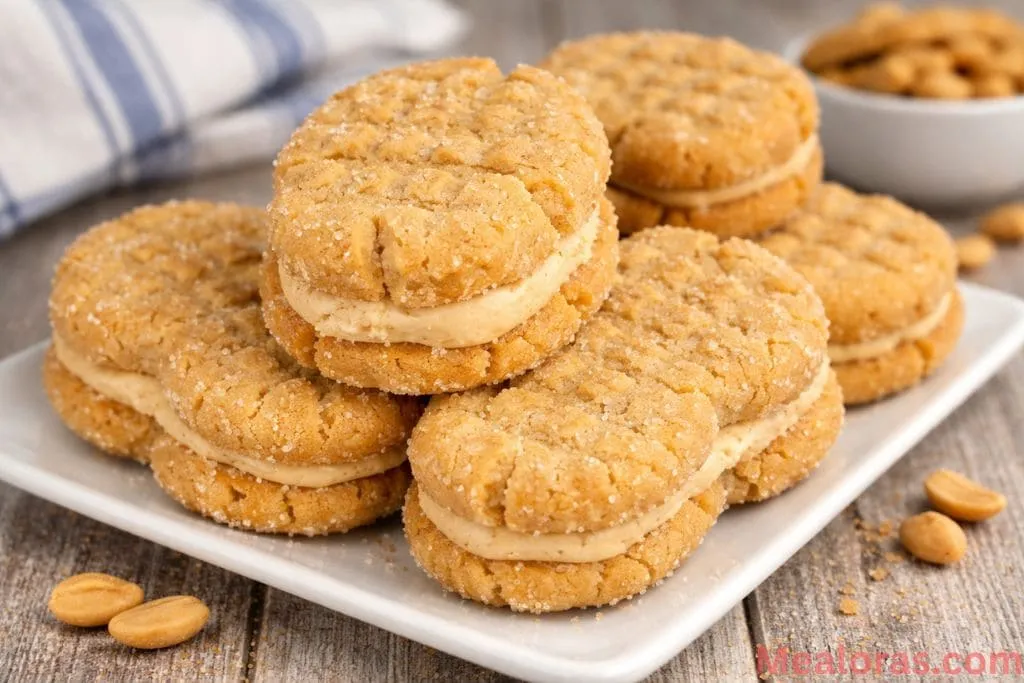
Few treats are as nostalgic and satisfying as a classic peanut butter sandwich cookie. The combination of a slightly crunchy, melt-in-your-mouth cookie with a rich, velvety peanut butter filling is a match made in heaven. While the store-bought version has been a pantry staple for generations, creating your own version at home elevates the experience to an entirely new level. These cookies are soft, intensely peanutty, and have that unmistakable shape that makes them so much fun to eat.
Table of Contents
Whether you are looking for a weekend baking project or a sweet treat to share with neighbors, this recipe is a guaranteed winner. It uses simple pantry staples to recreate a gourmet version of the famous snack. The best part is that you can control the quality of the ingredients, ensuring every bite is fresh and flavorful. If you enjoy baking snacks from scratch, you might also want to try this crispy oatmeal lace cookies recipe for another texture-rich treat.
Ingredients for the Perfect Batch
To make these delicious sandwich cookies, you will need a few basic kitchen tools: two mixing bowls, an electric hand mixer (or a stand mixer), a baking sheet, and a silicone baking mat or parchment paper.
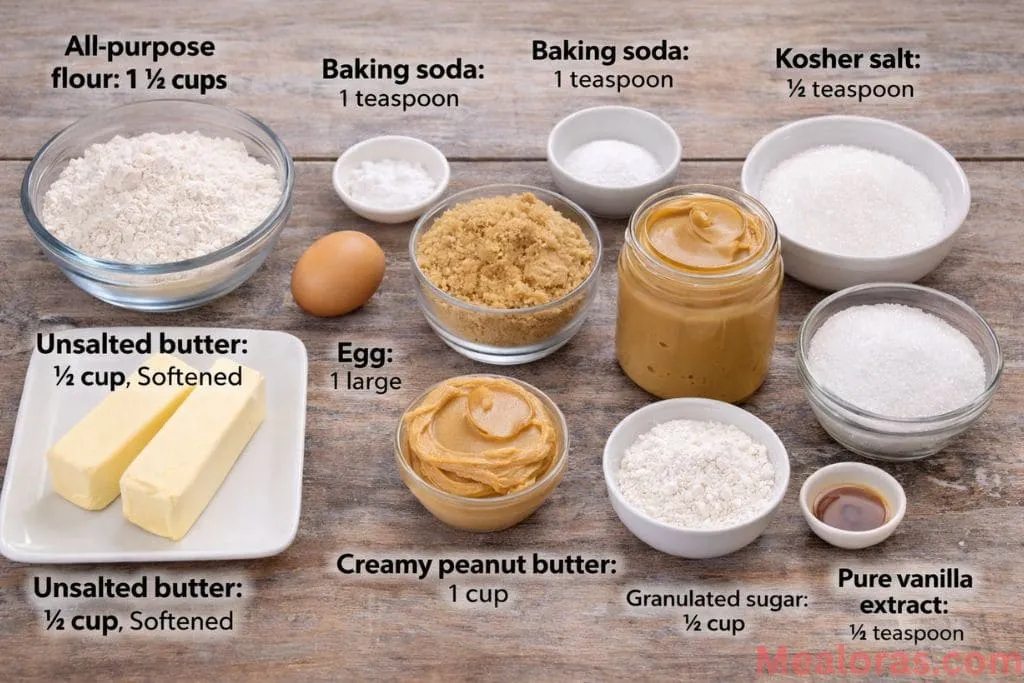
For the Cookies:
- All-purpose flour: 1 ½ cups
- Baking soda: 1 teaspoon
- Kosher salt: ½ teaspoon (Note: If using salted butter, you can skip this)
- Unsalted butter: ½ cup (Ensure it is softened to room temperature)
- Light brown sugar: 1 cup, packed
- Creamy peanut butter: 1 cup
- Egg: 1 large
- Pure vanilla extract: 1 teaspoon
- Granulated sugar: ½ cup (Keep this in a separate small bowl for rolling)
For the Peanut Butter Cream Filling:
- Unsalted butter: 4 tablespoons (softened)
- Creamy peanut butter: ½ cup
- Powdered sugar: 1 ½ cups
- Milk: 2 tablespoons
- Pure vanilla extract: ¼ teaspoon
Step-by-Step Preparation
Preparing the Dough
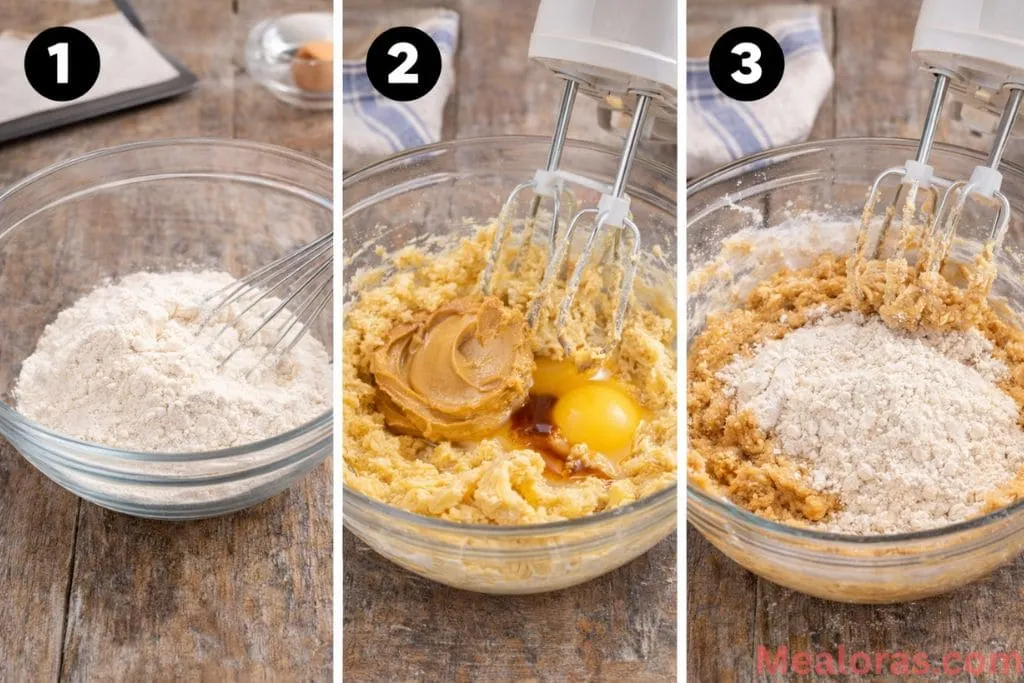
- Begin by getting your oven ready. Heat it to 350°F (175°C) and line your baking sheets with parchment paper or silicone mats so the cookies don’t stick. In a medium-sized bowl, whisk together the flour, baking soda, and salt. Setting these dry ingredients aside helps ensure they are evenly distributed later on.
- In a larger mixing bowl, use your electric mixer to beat the softened butter and brown sugar together. You want this mixture to be light and fluffy, which usually takes about two minutes. Once it looks creamy, add the cup of peanut butter and mix again until smooth. Crack in the egg and pour in the vanilla extract, beating the mixture until everything is fully incorporated.
- Now, turn your mixer to a low speed and gradually add the flour mixture to the wet ingredients. Mix just until you can no longer see streaks of white flour. It is important not to overwork the dough at this stage, as that can make the cookies tough rather than tender.
Shaping and Baking
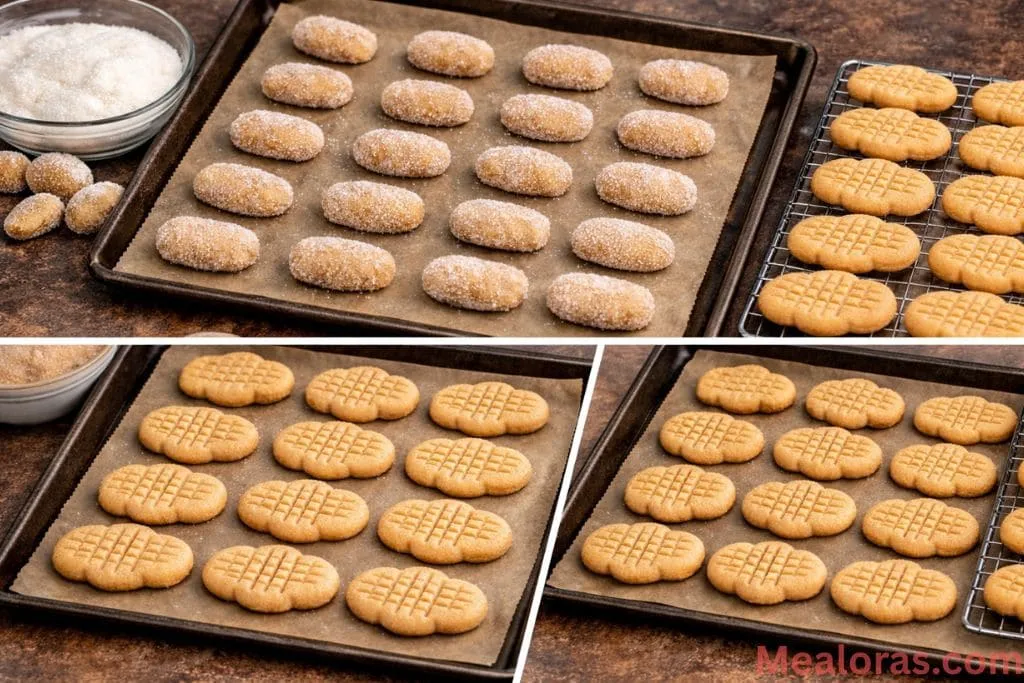
- Scoop out small portions of dough and roll them into balls about one inch in size. To get that signature look, roll each ball into a short log or oval shape. Gently roll each log in the bowl of granulated sugar until it is completely coated. Place these logs on your prepared baking sheet, leaving about two inches of space between them.
- Using a fork, press down on the dough in a criss-cross pattern. This flattens the cookie and gives it that traditional textured top. To finish the look, use your fingers to gently pinch the middle of the long sides of the cookie. This creates the classic peanut shape.
- Slide the trays into the oven and bake for about 10 to 12 minutes. You are looking for the edges to turn a very light golden brown while the centers remain soft. Let the cookies rest on the baking sheet for five minutes before moving them to a wire rack. They must be completely cool before you even think about adding the filling.
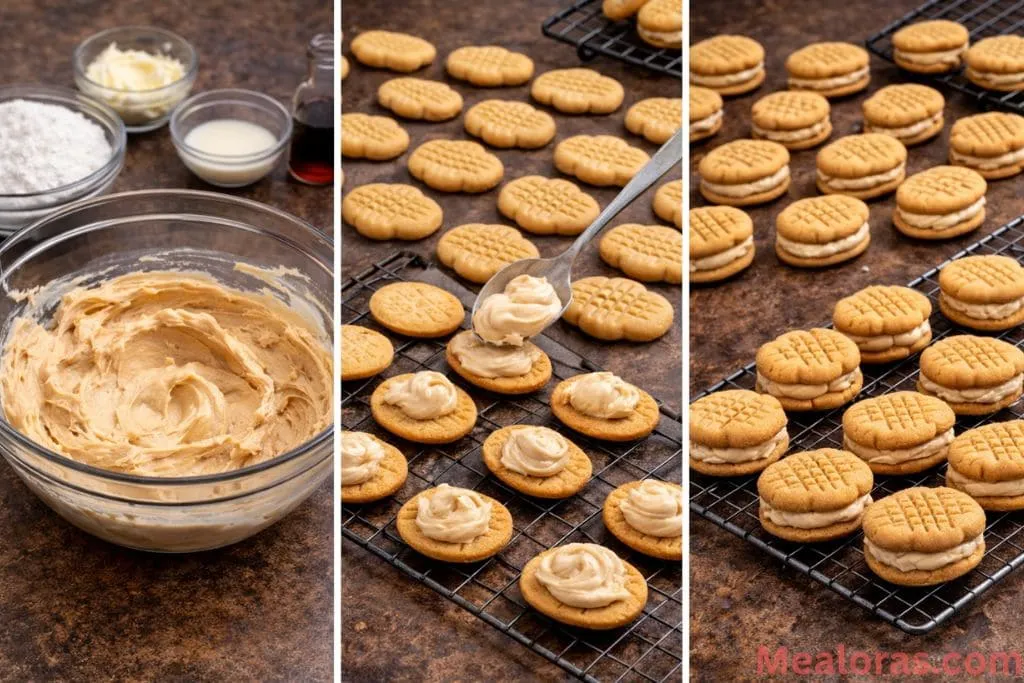
Creating the Filling and Assembling
- While the cookies are cooling, you can whip up the cream filling. In a clean bowl, beat the softened butter until it is smooth and airy. Add the peanut butter, milk, and vanilla, then slowly mix in the powdered sugar. Continue beating until the frosting is thick, creamy, and easy to spread.
- Once the cookies are cold to the touch, flip half of them over so the flat bottom faces up. Spoon a generous amount of filling onto the center of these cookies. Place another cookie on top, bottom-side down, and press gently so the filling reaches the edges. Repeat this until all your sandwiches are ready to enjoy. If you love sweet bakes with creamy elements, this blueberry cream cheese bread is another fantastic recipe to explore.
Tips for Success and Flavor Variations
- Temperature Check: Always use room temperature butter and eggs. This allows the fats and liquids to emulsify properly, resulting in a much smoother dough and a more consistent bake.
- Peanut Butter Choice: Stick to standard creamy peanut butter for the best results. Natural peanut butters that require stirring often have too much oil separation, which can cause the cookies to spread too much or become greasy.
- The Fork Trick: If the fork sticks to the dough while making the pattern, dip the tines into a little bit of sugar or flour between presses.
- Chocolate Version: For a decadent twist, dip half of each finished sandwich cookie into melted dark or milk chocolate. Let them set on parchment paper until the chocolate is firm.
- Crunchy Texture: If you prefer a bit of crunch, you can use crunchy peanut butter in the cookie dough, though creamy is better for the filling to keep it smooth.
Proper Storage and Serving Ideas
To keep these cookies tasting fresh, store them in an airtight container at room temperature. They will stay soft and delicious for about 3 to 4 days. If you need to keep them longer, you can store the container in the refrigerator for up to a week, though you may want to let them sit out for a few minutes before eating so the filling softens.
These cookies are perfect for a mid-afternoon snack or a simple dessert. Serve them with a tall glass of cold milk or a warm cup of herbal tea. They also make wonderful gifts when stacked in a clear jar and tied with a ribbon. Because they are sturdy once the filling sets, they are great for packing in lunchboxes or taking on a picnic.
Frequently Asked Questions
Can I make these cookies gluten-free? Yes, you can substitute the all-purpose flour with a high-quality 1:1 gluten-free flour blend.
How do I prevent the cookies from spreading too much? Make sure your butter isn’t melted and avoid over-greasing the baking sheet. Chilling the dough for 20 minutes before shaping can also help.
Is it okay to use salted butter? Yes, but if you do, simply omit the extra half teaspoon of salt called for in the recipe.
Can I freeze these cookies? You can freeze the baked cookies (without filling) for up to 2 months. You can also freeze the assembled sandwiches, though the texture of the filling may change slightly.
What if my filling is too thin? If the filling seems runny, add more powdered sugar one tablespoon at a time until it reaches the desired thickness.
What if my filling is too thick to spread? Simply add a tiny splash of milk (about half a teaspoon) and beat it again until it softens.
Do I have to make the peanut shape? Not at all. You can roll them into simple rounds if you prefer a standard sandwich cookie look.
Can I use a different type of nut butter? Almond butter or cashew butter can work, though the flavor and texture will differ from the traditional version.
How many cookies does this recipe make? Depending on the size of your scoops, you should get approximately 12 to 15 sandwich cookies.
Why did my cookies come out hard? This usually happens if the dough is overmixed or if the cookies were baked for too long. Keep a close eye on them toward the end of the baking time.
Conclusion
Creating these peanut butter sandwich cookies is a rewarding way to bring a touch of nostalgia into your kitchen. The combination of the sweet, salty dough and the lush cream filling is truly irresistible. They are simple enough for beginners but yield results that look like they came from a professional bakery. Once you taste the difference between these and the boxed version, you may never go back!
Gather your ingredients and give this recipe a try this afternoon. It is a wonderful way to fill your home with the delicious aroma of roasted peanuts and baked sugar. If you enjoy the recipe, be sure to share it with your friends and family so they can experience these treats too!
Peanut Butter Sandwich Cookies
Ingredients
- For the Cookies:
- 1 ½ cups all-purpose flour
- 1 teaspoon baking soda
- ½ teaspoon kosher salt
- ½ cup unsalted butter softened
- 1 cup light brown sugar packed
- 1 cup creamy peanut butter
- 1 large egg
- 1 teaspoon pure vanilla extract
- ½ cup granulated sugar for rolling
- For the Filling:
- 4 tablespoons unsalted butter softened
- ½ cup creamy peanut butter
- 1 ½ cups powdered sugar
- 2 tablespoons milk
- ¼ teaspoon pure vanilla extract
Instructions
- Heat the oven to 350°F and prepare your baking sheets with non-stick mats or parchment.
- Whisk the flour, baking soda, and salt in a small bowl and set it aside.
- Cream the butter and brown sugar in a large bowl until the mixture is light and airy.
- Mix in the peanut butter, egg, and vanilla until the batter is smooth.
- Gradually stir in the dry ingredients, being careful not to overmix the dough.
- Roll the dough into one-inch balls, then shape them into small logs and roll them in granulated sugar.
- Place the logs on the baking sheet and use a fork to create a criss-cross pattern while flattening them.
- Pinch the center of each cookie to create a peanut shape and bake for 10-12 minutes.
- Let the cookies cool completely on a wire rack before starting the assembly.
- Beat the filling ingredients together until smooth and fluffy.
- Spread a layer of filling on the flat side of one cookie and press another cookie on top to create a sandwich.
Notes

Mealoras your go-to for simple, flavorful recipes! From quick weeknight dinners to sweet treats and family favorites, we make cooking easy, fun, and delicious for everyone in the kitchen.