There is nothing quite like a rich, chocolatey brownie to satisfy a sweet craving. But when you add the deep, nutty flavor of brown butter and a kick of espresso, you take a simple treat to a whole new level. These Espresso Brownies are for anyone who loves a dessert that is not too sweet but packed with intense flavor.
The secret to this recipe is the combination of dark chocolate and coffee. Coffee naturally makes chocolate taste better and stronger. When you mix that with the toasted scent of browned butter, you get a brownie that tastes like it came from a high-end bakery. Whether you are a beginner or an experienced baker, this guide will help you make the perfect batch every single time.
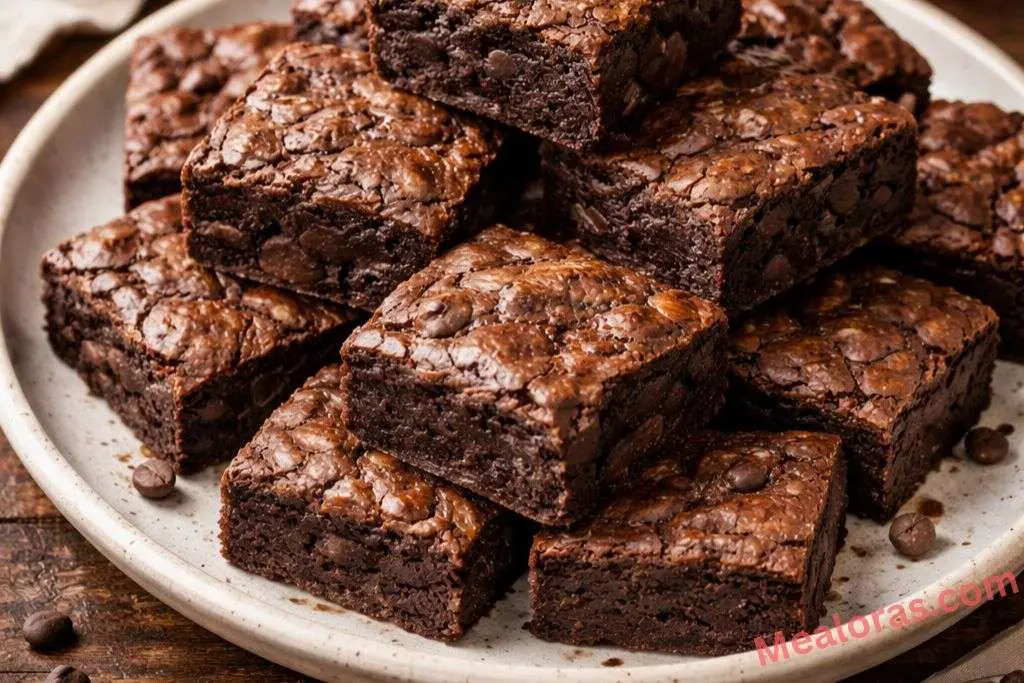
These brownies have a thin, crackly top and a very fudgy center. They are thick, chewy, and melt in your mouth. Best of all, they do not require any fancy equipment. If you can use a whisk and a saucepan, you can make these. Let’s dive into the world of espresso brownies and see how easy it is to create something truly delicious.
Why You Will Love These Espresso Brownies
If you are wondering why these are different from a box mix, the answer is the quality of the ingredients. Using real butter that has been browned on the stove adds a caramel-like depth that you just cannot find in a store-bought version. The addition of espresso powder doesn’t make them taste like a cup of coffee; instead, it highlights the cocoa and makes the chocolate taste richer.
These brownies are perfect for a quiet afternoon snack or as a gift for a friend. They stay fresh for days and actually taste even better the next morning after the flavors have had time to settle. Plus, they are incredibly easy to customize if you want to add nuts or different types of chocolate chips.
Essential Tools for Baking
Before you start, it is helpful to have your tools ready. Having everything in place makes the process smooth and fun.
- 8×8 Square Baking Pan: This is the standard size for thick, fudgy brownies.
- Parchment Paper: This helps you lift the brownies out of the pan easily without them sticking.
- Small Saucepan: You will need this to brown your butter safely.
- Large Mixing Bowl: For mixing your sugars and eggs.
- Whisk and Rubber Spatula: To get that perfect batter consistency.
- Kitchen Scale (Optional): While cup measurements work, a scale is the best way to get professional results.
Ingredients for Espresso Brownies
To get the best results, try to use high-quality chocolate and fresh eggs. Here is exactly what you will need for this recipe.
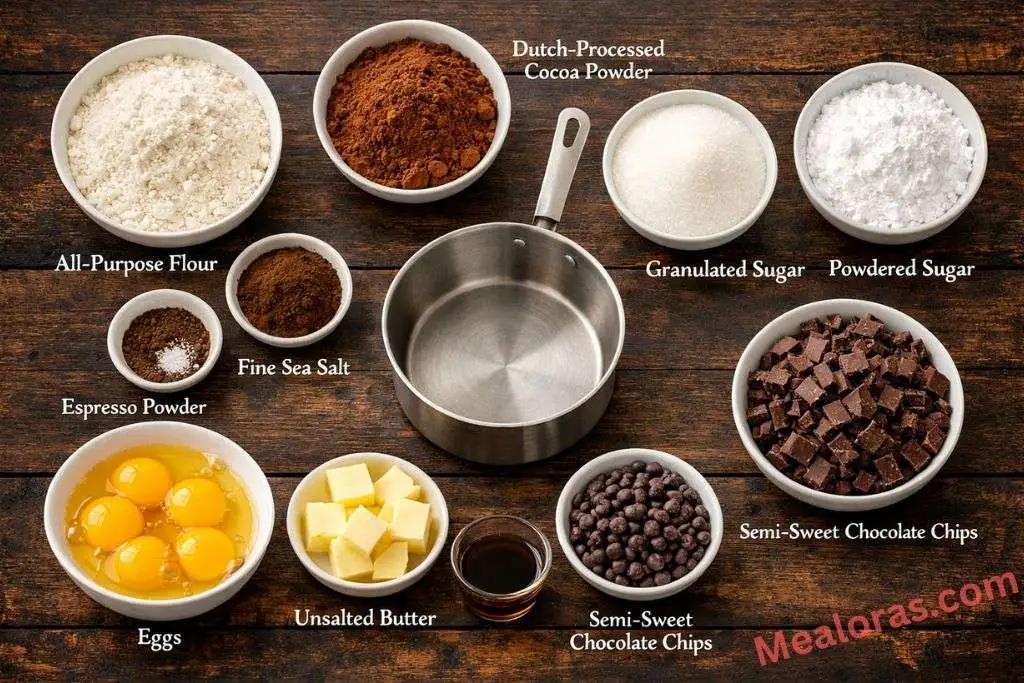
The Wet Ingredients
- 1 cup (226g) Unsalted Butter: This will be browned to create a nutty base.
- 3 Large Eggs: Use room temperature eggs so they mix better.
- 1/2 cup (100g) Granulated Sugar: For sweetness and a crackly top.
- 1 cup (120g) Powdered Sugar: This helps create a soft, fudgy texture.
- 2 teaspoons Vanilla Extract: A splash of vanilla rounds out the chocolate flavor.
- 3.5 ounces Dark Chocolate Bar: Roughly chopped (70% cocoa is a great choice).
The Dry Ingredients
- 1/2 cup (66g) All-Purpose Flour: Just enough to give the brownies structure.
- 4 tablespoons Dutch-Processed Cocoa Powder: This gives a deep, dark color.
- 1/2 tablespoon Espresso Powder: Use a fine powder that dissolves easily.
- 3/4 teaspoon Fine Sea salt: To balance the sweetness.
- 1/2 cup Semi-Sweet Chocolate Chips: For extra gooey pockets of chocolate.
For this recipe, using Dutch-processed cocoa powder is essential because it has a lower acidity and a darker color than regular cocoa. If you want to learn more about the science behind different types of cocoa, you can check out this detailed guide on cocoa powder varieties to see how they affect your baking
Step-by-Step Instructions
Follow these clear steps to ensure your brownies turn out perfectly.
1. Prepare Your Pan and Oven
Start by preheating your oven to 350°F (180°C). Take your 8×8 square baking pan and line it with parchment paper. It is best to let the paper hang over the sides so you can easily lift the brownies out later.
2. Brown the Butter
Place your unsalted butter in a small saucepan over medium heat. Let it melt, then continue to cook it while stirring. The butter will start to bubble and pop. Eventually, you will see little brown bits forming at the bottom, and it will smell like toasted nuts. Once it reaches a golden-amber color, remove it from the heat immediately.
3. Melt the Chocolate
While the butter is still hot, stir in your chopped dark chocolate bar and the cocoa powder. The heat from the butter will melt the chocolate. Whisk it until the mixture is smooth and glossy. Set this aside to cool for a few minutes.
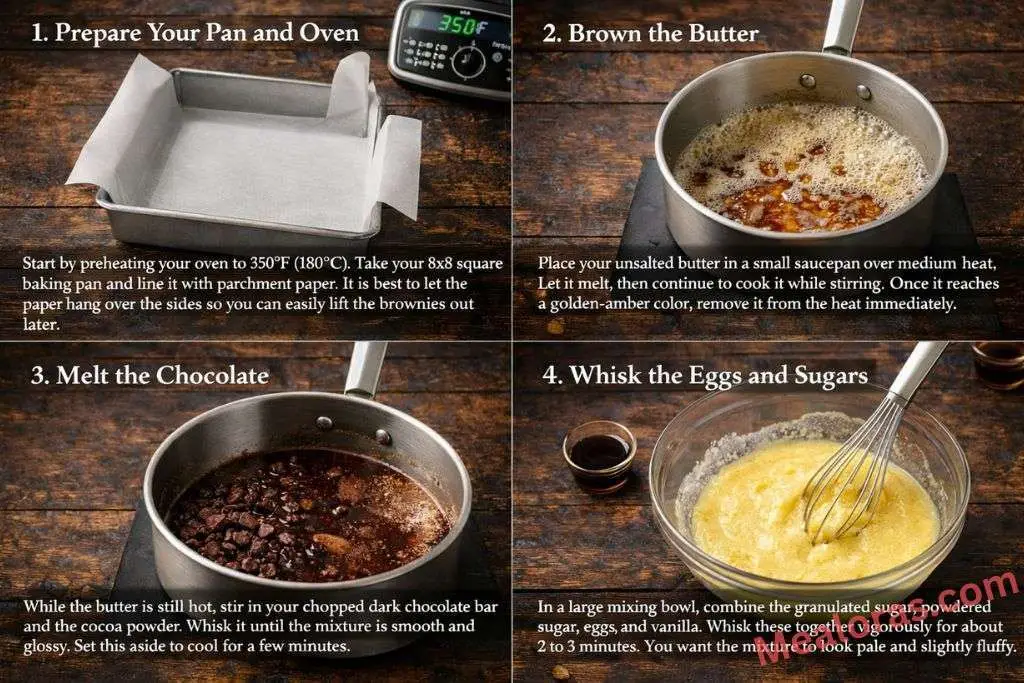
4. Whisk the Eggs and Sugars
In a large mixing bowl, combine the granulated sugar, powdered sugar, eggs, and vanilla. Whisk these together vigorously for about 2 to 3 minutes. You want the mixture to look pale and slightly fluffy. This step is what creates that beautiful shiny, crackly crust on top of the brownies.
5. Combine the Mixtures
Slowly pour the warm butter and chocolate mixture into the egg mixture. Whisk constantly as you pour to make sure everything is well combined and the eggs don’t cook from the heat.
6. Fold in Dry Ingredients
Sift in the flour, espresso powder, and salt. Use a rubber spatula to gently fold the dry ingredients into the wet batter. Stop as soon as you see no more streaks of flour. Overmixing can make the brownies tough, so be gentle! Fold in the chocolate chips at the very end.
7. Bake to Perfection
Pour the batter into your prepared pan and smooth the top with your spatula. Bake for 28 to 35 minutes. To check if they are done, insert a toothpick into the center. It should come out with a few moist crumbs attached, but not wet batter.

8. The Cooling Process
This is the hardest part! Let the brownies cool in the pan for at least one to two hours. Brownies continue to set as they cool. If you cut them too early, they might be too messy. Once cooled, lift them out using the parchment paper and cut them into squares.
While a pan of Ultimate Fudgy Brown Butter Espresso Brownies is the perfect way to end a meal, sometimes you need a comforting, savory classic to start things off. If you are planning a big family dinner, you might also enjoy this Brenda Gantt Corn Bread Dressing (Authentic Southern Recipe) which brings that same level of traditional, kitchen-tested quality to your table.
Tips for the Best Results
- Don’t Overbake: It is better to take them out a minute early than a minute late. Fudgy brownies rely on a slightly underbaked center.
- Use Room Temp Eggs: Cold eggs can cause the melted butter to seize up. Set your eggs on the counter 30 minutes before you start.
- Quality Coffee Matters: Use a fine espresso powder rather than instant coffee granules for the smoothest texture.
- The Sift Step: Sifting the cocoa powder and flour prevents lumps in your batter, making it much easier to fold.
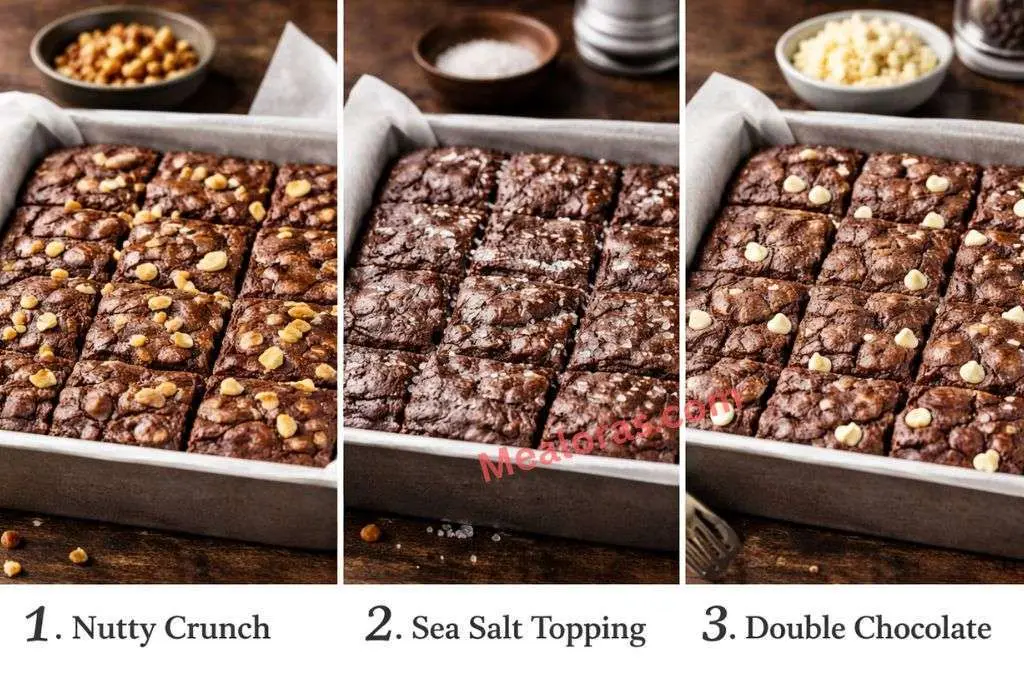
Easy Variations
- Nutty Crunch: Add 1/2 cup of chopped walnuts or pecans for a nice texture.
- Sea Salt Topping: Sprinkle a little flaky sea salt on top right after baking for a gourmet touch.
- Double Chocolate: Use white chocolate chips instead of semi-sweet for a pretty color contrast.
Storage and Serving Ideas
To keep your brownies fresh, store them in an airtight container at room temperature for up to 3 days. If you want them to last longer, you can keep them in the fridge for up to a week. Cold brownies are actually very delicious and extra chewy!
For serving, these are wonderful on their own. You can also serve them slightly warm with a glass of cold milk or a scoop of vanilla bean ice cream. Since they are so rich, a small square goes a long way.
Frequently Asked Questions (FAQs)
1. Can I use instant coffee instead of espresso powder? Yes, but espresso powder is more concentrated. If using instant coffee, you may need to use a bit more, and ensure it is a fine powder.
2. Why do I need to brown the butter? Browning the butter removes the water and toasts the milk solids, creating a deep, caramel-like flavor that makes these brownies taste gourmet.
3. Why didn’t my brownies get a crackly top? The crackly top comes from whisking the eggs and sugar long enough. Make sure to whisk until the mixture is pale and light.
4. Can I use a glass baking dish? You can, but glass holds heat differently than metal. You may need to bake them for an extra 5 minutes.
5. How do I know when the butter is browned? Look for small brown specks at the bottom of the pan and a nutty aroma. Don’t leave it unattended, as it can burn quickly!
6. Can I make these gluten-free? You can try using a 1:1 gluten-free baking flour blend, though the texture may vary slightly.
7. Is Dutch-processed cocoa powder necessary? It is recommended for a darker color and smoother taste, but regular unsweetened cocoa powder will also work.
8. Can I freeze these brownies? Yes! Wrap them tightly in plastic wrap and foil. They can be frozen for up to 2 months.
9. Why are my brownies cakey instead of fudgy? This usually happens if you use too much flour or overbeat the batter after adding the flour. Measure carefully!
10. Can I use salted butter? Yes, just reduce the added sea salt to about 1/4 teaspoon to make sure they aren’t too salty.
Final Thoughts
Making these Espresso Brownies is a rewarding experience that fills your kitchen with the best scents of chocolate and toasted butter. They are the ultimate treat for any chocolate lover and are sure to be a hit with anyone who tries them.
If you enjoyed this recipe, please share it with your friends and family! It is a wonderful way to bring people together over something sweet and delicious. Happy baking!

Mealoras your go-to for simple, flavorful recipes! From quick weeknight dinners to sweet treats and family favorites, we make cooking easy, fun, and delicious for everyone in the kitchen.