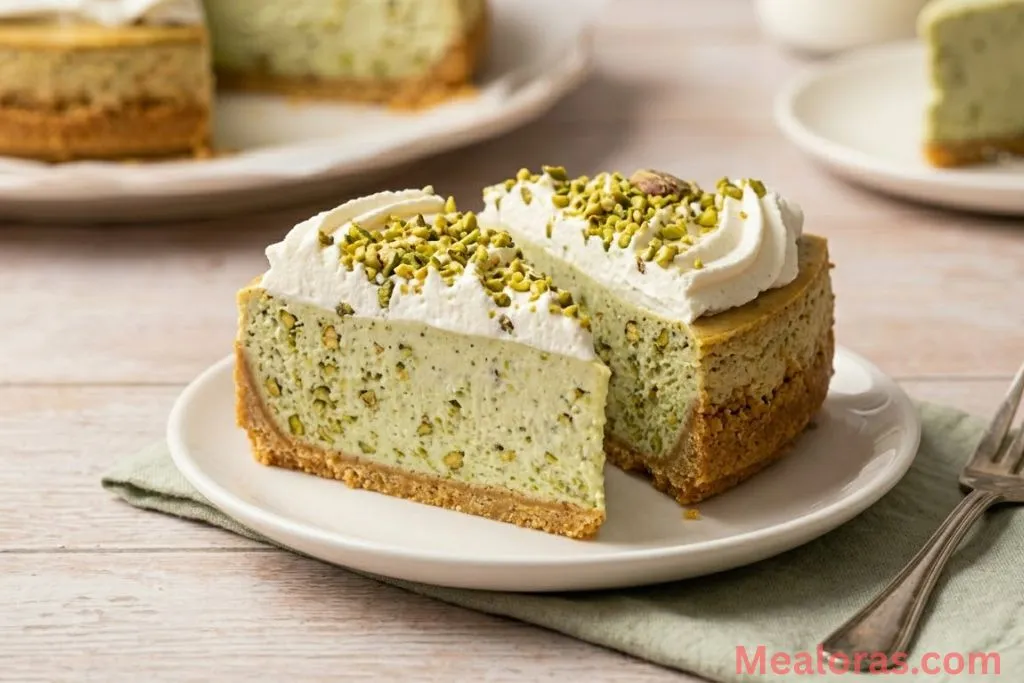
This No Bake Pistachio Cheesecake is a dream for anyone who loves creamy, nutty desserts without the hassle of turning on the oven. It features a buttery vanilla wafer crust and a luscious green filling that balances the tang of cream cheese with the distinct, toasted flavor of pistachios. Whether looking for a refreshing treat on a warm afternoon or a sophisticated dessert to share with others, this recipe delivers a perfect balance of texture and taste.
Table of Contents
What makes this specific version stand out is its simplicity. By using a few clever shortcuts and high-quality ingredients, a professional-looking dessert is achieved with very little effort. The vibrant green color and smooth consistency make it a showstopper on any dessert table.
Essential Kitchen Tools
Before starting, gather these basic tools to ensure the process goes smoothly:
- 8-inch Springform Pan: Essential for easy removal of the cheesecake.
- Food Processor: For turning vanilla wafers into fine crumbs.
- Electric Hand Mixer or Stand Mixer: To achieve a perfectly smooth, lump-free filling.
- Mixing Bowls: A few large and medium sizes for different components.
- Rubber Spatula: For folding ingredients and smoothing the top.
- Parchment Paper: To line the bottom of the pan for a clean release.
Ingredients You Will Need
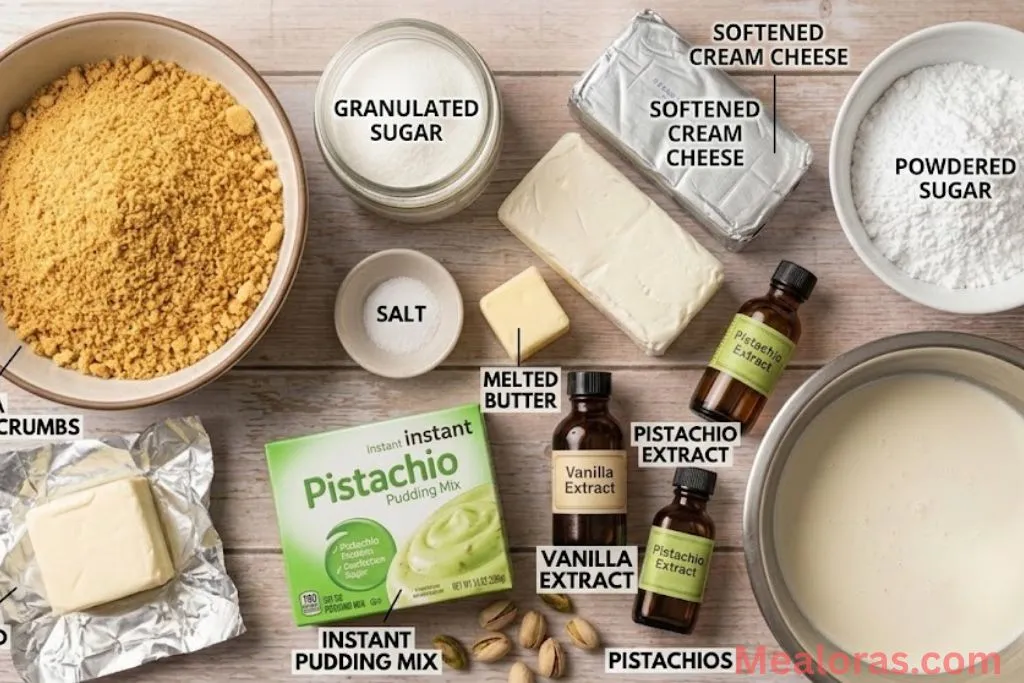
For the Vanilla Wafer Crust:
- 2 ½ cups (275 g) vanilla wafer crumbs
- ¼ cup (50 g) granulated sugar
- ¼ teaspoon (1.5 g) salt
- ½ cup (113 g) unsalted butter, melted
For the Pistachio Cheesecake Filling:
- 16 ounces (453 g) cream cheese, room temperature
- 1 package (3.4 oz) instant pistachio pudding mix
- 1 teaspoon (4 g) vanilla extract
- 1 teaspoon (2 g) pistachio extract
- ½ cup (60 g) powdered sugar
- 2 cups (476 g) heavy cream
For the Whipped Cream Topping:
- 1 ½ cups (357 g) heavy cream
- ¼ cup (30 g) powdered sugar
- 2 teaspoons (8 g) vanilla extract
- Optional: Finely chopped pistachios for decoration
Step-by-Step Instructions
1. Prepare the Crust
Begin by lining the bottom of an 8-inch springform pan with a circle of parchment paper. In a food processor, pulse the vanilla wafers until they reach a fine, sandy texture. In a medium mixing bowl, combine the wafer crumbs, granulated sugar, salt, and melted butter. Stir with a spoon until the crumbs are evenly coated and look like wet sand.
Press the mixture firmly into the bottom and slightly up the sides of the prepared pan. Using the bottom of a measuring cup or a flat glass can help ensure the crust is even and tightly packed. Place the pan in the refrigerator to chill while preparing the filling.
2. Create the Cheesecake Base
In a large mixing bowl, add the softened cream cheese. It is very important that the cream cheese is at room temperature to avoid a lumpy texture. Using an electric mixer on medium speed, beat the cream cheese until it is completely smooth and creamy.
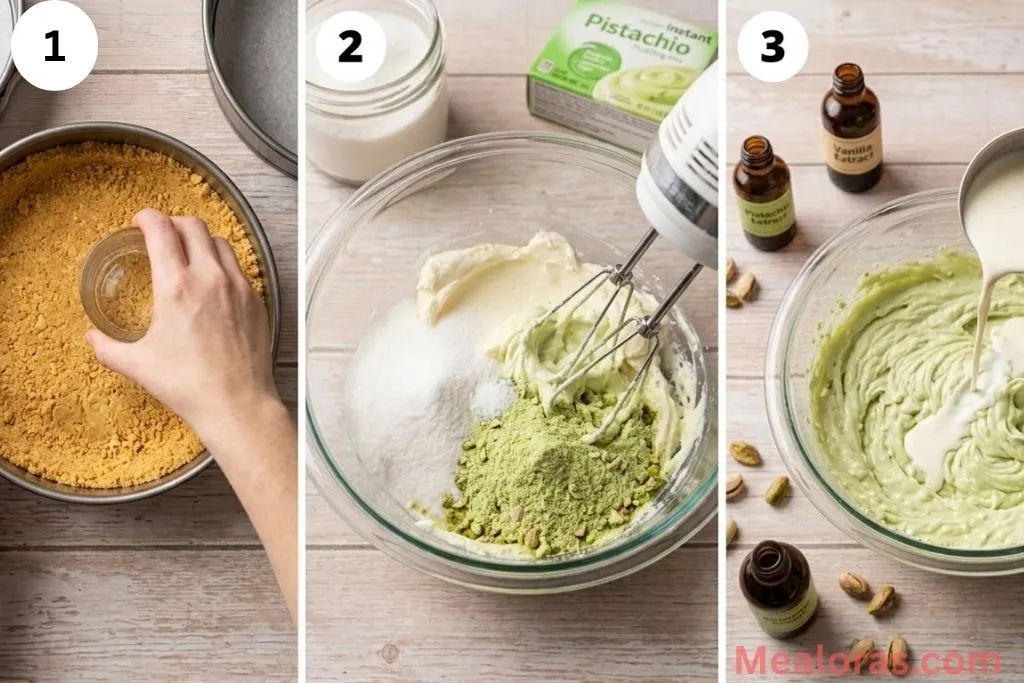
3. Mix the Filling
To the cream cheese, add the instant pistachio pudding mix, vanilla extract, pistachio extract, and powdered sugar. Start the mixer on low speed to incorporate the dry ingredients without creating a cloud of sugar. Once combined, slowly pour in the 2 cups of heavy cream.
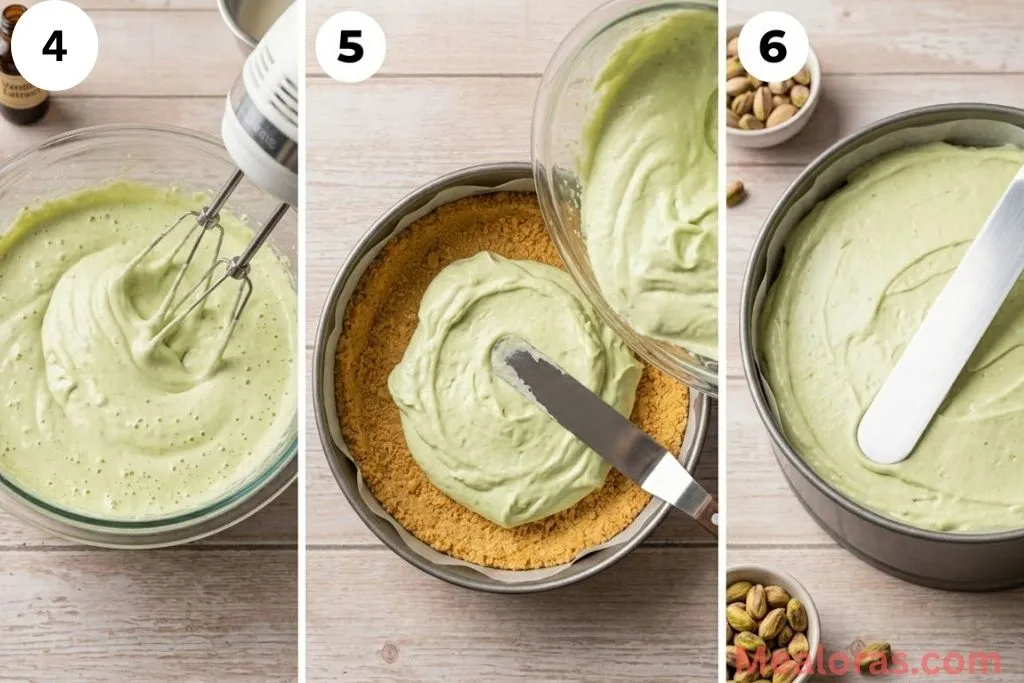
Increase the mixer speed to medium-high and continue to whip the mixture. As the cream is incorporated, the filling will begin to thicken and become light and fluffy. Continue beating until the mixture holds its shape and looks voluminous.
4. Assemble and Chill
Remove the chilled crust from the refrigerator. Spoon the pistachio filling over the crust, using a spatula to spread it evenly to the edges. Smooth the top with an offset spatula or the back of a spoon. Cover the pan tightly with plastic wrap and return it to the refrigerator. For the best results, let the cheesecake set for at least 6 hours, though leaving it overnight is highly recommended for the cleanest slices.
5. Prepare the Whipped Topping
When ready to serve, prepare the fresh whipped cream. In a chilled mixing bowl, combine the 1 ½ cups of heavy cream, powdered sugar, and vanilla extract. Whip on medium-high speed until stiff peaks form.
6. Final Touches
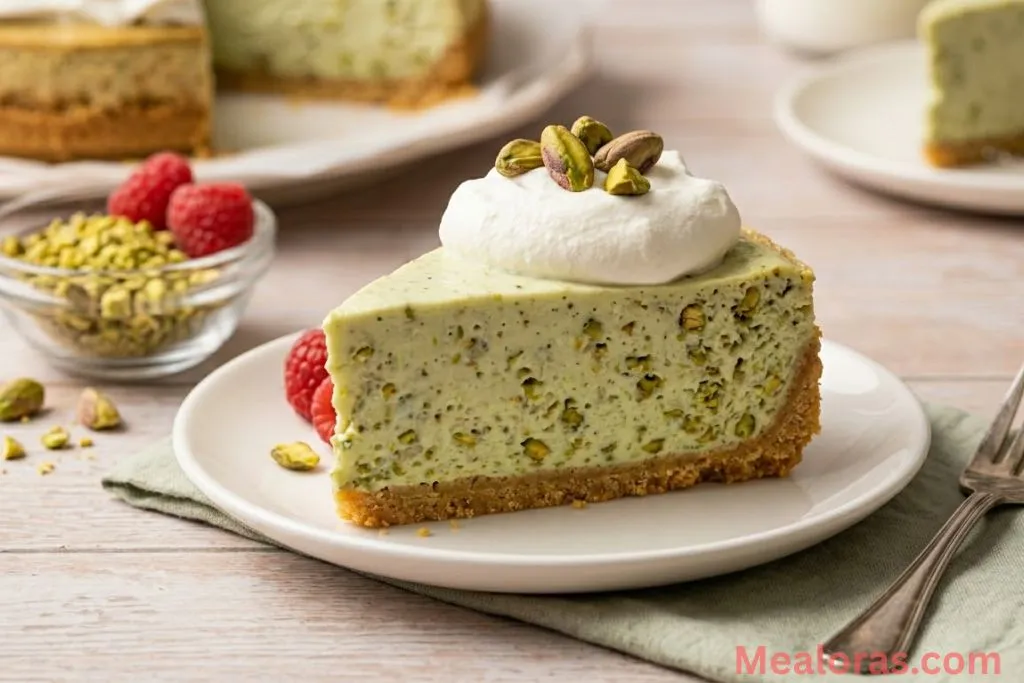
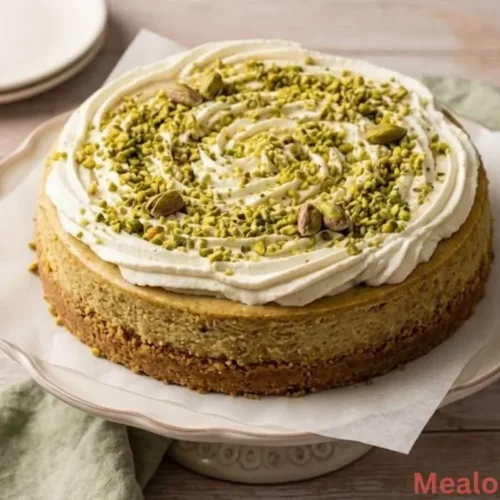
Carefully run a thin knife around the edge of the cheesecake before releasing the springform sides. Transfer the whipped cream into a piping bag or simply dollop it on top of the cheesecake. If desired, sprinkle a generous handful of chopped pistachios over the top for added crunch and visual appeal.
Tips for Success
Achieving the perfect no-bake dessert often comes down to the details. Here are a few ways to ensure a great result every time:
- Temperature Matters: Ensure the cream cheese is truly soft. If it is too cold, the pudding mix won’t blend correctly, resulting in small white specks in the green filling.
- Firm Pressure: When pressing the crust into the pan, be firm. A loosely packed crust will crumble and fall apart when sliced.
- Cold Cream: Unlike the cream cheese, the heavy cream used for whipping must be very cold. This helps it aerate and thicken much faster.
- Patience is Key: It can be tempting to slice the cake early, but the “no-bake” structure relies entirely on chilling time to stay upright.
If you enjoy the rich, buttery textures found in this dessert, you might also want to explore the best gooey brown butter cake recipe for your next baking project.
Recipe Variations
While this recipe is delicious as written, there are several ways to adjust it:
- Different Crusts: If vanilla wafers aren’t available, graham crackers or shortbread cookies work excellently as a substitute.
- Extra Nutty: For more texture, fold in half a cup of finely chopped pistachios directly into the cheesecake filling before pouring it into the pan.
- Pudding Swaps: While pistachio is the star here, the same method works with other instant pudding flavors like vanilla or white chocolate for a different flavor profile.
- Fruit Toppings: A few fresh raspberries or sliced strawberries on top provide a beautiful color contrast and a tart balance to the sweet filling.
For those who appreciate the combination of fruit and dense, flavorful cakes, this peach cobbler pound cake recipe is another fantastic option to keep in your collection.
Storing and Serving
This cheesecake should always be kept refrigerated. It can be stored in the fridge for up to 3 to 4 days, provided it is covered well to prevent it from picking up other scents.
When serving, use a sharp knife dipped in hot water and wiped dry between each cut. This technique ensures clean, professional-looking slices every time. This dessert pairs wonderfully with a refreshing glass of cold milk or a hot cup of herbal tea.
Frequently Asked Questions
1. Can I use cook-and-serve pudding instead of instant? No, this recipe requires instant pudding mix. Cook-and-serve pudding will not thicken the filling properly without being heated first.
2. Is it possible to make this recipe gluten-free? Yes, simply substitute the vanilla wafers with a gluten-free cookie or cracker of your choice.
3. Why is my cheesecake filling too soft? This usually happens if the heavy cream wasn’t whipped long enough or if the cheesecake didn’t chill for the full 6 hours.
4. Can I freeze this cheesecake? Yes, you can freeze it for up to one month. Thaw it in the refrigerator for several hours before serving.
5. Do I have to use pistachio extract? The extract is optional but highly recommended to deepen the nutty flavor provided by the pudding mix.
6. Can I make this in a 9-inch pan instead? Yes, but the cheesecake will be slightly thinner. You may not need to press the crust as high up the sides.
7. How do I get the crust to stop sticking to the pan? Using a parchment paper circle on the bottom is the best way to ensure the crust releases easily.
8. Can I use whipped topping from a tub instead of heavy cream? You can, but the flavor and stability of fresh whipped cream are generally superior for this specific filling.
9. My cream cheese is lumpy, how can I fix it? If it’s already mixed with other ingredients, try using a high-speed blender for a few seconds to smooth it out.
10. Can I use salted butter for the crust? Yes, if you use salted butter, simply omit the extra salt listed in the crust ingredients.
Conclusion
This No Bake Pistachio Cheesecake is a fantastic addition to any recipe collection. It offers a sophisticated flavor and a beautiful presentation with a very straightforward preparation process. The combination of the crunchy wafer base and the airy, nutty filling creates a satisfying experience in every bite.
Please consider sharing this recipe with friends and family who enjoy simple yet elegant desserts. It is a wonderful way to bring people together for a sweet treat that everyone can enjoy.
No Bake Pistachio Cheesecake
Ingredients
- Crust: 2 ½ cups vanilla wafer crumbs ¼ cup granulated sugar, ¼ tsp salt, ½ cup melted unsalted butter.
- Filling: 16 oz cream cheese room temp, 1 pkg instant pistachio pudding mix, 1 tsp vanilla extract, 1 tsp pistachio extract, ½ cup powdered sugar, 2 cups heavy cream.
- Topping: 1 ½ cups heavy cream ¼ cup powdered sugar, 2 tsp vanilla extract, chopped pistachios.
Instructions
- Combine vanilla wafer crumbs, sugar, salt, and melted butter in a bowl and stir until coated.
- Press the mixture firmly into the bottom and sides of a lined 8-inch springform pan and chill.
- Beat the room temperature cream cheese in a large bowl until completely smooth.
- Add pudding mix, extracts, and powdered sugar, then slowly pour in the heavy cream while mixing.
- Whip the mixture on medium-high speed until thick, fluffy, and able to hold its shape.
- Spread the filling evenly over the chilled crust and smooth the top with a spatula.
- Cover and refrigerate for at least six hours or overnight to ensure a firm set.
- Prepare the topping by whipping heavy cream, powdered sugar, and vanilla until stiff peaks form.
- Remove the cheesecake from the pan and decorate with whipped cream and chopped pistachios.
Notes
• Use very cold heavy cream for the best volume when whipping the topping.
• Keep the cheesecake refrigerated until the moment of serving to maintain its structure.

Mealoras your go-to for simple, flavorful recipes! From quick weeknight dinners to sweet treats and family favorites, we make cooking easy, fun, and delicious for everyone in the kitchen.