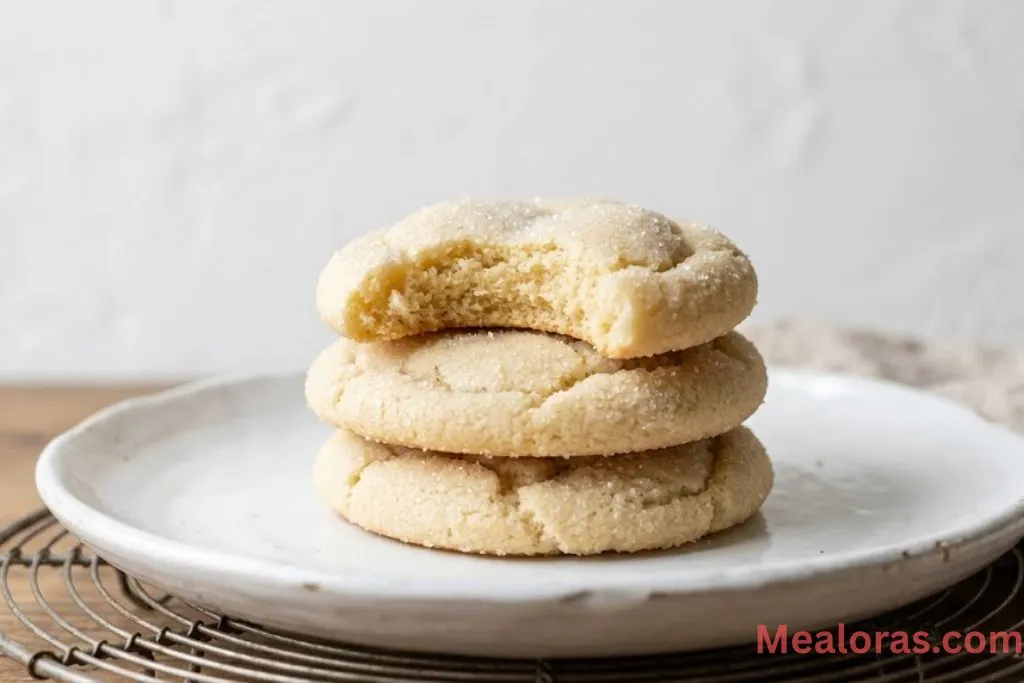
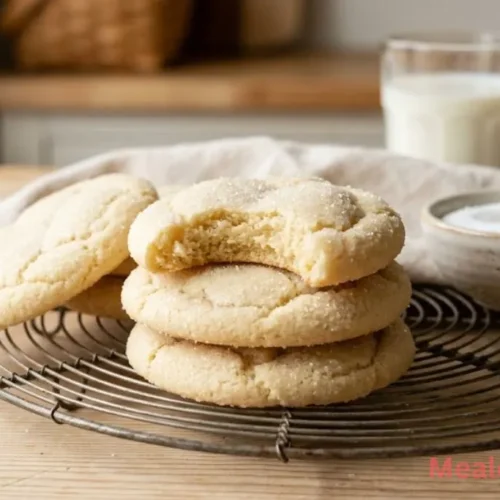
Finding the perfect cookie that is soft, tender, and incredibly light can feel like a challenge. Many recipes result in treats that are either too crunchy or too thin. These Melt-In-Your-Mouth Sugar Cookies are the ultimate solution for anyone craving a pillow-soft texture with a classic, sweet flavor.
Table of Contents
This recipe creates a cookie that practically dissolves when taken a bite. The secret lies in the combination of cool room-temperature butter and a hint of heavy cream, which ensures a rich, creamy finish. Whether baking for a quiet afternoon or preparing a sweet gift for a friend, these cookies are reliable, simple, and consistently delicious.
The beauty of this dough is its versatility. While they are stunning with a simple coating of granulated sugar, they also serve as a wonderful base for creative additions. For those who enjoy variety in their baking, these bakery-style chocolate chip cookies offer a similar thick and satisfying texture that any cookie lover will appreciate.
Why This Recipe Works
The texture is the star of the show here. Unlike a standard crisp cookie, these remain fluffy and moist for days. By using a mix of a whole egg and an extra egg yolk, the dough gains a richness that sets it apart. The addition of cream of tartar and baking soda provides a gentle lift, resulting in a light, aerated crumb that stays soft long after cooling.
Ingredients for Melt-In-Your-Mouth Sugar Cookies
To achieve the best results, ensure all ingredients are measured accurately. Using a kitchen scale is the most reliable way to get that perfect, consistent bake every time.
The Dry Ingredients
- All-purpose flour: 2 2/3 cups (345 grams)
- Baking soda: 3/4 teaspoon
- Fine sea salt: 1 teaspoon
- Cream of tartar: 1/2 teaspoon
- Baking powder: 1/4 teaspoon
The Wet Ingredients
- Unsalted butter (cool room temperature): 14 tablespoons (196 grams)
- Granulated sugar: 1 1/4 cups (250 grams)
- Large egg (room temperature): 1
- Large egg yolk (room temperature): 1
- Heavy cream (room temperature): 2 tablespoons
- Vanilla extract or vanilla bean paste: 2 teaspoons
Optional
- Sprinkles: 1/2 cup (if a pop of color is desired)
- Extra sugar: For rolling the dough balls before baking
Essential Tools
- Large mixing bowl or stand mixer
- Medium whisking bowl
- Baking sheets
- Parchment paper
- Cookie scoop (2-tablespoon size)
- Wire cooling rack
Step-by-Step Instructions
1. Prepare the Dry Base
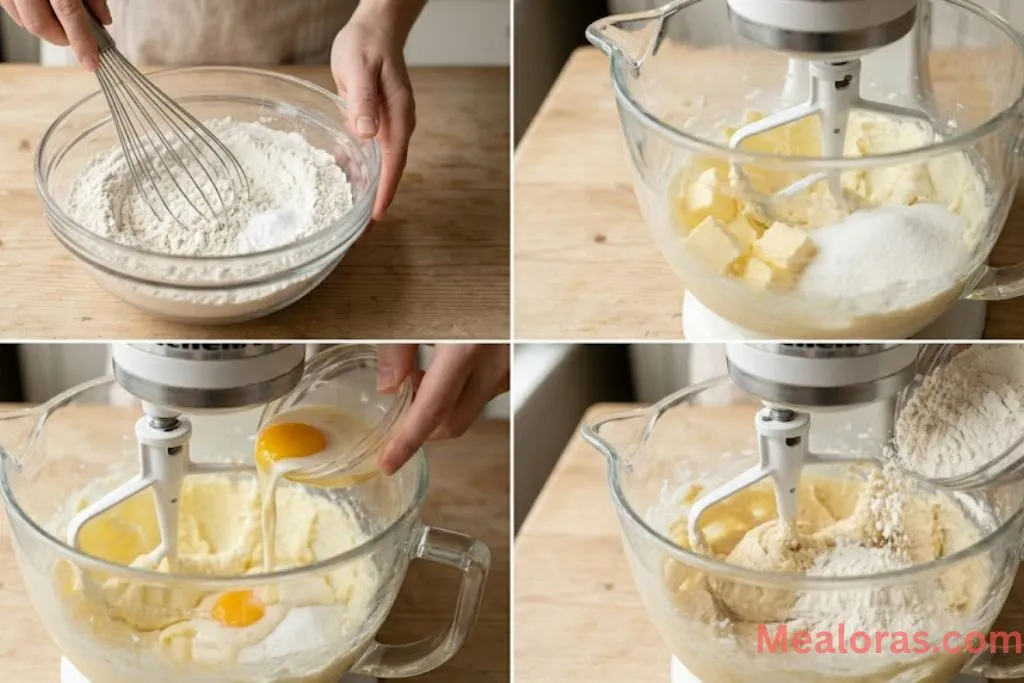
In a medium-sized bowl, combine the all-purpose flour, baking soda, fine sea salt, cream of tartar, and baking powder. Use a whisk to blend them thoroughly, ensuring there are no clumps. Set this aside for later.
2. Cream the Butter and Sugar
In a large mixing bowl or the bowl of a stand mixer fitted with a paddle attachment, beat the cool room-temperature butter and granulated sugar together. Mix on medium-high speed for about 3 minutes. The mixture should look pale, light, and very fluffy. This step is vital for creating an airy texture.
3. Incorporate the Wet Ingredients
Scrape down the sides of the bowl to ensure everything is even. Add the whole egg, the extra egg yolk, the heavy cream, and the vanilla extract. Mix until just combined. The batter should look smooth and creamy.
4. Combine Everything
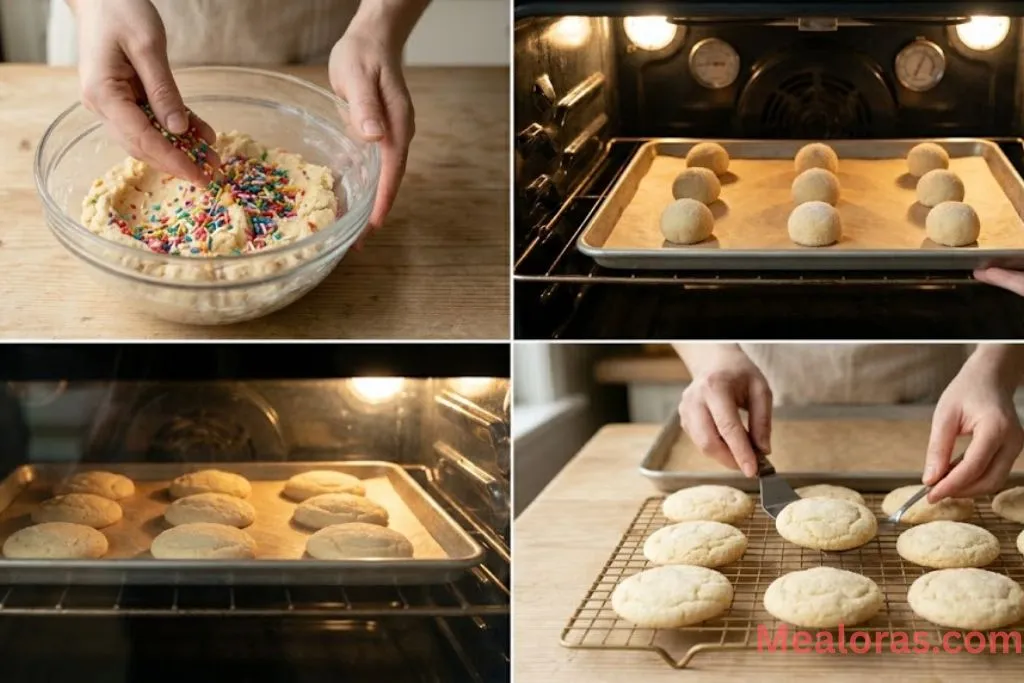
Turn the mixer to low speed and gradually add the dry flour mixture. If using sprinkles, toss them in now. Mix until the flour just disappears. The dough should be soft and scoopable. If it feels too oily or loose, a small tablespoon of extra flour can be added, but be careful not to overmix.
5. First Chill
Cover the bowl with plastic wrap and place it in the refrigerator for 30 minutes. This makes the dough much easier to handle and prevents the cookies from spreading too much in the oven.
6. Shape and Long Chill
Line a baking sheet with parchment paper. Scoop the dough into 2-tablespoon-sized portions and roll them into smooth balls between your palms. Place them on the sheet. Cover the tray tightly and refrigerate for at least 3 to 4 hours, though leaving them overnight produces the best, thickest results.
7. The Bake
Preheat the oven to 350°F (180°C). Roll each chilled dough ball in a small bowl of granulated sugar until coated. Space them out on the baking sheet. Bake for 8 to 9 minutes. The tops should look set but still very pale. For a soft and moist center, avoid letting the edges turn brown.

8. Cool and Set
Let the cookies rest on the hot baking sheet for about 10 minutes. This allows the centers to finish setting. Move them to a wire rack to cool completely.
Tips for the Perfect Texture
Success in baking often comes down to the small details. To ensure these cookies stay soft, always measure the flour by spooning it into the cup and leveling it off with a knife, rather than scooping the cup directly into the bag. This prevents the dough from becoming too dry.
Temperature is also key. Using butter that is “cool” room temperature (around 67°F) ensures it holds enough air during the creaming process. If the butter is too soft or melted, the cookies will spread into flat discs rather than staying plump and fluffy.
If you enjoy fruit-inspired treats with a similar soft base, you might also love trying a strawberry shortcake cookies recipe for a bright and fresh twist on a classic.
Variations to Try
While the classic version is a favorite, there are many ways to change the flavor profile:
- Citrus Zest: Add a teaspoon of lemon or orange zest to the sugar for a refreshing aroma.
- Almond Touch: Swap half of the vanilla extract for almond extract for a professional bakery flavor.
- Colored Sugar: Use vibrant sanding sugars to match a specific holiday or theme.
- Spices: A pinch of nutmeg or cardamom added to the dry ingredients can provide a warm, cozy depth.
Storage and Serving Ideas
To keep that “melt-in-your-mouth” quality, store the cookies in an airtight container at room temperature. They will remain fresh and soft for up to 4 days. If they need to be kept longer, they can be frozen in a sealed bag for up to two months. Simply thaw them at room temperature for an hour before eating.
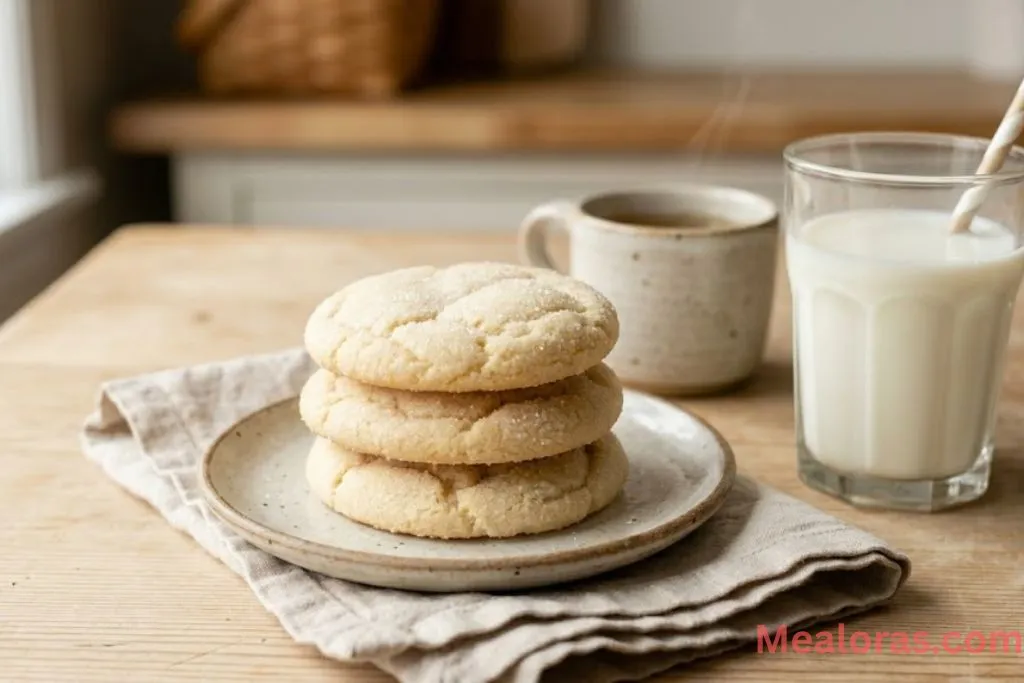
These cookies are delightful when served with a cold glass of milk or a warm cup of herbal tea. Because of their sturdy yet soft nature, they are also perfect for making ice cream sandwiches. Just place a scoop of vanilla bean ice cream between two cookies and press gently.
Common Mistakes to Avoid
- Overbaking: This is the most common error. If the cookies look “done” in the oven, they are likely overbaked. They should look slightly underdone and pale when pulled out.
- Skipping the Chill: Chilling the dough is mandatory. It concentrates the flavors and controls the spread.
- Warm Ingredients: Using warm eggs or warm cream can cause the butter to break, leading to a greasy texture.
Frequently Asked Questions
1. Can I use salted butter instead of unsalted? Yes, but reduce the added sea salt to 1/2 teaspoon to prevent the cookies from being too salty.
2. Why did my cookies turn out flat? This usually happens if the butter was too warm or if the dough wasn’t chilled long enough before baking.
3. Do I have to use heavy cream? The cream adds a specific richness and moisture. If necessary, whole milk can be used, but the texture may be slightly less creamy.
4. Can I make the dough in advance? Absolutely. The dough can stay in the fridge for up to 2 days before baking, or it can be frozen for up to a month.
5. Why is cream of tartar used? It acts as a leavening agent and gives the cookies a unique, soft, and slightly tangy profile that defines a classic sugar cookie.
6. Can I use a hand mixer instead of a stand mixer? Yes, a hand mixer works perfectly well for creaming the butter and sugar and incorporating the other ingredients.
7. How do I know when the cookies are finished baking? The edges will be set and the tops will no longer look wet or shiny, even if they appear very pale.
8. Is it okay to use vanilla imitation? Pure vanilla extract or vanilla bean paste provides a much richer and more natural flavor for this recipe.
9. Can I add nuts to this recipe? While you can add finely chopped nuts, it will change the “melt-in-your-mouth” texture significantly.
10. Why do my cookies feel hard the next day? They were likely overbaked or left uncovered. Store them in an airtight container as soon as they are cool to lock in moisture.
Conclusion
These Melt-In-Your-Mouth Sugar Cookies are a staple for any baker’s collection. With their delicate crumb and rich, buttery taste, they provide a sense of comfort in every bite. The process is straightforward, making it a great project for beginners and experienced bakers alike.
The combination of simple ingredients and a careful chilling process results in a treat that is far superior to anything found in a store. Once the technique is mastered, it becomes easy to see why these are a favorite for so many.
If this recipe brings a smile to the kitchen, consider sharing it with friends or family members who appreciate a perfect sweet treat. Spreading the joy of baking is a wonderful way to connect with others over something delicious!
Melt-In-Your-Mouth Sugar Cookies
Ingredients
- 2 2/3 cups 345g all-purpose flour
- 3/4 tsp baking soda
- 1 tsp fine sea salt
- 1/2 tsp cream of tartar
- 1/4 tsp baking powder
- 14 tbsp 196g unsalted butter, cool room temperature
- 1 1/4 cups 250g granulated sugar
- 1 large egg room temperature
- 1 large egg yolk room temperature
- 2 tbsp heavy cream room temperature
- 2 tsp vanilla extract or vanilla bean paste
- Optional: 1/2 cup sprinkles
- Optional: Extra granulated sugar for rolling
Instructions
- Flour Measurement: Always spoon and level the flour or use a kitchen scale to ensure the cookies do not become dry or crumbly.
- Temperature Matters: Ensure the butter is cool to the touch (around 67°F) to prevent the cookies from spreading too flat in the oven.
- Don’t Overbake: Pull the cookies out while they still look slightly underdone; they will finish setting as they cool on the hot pan
Notes
• Temperature Matters: Ensure the butter is cool to the touch (around 67°F) to prevent the cookies from spreading too flat in the oven.
• Don’t Overbake: Pull the cookies out while they still look slightly underdone; they will finish setting as they cool on the hot pan

Mealoras your go-to for simple, flavorful recipes! From quick weeknight dinners to sweet treats and family favorites, we make cooking easy, fun, and delicious for everyone in the kitchen.