Making fresh, warm bread from scratch is one of the most rewarding experiences in the kitchen. There is something truly special about the smell of dough rising and the anticipation of that first soft bite. While many people think they need a fancy oven to achieve bakery-quality results, these Stovetop Custard Cream Buns prove otherwise. These treats are wonderfully soft, golden, and filled with a silky smooth custard that melts in the mouth.
Table of Contents
This recipe is perfect for anyone who wants to enjoy homemade pastries without turning on the oven. It is a fantastic option for small kitchens or for those warm days when you want to keep the house cool. Because these are cooked in a simple pan on the stove, they develop a unique, lightly toasted exterior while staying incredibly pillowy on the inside. Whether served for breakfast or as a cozy afternoon snack, these buns are sure to become a favorite.
If you enjoy making sweet, creamy treats without the hassle of baking, you might also like these no-bake mini Biscoff cheesecakes, which offer another easy way to satisfy a dessert craving.
Ingredients You Will Need
To ensure success, it is helpful to have all your ingredients measured out before you begin. This recipe uses simple pantry staples to create something extraordinary.
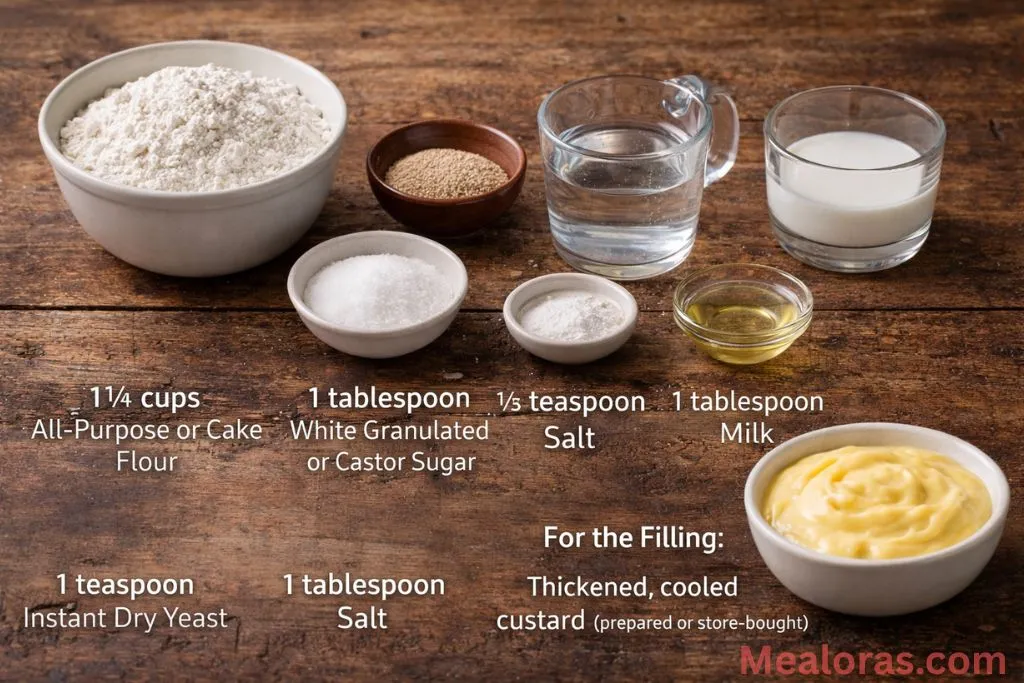
For the Bun Dough:
- All-Purpose or Cake Flour: 1 ¾ cups (Cake flour gives a slightly more tender result, but all-purpose works perfectly well).
- Instant Dry Yeast: 1 teaspoon
- White Granulated or Castor Sugar: 1 tablespoon
- Salt: ⅓ teaspoon
- Warm Water: ½ cup (Ensure it is warm to the touch, not hot).
- Milk: 1 tablespoon
- Oil: 1 tablespoon (Canola or sunflower oil work best for their neutral flavor).
For the Filling:
- Custard: Use your favorite prepared custard. You can use homemade custard or a store-bought version. Ensure it is cooled and thickened before using it as a filling.
Basic Tools Needed:
- A large mixing bowl
- A non-stick frying pan with a tight-fitting lid
- A rolling pin
- A kitchen towel for covering the dough
- A small brush for oiling the pan
Step-by-Step Cooking Instructions
1. Preparing the Dough Start by taking a large mixing bowl and whisking together the flour, instant dry yeast, sugar, and salt. In a separate small jug or bowl, combine the warm water, milk, and oil. Pour the liquid mixture into the dry ingredients. Stir with a wooden spoon or your hands until a shaggy dough begins to form.
2. Kneading for Texture Transfer the dough onto a lightly floured surface. Knead the dough for about 5 minutes. You are looking for a transformation; the dough should go from sticky and lumpy to smooth and elastic. If it feels too sticky to handle, you can add a tiny sprinkle of flour, but try not to add too much so the buns stay light.
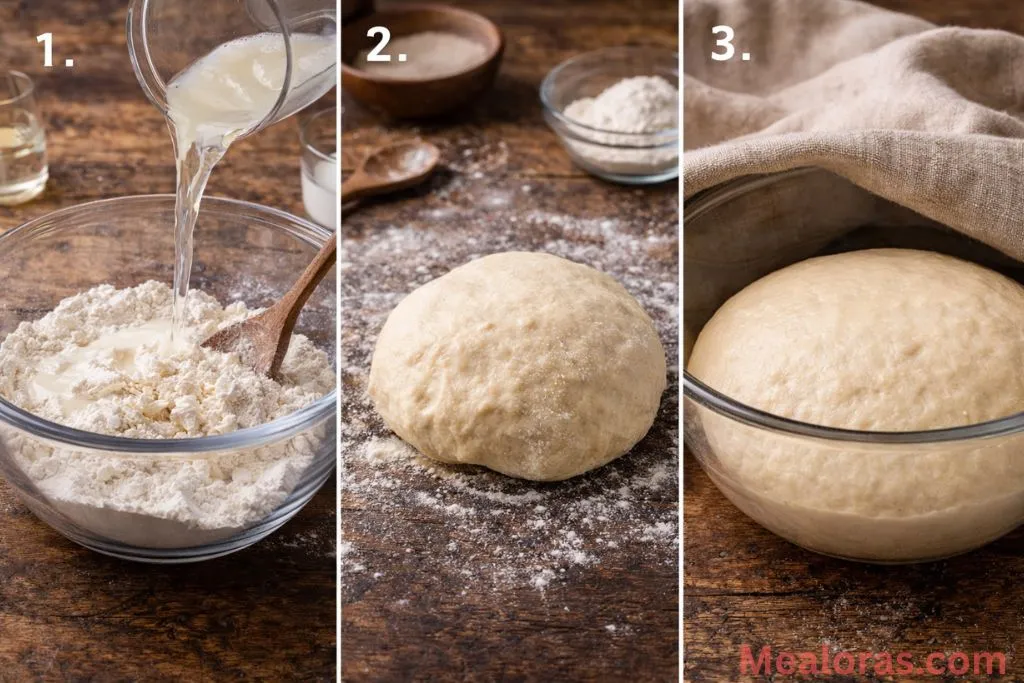
3. The First Rise Place the smooth dough ball back into the bowl and cover it with a clean kitchen towel or plastic wrap. Find a warm, draft-free spot in your kitchen and let it rest for about an hour. During this time, the yeast will work its magic, and the dough should double in size.
4. Shaping the Buns Once the dough has risen, gently press it down to release the air (punching the dough). Knead it for another 2 to 3 minutes to ensure a fine crumb. Divide the dough into 12 equal portions. Roll each piece into a small ball.
Take one ball and roll it out into a flat circle. Place a teaspoon of your cooled, thick custard onto one half of the circle. Fold the other half over the filling to create a half-moon shape. Press the edges firmly with your fingers to seal them so the custard doesn’t leak out during cooking.
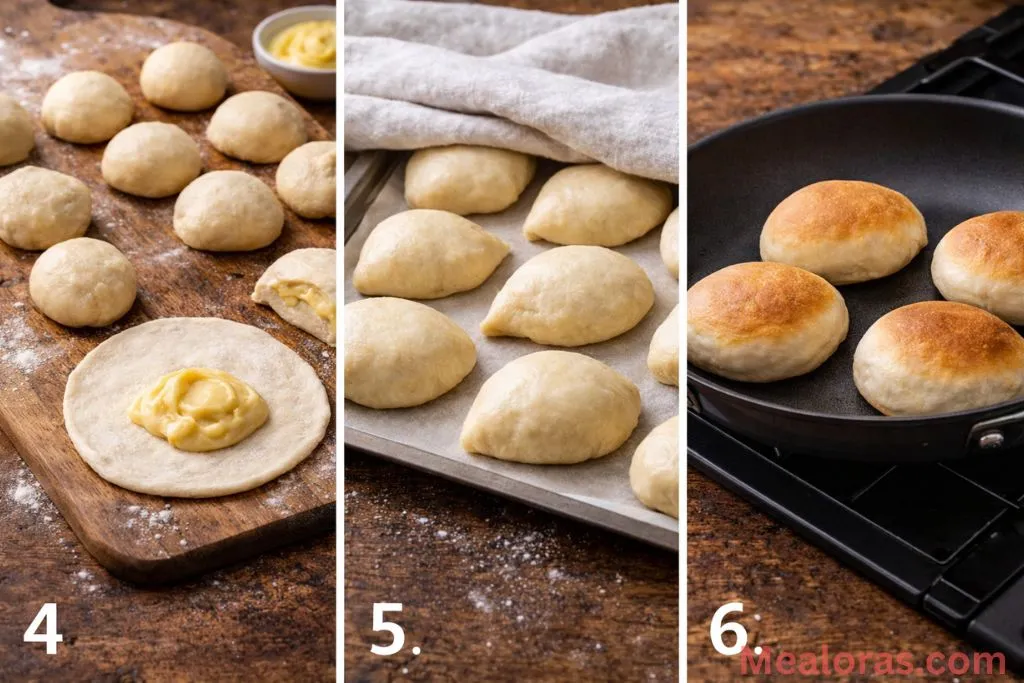
5. The Second Rise Place the shaped buns on a tray, cover them again, and let them rest for another 15 minutes. This short proofing time allows the dough to relax and puff up slightly, ensuring a soft final product.
6. Cooking on the Stovetop Place a non-stick pan over very low heat. If you don’t have a reliable non-stick pan, you can line the bottom with a piece of parchment paper. Brush a tiny amount of oil onto the pan. Carefully place a few buns in the pan, making sure they aren’t touching.
Cover the pan with a lid. Cook on low heat for 10 minutes. The steam trapped by the lid helps the buns “bake” through. Flip them over carefully and cook for an additional 5 minutes without the lid until both sides are a beautiful golden brown.
For those who love starting their day with creamy textures and minimal effort, these creamy chocolate brownie overnight oats are a great companion to a homemade bun.
Tips and Variations for Success
- Temperature Matters: Ensure your water is warm (like a baby’s bathwater) but not boiling. If the water is too hot, it will kill the yeast, and your buns won’t rise.
- The Seal is Key: When folding the dough over the custard, make sure no custard gets on the edges of the dough. If the edges are greasy or wet, they won’t stick together, and the filling will leak in the pan.
- Low and Slow: Do not be tempted to turn up the heat. Cooking these too fast will brown the outside before the dough inside is fully cooked.
- Flavor Twists: You can add a pinch of cinnamon or nutmeg to the dough for a spiced version. If you prefer a different filling, Nutella or a thick jam also works beautifully with this stovetop method.
Storing and Serving Your Buns
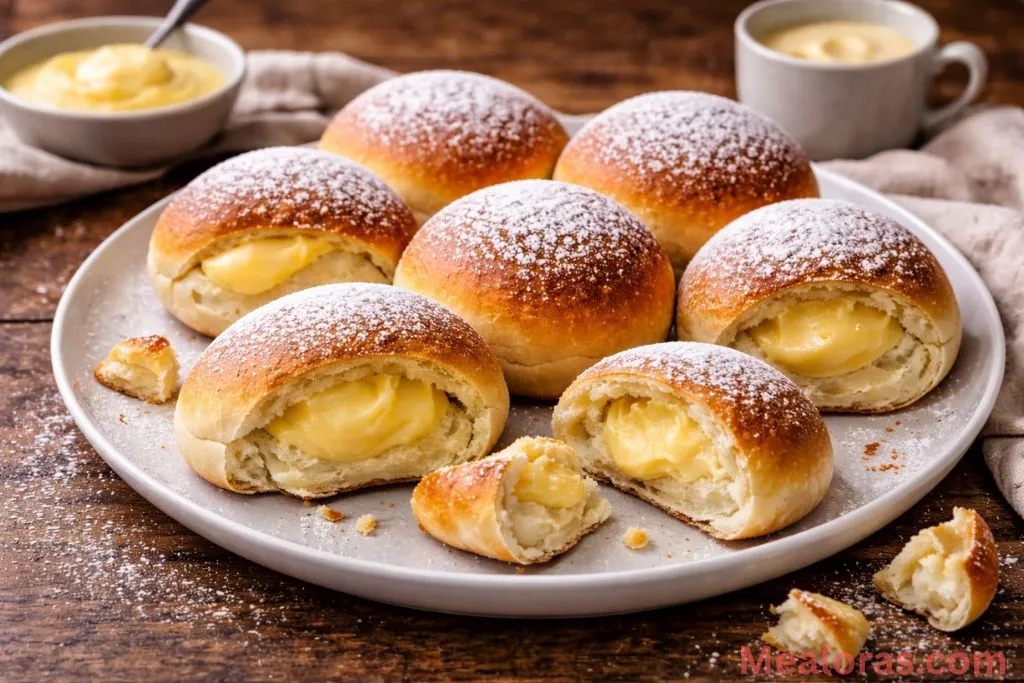
These buns are at their absolute best when served warm, just a few minutes after they come out of the pan. The contrast between the soft bread and the warm custard is incredible.
If you have leftovers, allow them to cool completely before placing them in an airtight container. They will stay fresh at room temperature for about a day, or in the refrigerator for up to three days. To reheat, simply place them back in a dry pan over low heat for a minute or two on each side, or pop them in the microwave for 10-15 seconds to soften the dough.
For a beautiful presentation, you can lightly dust the finished buns with powdered sugar or a little bit of desiccated coconut before serving.
Frequently Asked Questions
1. Can I use active dry yeast instead of instant? Yes, but you will need to dissolve the active dry yeast in the warm water and milk with the sugar first and let it sit for 5-10 minutes until it becomes foamy before adding the flour.
2. Why did my buns not rise? This usually happens if the yeast is old or if the water used was too hot. Always check the expiration date on your yeast.
3. Can I make the dough in a stand mixer? Absolutely. Use the dough hook attachment and mix on low speed for about 5 minutes until the dough is smooth.
4. What kind of custard is best? A very thick custard is necessary. If it is too runny, it will be impossible to seal the buns properly.
5. Do I have to use a lid while cooking? Yes, the lid is essential because it traps heat and moisture, which acts like a small oven to cook the dough through.
6. Can I bake these in the oven instead? Yes, you can bake them at 350°F (180°C) for about 15-20 minutes, but the stovetop method gives them a unique texture.
7. Can I make the dough the night before? Yes, you can let the dough do its first rise in the refrigerator overnight. Just let it come to room temperature before shaping.
8. Why are my buns doughy in the middle? The heat was likely too high. Cooking them on the lowest setting for the full 15 minutes is vital for a cooked center.
9. Can I freeze these buns? Yes, you can freeze them after they are cooked. Thaw them at room temperature and reheat gently before eating.
10. Can I use whole wheat flour? You can, but the buns will be much denser and won’t have the same light, fluffy texture as those made with white flour.
Conclusion
Stovetop Custard Cream Buns are a delightful reminder that you don’t need complex equipment to make wonderful food. With just a handful of ingredients and a bit of patience, anyone can create these soft, sweet treats right on their kitchen counter. The process of kneading and shaping the dough is meditative, and the result is a rewarding snack that feels like a warm hug.
If you enjoyed this recipe, please consider sharing it with your friends and family! Spreading the joy of cooking is a wonderful way to connect with the people you love. Whether you share a photo of your golden buns or invite someone over to try one, these treats are meant to be enjoyed together.

Stovetop Custard Cream Buns
Ingredients
- For the Dough:
- 1 ¾ cups All-Purpose or Cake Flour
- 1 teaspoon Instant Dry Yeast
- 1 tablespoon White Granulated or Castor Sugar
- ⅓ teaspoon Salt
- ½ cup Warm Water
- 1 tablespoon Milk
- 1 tablespoon Neutral Oil Canola or Sunflower
- For the Filling:
- Thickened cooled custard (prepared or store-bought)
Instructions
- Whisk the flour, yeast, sugar, and salt together in a large mixing bowl.
- Combine the warm water, milk, and oil in a separate container and pour into the dry ingredients.
- Stir until a shaggy dough forms, then move to a floured surface.
- Knead the dough for several minutes until it becomes smooth and elastic.
- Place the dough in a covered bowl and let it rest in a warm spot until it doubles in size.
- Punch down the risen dough and knead briefly before dividing into twelve equal pieces.
- Roll each piece into a circle and place a spoonful of thick custard on one half.
- Fold the dough over the custard and press the edges firmly to create a secure seal.
- Let the shaped buns rest under a towel for a short second proofing.
- Heat a non-stick pan on the lowest setting and lightly brush with oil.
- Place the buns in the pan and cover with a tight-fitting lid to trap the steam.
- Cook until the bottom is golden, then flip and finish cooking without the lid until browned on both sides.
Notes
• Heat Control: Keep the stove on the lowest possible setting to ensure the dough cooks through to the center without burning the exterior.
• Custard Consistency: Only use very thick custard; runny custard will leak and make the dough difficult to handle.

Mealoras your go-to for simple, flavorful recipes! From quick weeknight dinners to sweet treats and family favorites, we make cooking easy, fun, and delicious for everyone in the kitchen.