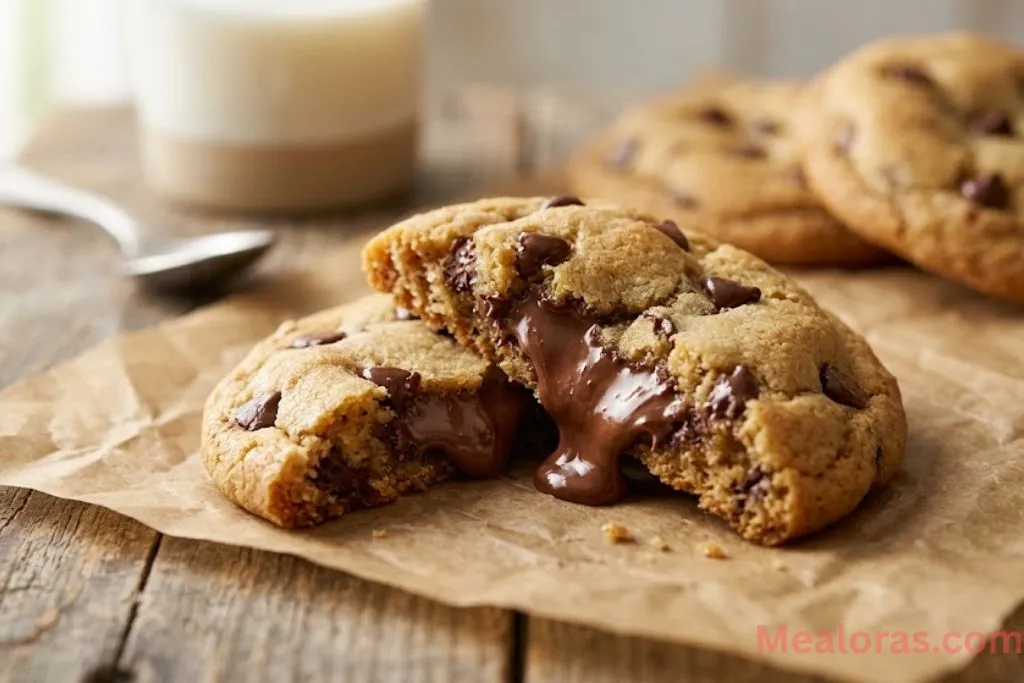
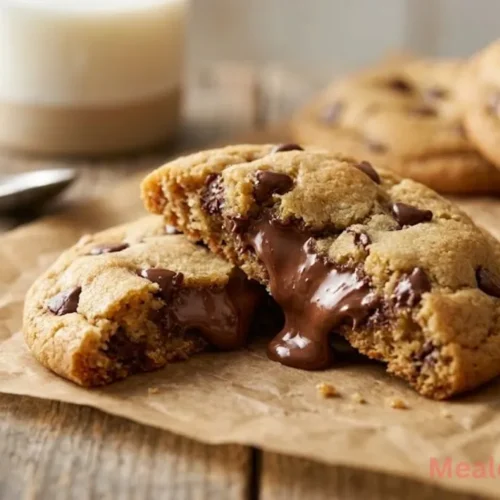
Imagine biting into a soft, golden cookie and discovering a molten, gooey center that melts in your mouth. These chocolate filled cookies are the ultimate treat for anyone who loves a surprise inside their dessert. With a chewy exterior and a rich, creamy heart, they offer a perfect balance of textures in every single bite.
Table of Contents
This recipe is designed to be straightforward and rewarding. It takes a classic dough and elevates it by tucking a decadent hazelnut cocoa spread right into the middle. Whether shared with friends or kept as a secret stash, these treats are bound to become a new household favorite.
If you enjoy experimenting with different cookie textures, you might also want to try this strawberry shortcake cookies recipe for a fruity, summery twist on the classic handheld dessert.
Why You Will Love These Chocolate Filled Cookies
The beauty of these cookies lies in the contrast. While most cookies rely on chips for flavor, these use a solid core of chocolate spread to ensure a gooey result even after the cookies have cooled down. The dough itself is buttery and rich, thanks to the use of brown sugar which provides a deep, molasses-like sweetness.
Preparation is simple, though it does require a bit of patience for chilling. This extra time ensures the filling doesn’t leak and the dough develops a complex flavor. If you are a fan of traditional textures, you’ll find that these have a similar soul to bakery style chocolate chip cookies, but with a much more indulgent center.
Ingredients for Success
To create these decadent treats, gathering high-quality ingredients is key. Each component plays a specific role in achieving that soft, bakery-quality finish.
For the Filling
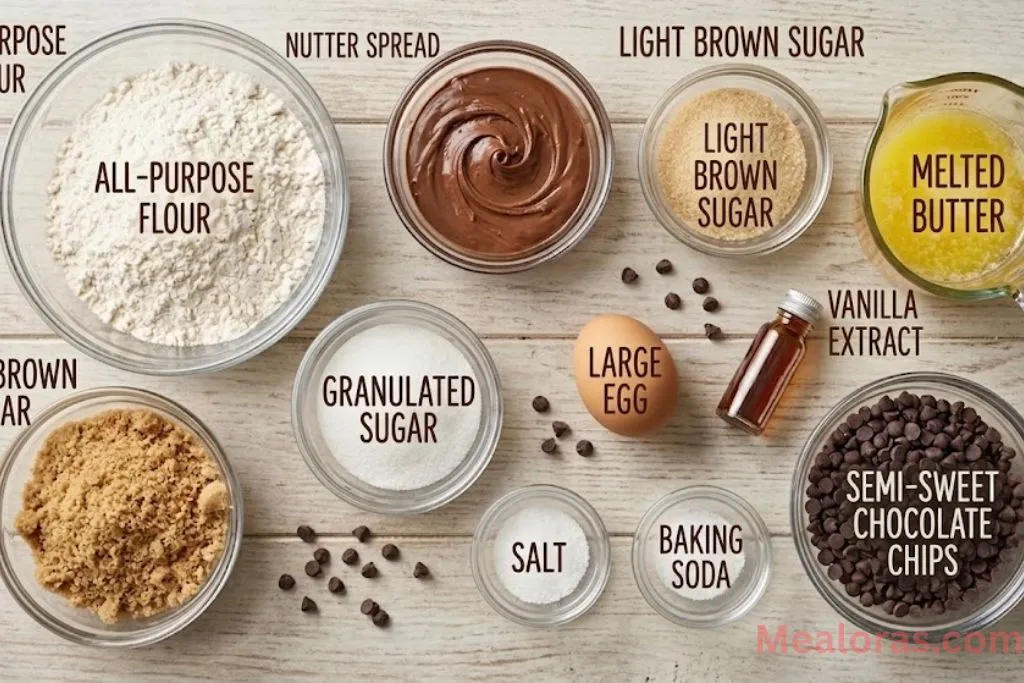
- Chocolate Hazelnut Spread: 1 cup (used to create the frozen centers).
For the Cookie Dough
- Unsalted Butter: 12 tablespoons (melted and cooled to room temperature).
- Light Brown Sugar: 1 cup, packed for a chewy texture.
- Granulated Sugar: 1/4 cup for crisp edges.
- Large Egg: 1, at room temperature to ensure easy mixing.
- Vanilla Extract: 1 tablespoon for a deep aromatic flavor.
- All-Purpose Flour: 1 3/4 cups plus 2 tablespoons.
- Baking Soda: 1 teaspoon to help the cookies rise.
- Fine Sea Salt: 1 teaspoon to balance the sweetness.
- Mini Chocolate Chips: 1 1/8 cups (or finely chopped chocolate bar).
Essential Tools
- Baking sheets and parchment paper.
- Small spoon or a teaspoon scoop.
- Medium and large mixing bowls.
- A sturdy whisk and a silicone spatula.
- A 2-tablespoon cookie scoop.
Step-by-Step Instructions
Follow these clear steps to ensure your chocolate filled cookies turn out perfectly every time.
1. Prepare the Filling
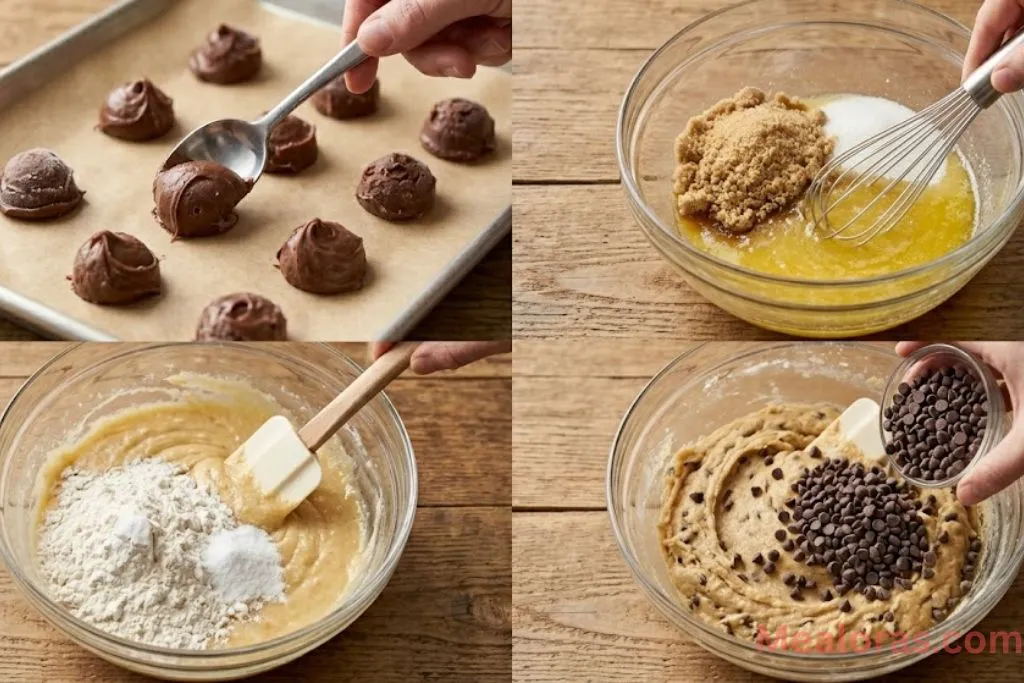
Start by lining a small tray with parchment paper. Using a teaspoon, scoop mounds of the chocolate hazelnut spread onto the tray. You should aim for about 20–24 small dollops. Place the tray in the freezer for at least 30 minutes, or until the mounds are frozen solid and easy to handle.
2. Mix the Butter and Sugars
In a large mixing bowl, combine the melted and cooled unsalted butter with the light brown sugar and granulated sugar. Use a whisk to blend them together vigorously for about one full minute. The mixture should look smooth and well-incorporated.
3. Add Wet Ingredients
Add the room-temperature egg and the vanilla extract to the butter mixture. Whisk again until the batter is creamy and the egg is fully emulsified into the fats and sugars.

4. Incorporate Dry Ingredients
Sift the all-purpose flour, baking soda, and sea salt into the bowl. Switch to a silicone spatula and gently fold the dry ingredients into the wet batter. When only a few streaks of flour remain, pour in the mini chocolate chips or chopped chocolate. Continue folding until the dough is uniform.
5. Chill the Dough
Cover the bowl with plastic wrap and let the dough rest in the refrigerator for 30 minutes. This makes the dough less sticky and easier to shape around the frozen filling.
6. Assemble the Cookies
Preheat your oven to 350°F (180°C) and line two large baking sheets with parchment paper. Take about 2 tablespoons of dough and flatten it into a disc in the palm of your hand. Remove the frozen filling from the freezer. Place one frozen chocolate mound in the center of the dough disc.
7. Seal and Shape
Carefully wrap the edges of the dough over the filling, pinching the seams together so no chocolate is visible. Roll it between your palms to form a smooth ball. Place the balls on the prepared baking sheets, leaving about 3 inches of space between them.
8. Bake to Perfection
Slide the trays into the oven and bake for 9 to 11 minutes. The edges should be lightly golden, but the centers should still look slightly soft and underbaked. Do not overbake, as the cookies will firm up as they cool on the hot tray.
Tips and Variations
- Temperature Matters: Ensure your butter is cooled after melting. If it is too hot, it will melt the sugars and result in a greasy cookie.
- Don’t Overstuff: While it’s tempting to add more filling, too much can cause the cookies to burst or leak during the baking process.
- Scale for Accuracy: If possible, use a kitchen scale to measure your flour. This prevents the cookies from becoming too dry or cakey.
- Alternative Fillings: While hazelnut spread is a classic choice, you can try using frozen dollops of cookie butter or even peanut butter for a different flavor profile.
- Salt Finish: A tiny sprinkle of flaky sea salt on top right after baking can enhance the chocolate flavor beautifully.
Storage and Serving
These cookies are best enjoyed warm when the center is at its gooiest. If you have leftovers, follow these storage tips:
- Room Temperature: Store in an airtight container for up to 3 days.
- Reheating: To get that “just baked” molten center again, pop a cookie in the microwave for 5–10 seconds before eating.
- Freezing: You can freeze the baked cookies for up to 2 months. Thaw them at room temperature or warm them gently in the oven.
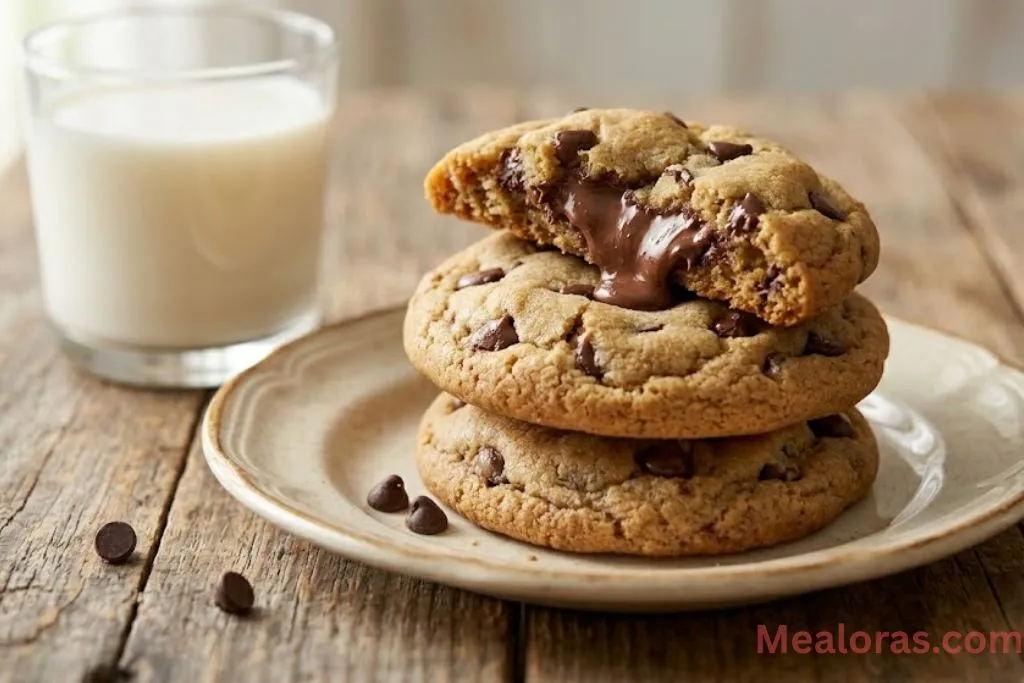
Serve these cookies with a tall glass of cold milk or a warm cup of decaf coffee for a cozy afternoon treat.
Frequently Asked Questions
1. Why did my cookies spread too much? This usually happens if the butter was too warm when mixed or if the dough wasn’t chilled long enough. Make sure the dough feels firm before shaping.
2. Can I use regular chocolate chips for the filling? Plain chocolate chips won’t create a molten center. It is better to use a spread or a soft chocolate ganache that has been frozen into balls.
3. Do I have to freeze the filling? Yes, freezing the filling is essential. If the spread is room temperature, it will be too messy to wrap with dough and will likely leak out in the oven.
4. Can I make the dough in advance? Absolutely. You can keep the dough in the fridge for up to 48 hours. Just let it sit at room temperature for a few minutes if it becomes too hard to scoop.
5. What if I don’t have sea salt? Regular table salt works fine, but use slightly less (about 3/4 teaspoon) as it is finer and tastes saltier than sea salt.
6. Why is my filling leaking out? This happens if the dough wasn’t sealed properly around the frozen center. Make sure there are no cracks or thin spots when rolling the balls.
7. Can I use a stand mixer? While you can, this recipe is easy enough to do by hand with a whisk and spatula, which helps prevent over-mixing the dough.
8. How many cookies does this recipe make? Following the 2-tablespoon scoop size, you should get approximately 20 to 24 medium-sized cookies.
9. Can I use dark chocolate instead of mini chips? Yes, chopping up a dark chocolate bar is a great way to add “pools” of chocolate to the dough.
10. Why are my cookies hard? Hard cookies are usually a result of overbaking. Take them out when the centers still look a little pale; they will finish cooking on the tray.
Conclusion
Mastering the art of chocolate filled cookies is a surefire way to impress any dessert lover. These treats combine the comfort of a standard cookie with the luxury of a molten chocolate center, making them a standout addition to your baking repertoire. With simple ingredients and clear steps, anyone can achieve these professional-looking results at home.
The rich flavor and satisfying texture make every minute of preparation worth it. Once you see the gooey center for the first time, you’ll understand why this recipe is a must-try.
If you loved this recipe, please share it with your friends and family so they can enjoy these molten treats too! Sharing the joy of baking is the best way to spread a little sweetness.
Chocolate Filled Cookies
Ingredients
- For the Filling
- 1 cup Chocolate Hazelnut Spread
- For the Cookie Dough
- 12 tablespoons Unsalted Butter melted and cooled
- 1 cup Light Brown Sugar packed
- 1/4 cup Granulated Sugar
- 1 Large Egg room temperature
- 1 tablespoon Vanilla Extract
- 1 3/4 cups plus 2 tablespoons All-Purpose Flour
- 1 teaspoon Baking Soda
- 1 teaspoon Fine Sea Salt
- 1 1/8 cups Mini Chocolate Chips
Instructions
- Scoop teaspoon-sized mounds of chocolate hazelnut spread onto a parchment-lined tray and freeze until solid.
- Whisk melted butter, brown sugar, and granulated sugar in a large bowl until smooth.
- Mix in the room-temperature egg and vanilla extract until the batter is creamy.
- Fold in the flour, baking soda, and salt using a spatula, then stir in the chocolate chips.
- Cover the dough and let it rest in the refrigerator to firm up.
- Preheat the oven and prepare baking sheets with parchment paper.
- Flatten a portion of dough, place a frozen chocolate mound in the center, and wrap the dough around it completely.
- Roll into a smooth ball and place on the baking sheet with plenty of space between each cookie.
- Bake until the edges are just golden and the centers remain soft.
- Allow the cookies to cool slightly on the tray to set before serving.
Notes
• Do not overbake; the cookies should look slightly soft in the middle when removed from the oven.
• Store in an airtight container and reheat for a few seconds in the microwave to restore the molten center.

Mealoras your go-to for simple, flavorful recipes! From quick weeknight dinners to sweet treats and family favorites, we make cooking easy, fun, and delicious for everyone in the kitchen.