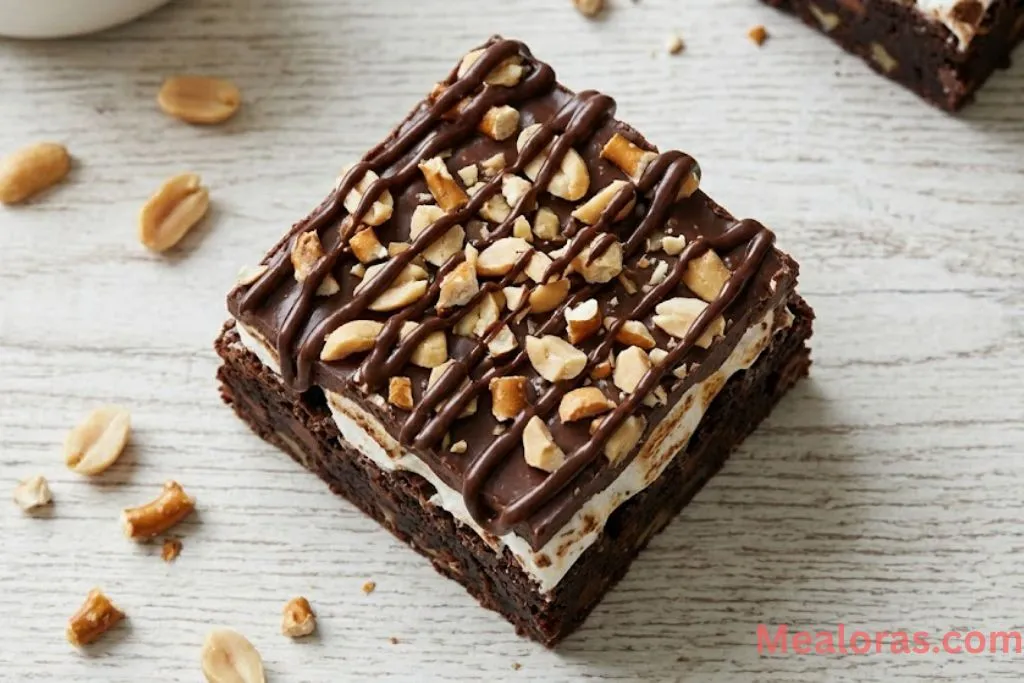
Imagine a dessert that combines the deep, rich flavor of dark cocoa with the soft, pillowy texture of melted marshmallows and the satisfying snap of toasted nuts. These Rocky Road Brownies are exactly that. They take everything you love about the classic ice cream flavor and pack it into a dense, chewy bar that is impossible to resist.
Table of Contents
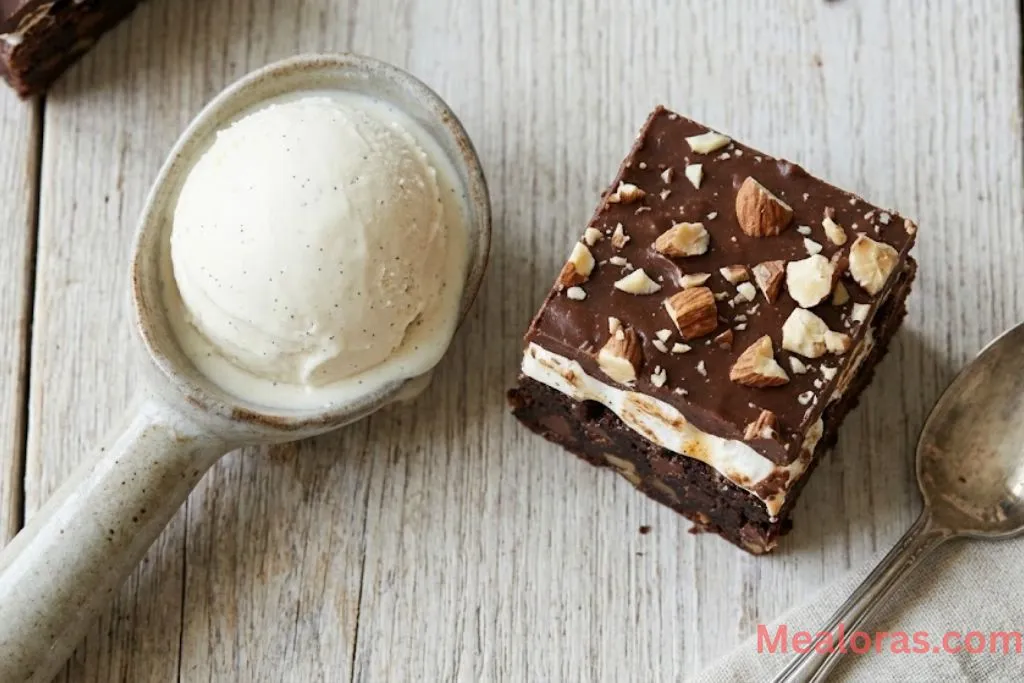
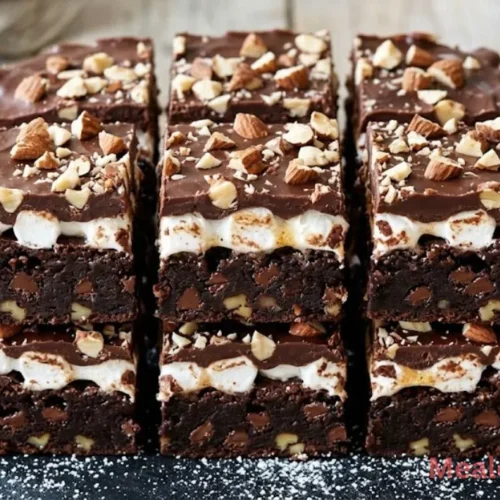
If you enjoy desserts that play with different textures, this recipe is for you. The base is an incredibly moist chocolate brownie, topped with a cloud-like layer of mini marshmallows and finished with a silky almond ganache. It is a sophisticated upgrade to a childhood favorite, and the best part is that you can make the entire batter in just one bowl without ever needing an electric mixer.
For those who love experimenting with different cookie-inspired chocolate treats, these brownies sit perfectly alongside other favorites like fudgy Biscoff cookie butter brownies, which offer a unique spiced flavor. Whether you are baking for a weekend treat or a special gathering, these brownies are guaranteed to be the star of the show.
Why This Rocky Road Brownies Recipe Works
The secret to a perfect brownie lies in the balance of fat, sugar, and chocolate. By melting the butter and chocolate together, you create a base that stays soft and fudgy even after cooling. Adding an extra egg yolk ensures the center remains gooey rather than cake like.
The “Rocky Road” element comes from the layers. Instead of just mixing everything into the batter, we toast the marshmallows on top during the final minutes of baking. This creates a sticky, melted topping that anchors the crunchy almonds and smooth chocolate ganache. If you are a fan of cookies and cream flavors, you might also find this texture similar to fudgy Oreo brownies recipe, which also emphasizes a rich, layered bite.
Ingredients You Will Need
To ensure the best results, use high-quality chocolate and fresh ingredients. Here is everything required for these decadent treats.
For the Brownie Batter
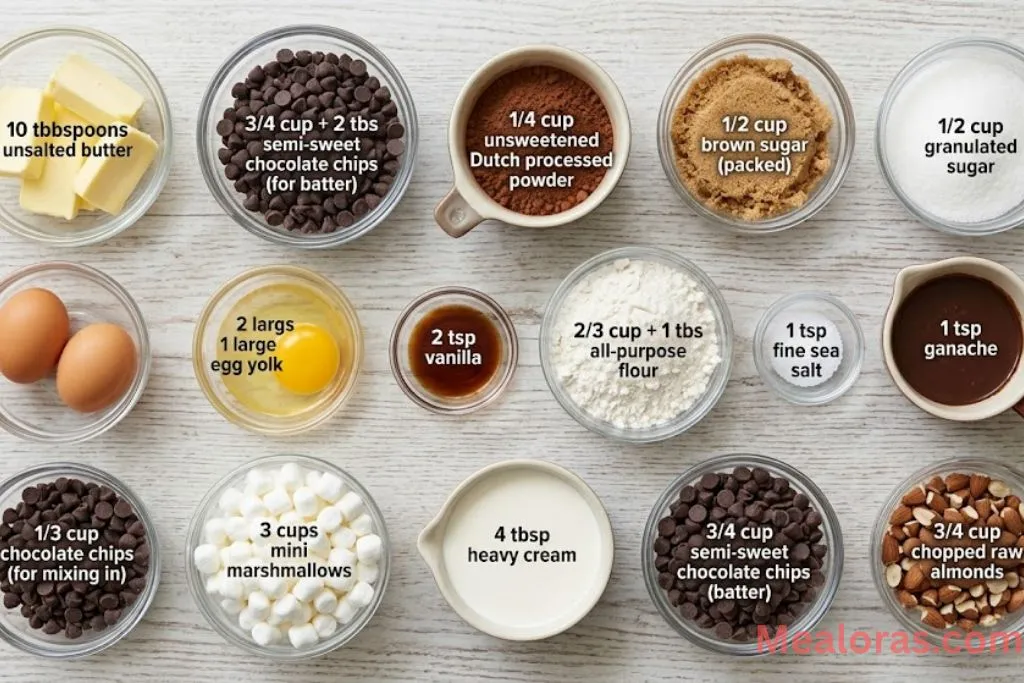
- Unsalted Butter: 10 tablespoons
- Semi-Sweet Chocolate Chips: 3/4 cup + 2 tablespoons
- Dutch Processed Cocoa Powder (Unsweetened): 1/4 cup
- Brown Sugar (Packed): 1/2 cup
- Granulated Sugar: 1/2 cup
- Large Eggs: 2
- Large Egg Yolk: 1
- Vanilla Extract: 2 teaspoons
- All-Purpose Flour: 2/3 cup + 1 tablespoon
- Fine Sea Salt: 1 teaspoon
- Extra Chocolate Chips (Optional): 1/3 cup
- Mini Marshmallows: 3 cups
For the Almond Ganache
- Heavy Cream: 4 tablespoons
- Semi-Sweet Chocolate Chips: 3/4 cup
- Raw Almonds (Chopped): 3/4 cup
Basic Tools Needed
- 8×8 Square Baking Pan (metal is recommended for even heat)
- Parchment Paper
- Whisk and Rubber Spatula
- Microwave-safe Bowl
Step-by-Step Instructions
1. Prepare for Baking
Start by preheating your oven to 350°F (180°C). Take your 8×8 square baking pan and line it with parchment paper. Ensure the paper hangs over the sides slightly; this creates a “sling” that makes it easy to lift the brownies out once they are set.
2. Melt the Chocolate and Butter
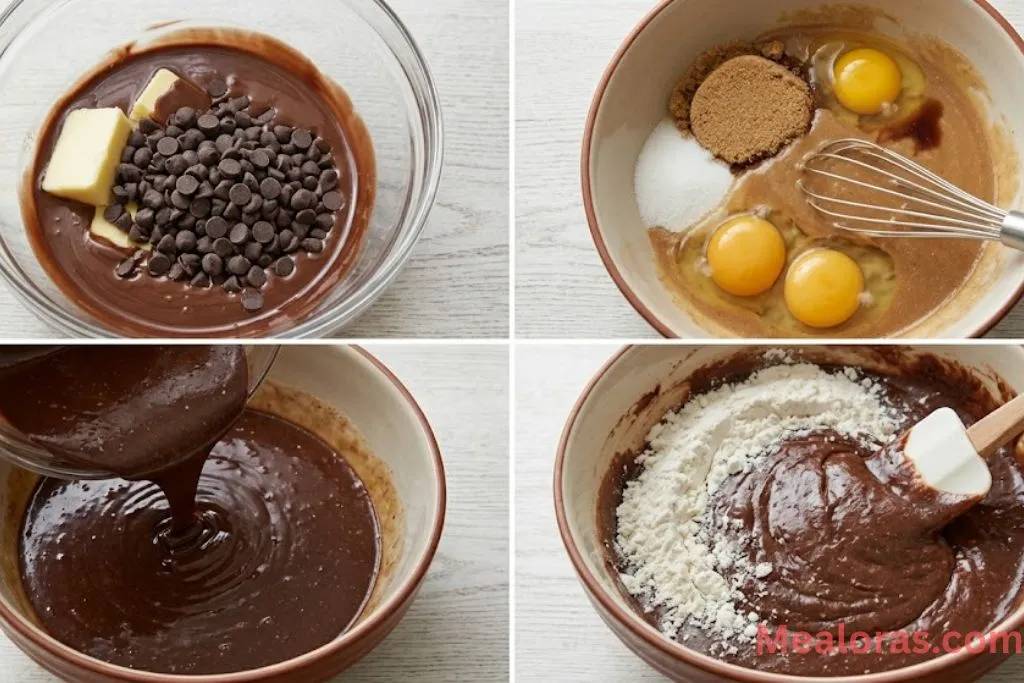
In a microwave-safe bowl, combine the 10 tablespoons of butter and the first portion of chocolate chips (3/4 cup + 2 tablespoons). Heat in 20-30 second intervals, stirring well between each, until the mixture is completely smooth. Once melted, whisk in the cocoa powder and set the bowl aside to cool slightly.
3. Mix the Wet Ingredients
In a separate large mixing bowl, combine the brown sugar, granulated sugar, two whole eggs, the extra egg yolk, and the vanilla extract. Whisk these together vigorously until the mixture is well-combined and smooth.
4. Combine and Fold
Slowly pour the melted chocolate and butter mixture into the bowl with the eggs and sugar. Whisk gently until the two are fully incorporated. Switch to a rubber spatula and fold in the flour, sea salt, and the optional 1/3 cup of chocolate chips. Be careful not to overmix; stop as soon as you no longer see streaks of white flour.
5. The First Bake
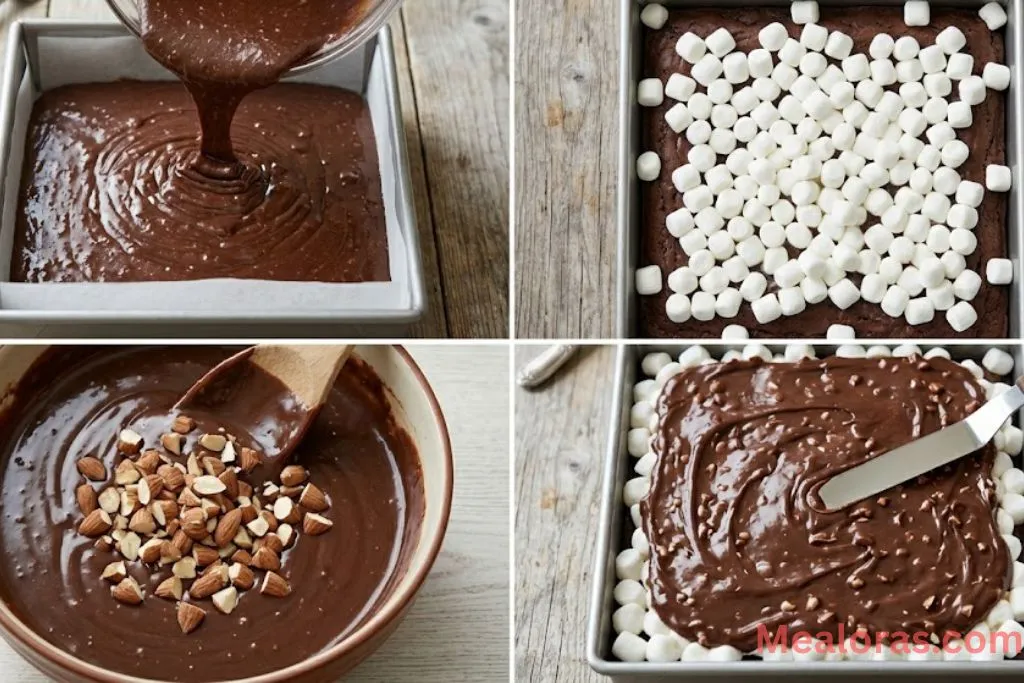
Transfer the batter into your prepared pan, smoothing the top with your spatula. Place it in the oven and bake for 25 to 30 minutes. You will know it is ready when a toothpick inserted into the center comes out with just a few moist crumbs attached.
6. Add the Marshmallow Layer
Immediately after removing the pan from the oven, cover the entire surface of the brownie with the 3 cups of mini marshmallows. Return the pan to the oven for just 3 minutes. This allows the marshmallows to puff up and soften without turning brown. Remove from the oven and let it sit on a wire rack.
7. Create the Almond Ganache
While the brownies cool, heat the heavy cream in a small bowl until it is just about to boil. Pour it over the remaining 3/4 cup of chocolate chips. Let it sit for one minute, then stir until it forms a glossy, smooth ganache. Mix in the chopped almonds.
8. Final Assembly and Cooling
Let the ganache cool for about 3 minutes so it thickens slightly, then gently spread it over the puffed marshmallows. Let the pan cool at room temperature first, then place it in the refrigerator for at least one hour. This chilling time is essential for the ganache to set, making it much easier to slice.
Tips for the Best Results
- Weight vs. Volume: If you have a kitchen scale, use it. Measuring flour by weight prevents the brownies from becoming dry or cakey.
- The Right Pan: Using a light-colored metal pan helps the heat distribute evenly. Dark pans or glass dishes can sometimes cause the edges to overcook before the center is done.
- Clean Slices: To get those perfect, bakery-style squares, use a very sharp knife. Wipe the blade clean with a damp cloth after every single cut to prevent the sticky marshmallows from pulling.
- Toast the Nuts: For an even deeper flavor, briefly toast your chopped almonds in a dry pan over medium heat for 2-3 minutes before adding them to the ganache.
Storage and Serving Ideas
These brownies are very rich, so they are best served in small squares. They pair beautifully with a cold glass of milk or a scoop of simple vanilla bean ice cream.
At Room Temperature: Keep the brownies in an airtight container. they will stay fresh and soft for 2 to 3 days.In the Fridge: If you prefer a firmer, fudgier texture, you can keep them in the refrigerator for up to 5 days.Freezing: These brownies freeze surprisingly well. Wrap individual squares tightly in plastic wrap and place them in a freezer-safe bag. They will last for about two weeks. Note that the marshmallows may lose some of their fluffiness after thawing, but the taste will still be incredible.
Frequently Asked Questions
1. Can I use large marshmallows instead of mini ones? Yes, but you should snip them into 4 or 5 smaller pieces using kitchen shears. This ensures they melt evenly across the surface.
2. Is it possible to use a different type of nut? Absolutely. While almonds are traditional for Rocky Road, walnuts or pecans are excellent substitutes that provide a similar crunch.
3. Why did my marshmallows disappear into the brownie? This usually happens if they are added too early. Make sure the brownie is almost fully baked before adding the marshmallow layer for the final 3 minutes.
4. Can I use a boxed brownie mix? Yes. You can use the topping method (marshmallows and almond ganache) on top of a prepared box mix to save time.
5. How do I know when the brownies are perfectly baked? Look for the edges to be set and the top to have a slight shine. A toothpick should have moist crumbs, not liquid batter.
6. Can I make these without the almond ganache? You can, but the ganache helps hold the nuts in place and adds a luxurious finish that balances the sweetness of the marshmallows.
7. Why do I need to chill them before cutting? The marshmallow and ganache layers are very sticky when warm. Chilling firms them up so the knife can glide through without making a mess.
8. Can I use milk chocolate instead of semi-sweet? You can, but the result will be much sweeter. The semi-sweet chocolate helps balance the sugar in the marshmallows.
9. What is Dutch-processed cocoa powder? It is cocoa that has been treated to reduce acidity. it gives the brownies a darker color and a smoother, more mellow chocolate taste.
10. Can I make these gluten-free? You can try substituting the all-purpose flour with a high-quality 1:1 gluten-free baking flour blend.
Conclusion
Creating these Rocky Road Brownies is a rewarding experience for any baker. The combination of a fudgy base, stretchy marshmallows, and crunchy almonds creates a symphony of textures that is hard to find in any other dessert. They are simple to put together but look and taste like they came from a high-end bakery.
Whether you are looking for a reliable recipe for a potluck or just want to treat yourself to a decadent afternoon snack, these brownies are the perfect choice. Give them a try and see how quickly they become a staple in your kitchen!
If you enjoyed this recipe, please consider sharing it with your friends and fellow chocolate lovers. It is the perfect treat to bring people together.
Rocky Road Brownies
Ingredients
- Brownie Batter
- 10 tablespoons unsalted butter
- 3/4 cup + 2 tablespoons semi-sweet chocolate chips
- 1/4 cup unsweetened Dutch processed cocoa powder
- 1/2 cup brown sugar packed
- 1/2 cup granulated sugar
- 2 large eggs
- 1 large egg yolk
- 2 teaspoons vanilla extract
- 2/3 cup + 1 tablespoon all-purpose flour
- 1 teaspoon fine sea salt
- 1/3 cup semi-sweet chocolate chips optional
- 3 cups mini marshmallows
- Almond Ganache
- 4 tablespoons heavy cream
- 3/4 cup semi-sweet chocolate chips
- 3/4 cup chopped raw almonds
Instructions
- Preheat the oven and prepare an 8×8 square baking pan with parchment paper. Melt the butter and chocolate chips in a microwave-safe bowl until smooth, then whisk in the cocoa powder. In a separate large bowl, whisk together the brown sugar, granulated sugar, eggs, egg yolk, and vanilla. Stream the melted chocolate mixture into the egg mixture and whisk until combined. Fold in the flour, salt, and extra chocolate chips using a spatula. Pour the batter into the pan and bake until a toothpick comes out with moist crumbs. Spread mini marshmallows over the hot brownies and return to the oven briefly to soften. Heat the heavy cream and pour it over the remaining chocolate chips, stirring until smooth to create a ganache. Stir in the chopped almonds and spread the mixture over the marshmallow layer. Let the brownies cool completely and chill in the fridge before slicing.
Notes
• Pan Selection: Use a light-colored metal pan for even baking; glass or ceramic pans may require extra time.
• Slicing Guide: Use a sharp knife and wipe it clean between every cut to ensure clean, beautiful squares.
• Storage: Keep in an airtight container at room temperature for up to three days or freeze for up to two weeks.

Mealoras your go-to for simple, flavorful recipes! From quick weeknight dinners to sweet treats and family favorites, we make cooking easy, fun, and delicious for everyone in the kitchen.