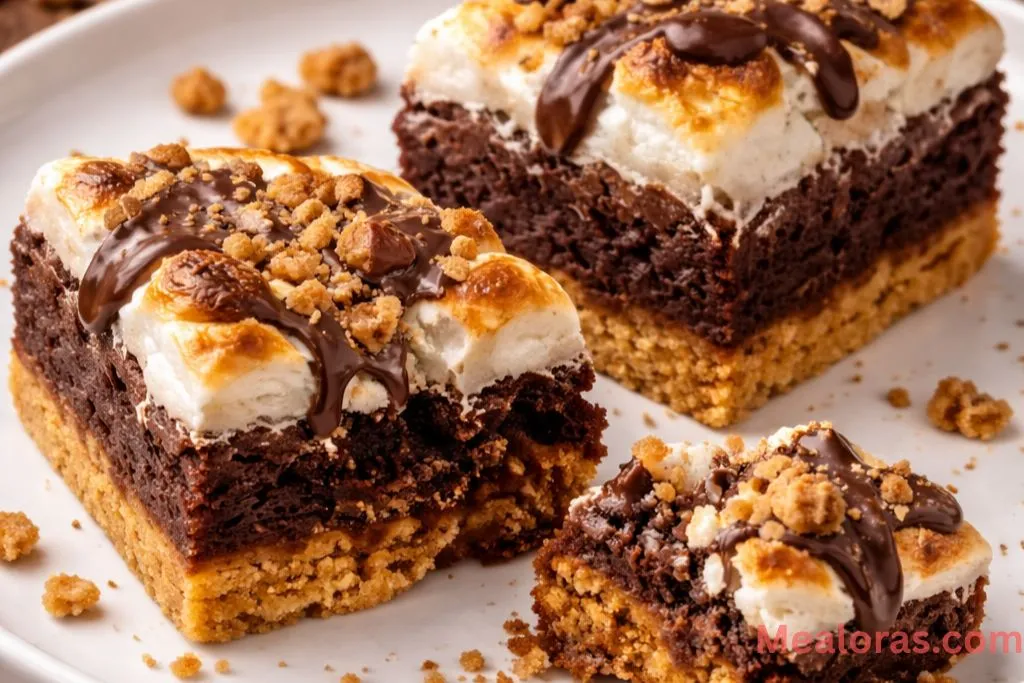
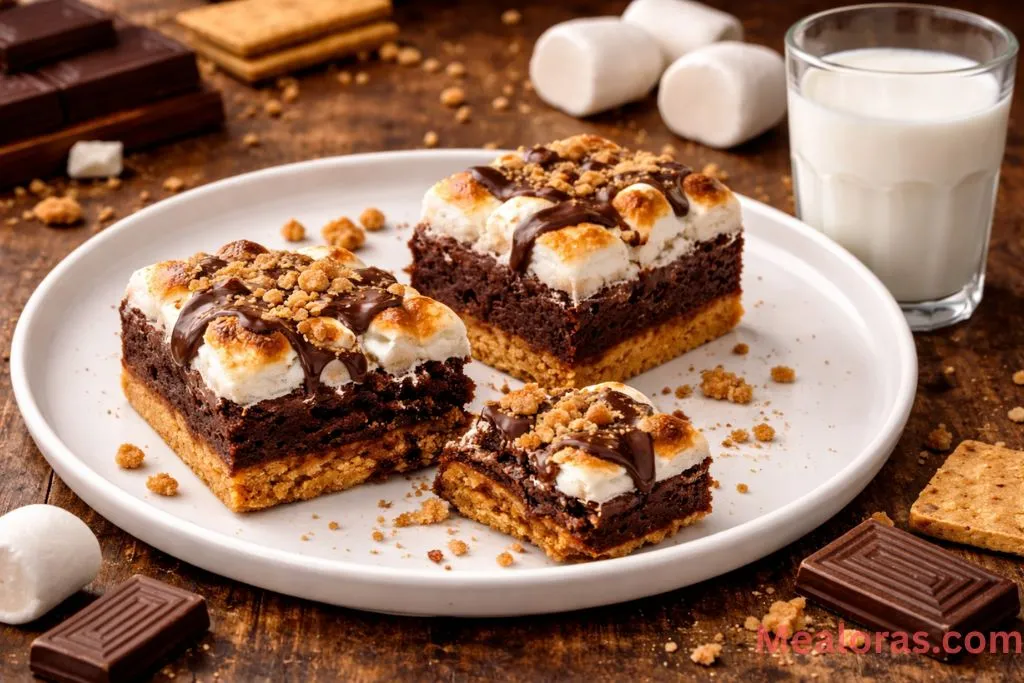
Imagine the ultimate dessert experience a rich, fudgy brownie base, a crisp graham cracker crust, and a thick layer of toasted, pillowy marshmallow on top. These S’mores Brownies from Scratch bring all the nostalgia of a summer campfire right into your kitchen without needing a single spark. Every bite is a perfect balance of textures, from the crunch of the crackers to the gooey, melted marshmallow.
Table of Contents
Making these treats is surprisingly simple. You don’t need to be an expert baker to achieve that professional look and taste. By layering the ingredients carefully, you create a dessert that looks impressive but feels incredibly comforting. Whether it is a rainy afternoon or a weekend family gathering, this recipe delivers a decadent result that everyone will love.
Why You Will Love These S’mores Brownies from Scratch
The beauty of these brownies lies in the triple-threat combination of flavors. Most brownies focus on just the chocolate, but this recipe adds depth with a buttery graham cracker foundation. It provides a structural base that holds up the dense, chocolatey middle. The crowning glory is the marshmallow layer, which gets slightly charred to provide that authentic outdoor flavor.
This recipe is designed to be reliable. By using a mix of cocoa powder and melted chocolate chips, you ensure a moist and chewy consistency every single time. If you enjoy experimenting with different textures in your baking, you might also want to try these fudgy Biscoff cookie butter brownies for another unique twist on a classic favorite.
Ingredients Needed
To make these S’mores Brownies from Scratch, you will need a few pantry staples along with the classic s’mores components. Having everything measured out before you start will make the process much smoother.
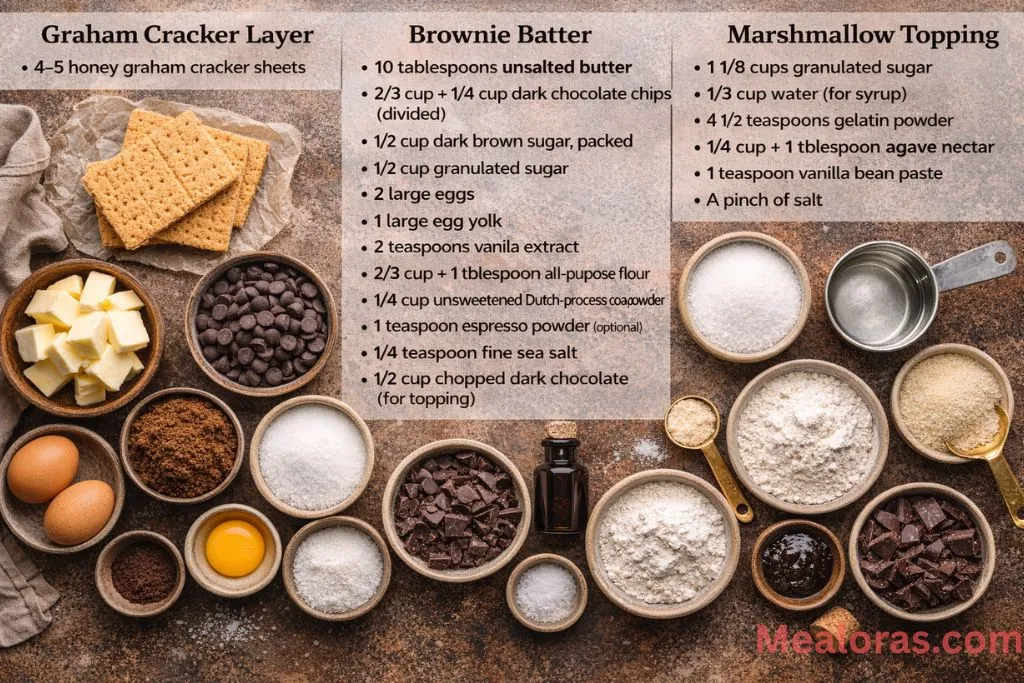
For the Graham Cracker Layer:
- 4–5 honey graham cracker sheets (enough to cover the bottom of your pan)
For the Brownie Batter:
- 10 tablespoons unsalted butter
- 2/3 cup + 1/4 cup dark chocolate chips (divided)
- 1/2 cup dark brown sugar, packed
- 1/2 cup granulated sugar
- 2 large eggs
- 1 large egg yolk
- 2 teaspoons vanilla extract
- 2/3 cup + 1 tablespoon all-purpose flour
- 1/4 cup unsweetened Dutch-process cocoa powder
- 1 teaspoon espresso powder (optional, but enhances the chocolate)
- 1/4 teaspoon fine sea salt
- 1/2 cup chopped dark chocolate (for the topping layer)
For the Marshmallow Topping:
- 1 1/8 cups granulated sugar
- 1/3 cup water (plus extra for the gelatin)
- 4 1/2 teaspoons gelatin powder
- 1/4 cup + 1 tablespoon agave nectar (or honey/corn syrup)
- 1 teaspoon vanilla bean paste
- A pinch of salt
Essential Kitchen Tools
- 8×8 inch square baking pan
- Parchment paper
- Heatproof mixing bowls
- Whisk and rubber spatula
- Heavy-bottomed saucepan (for the marshmallow syrup)
- Electric stand mixer or hand mixer
- Kitchen torch (optional, for toasting)
Step-by-Step Instructions
1. Prepare the Baking Pan
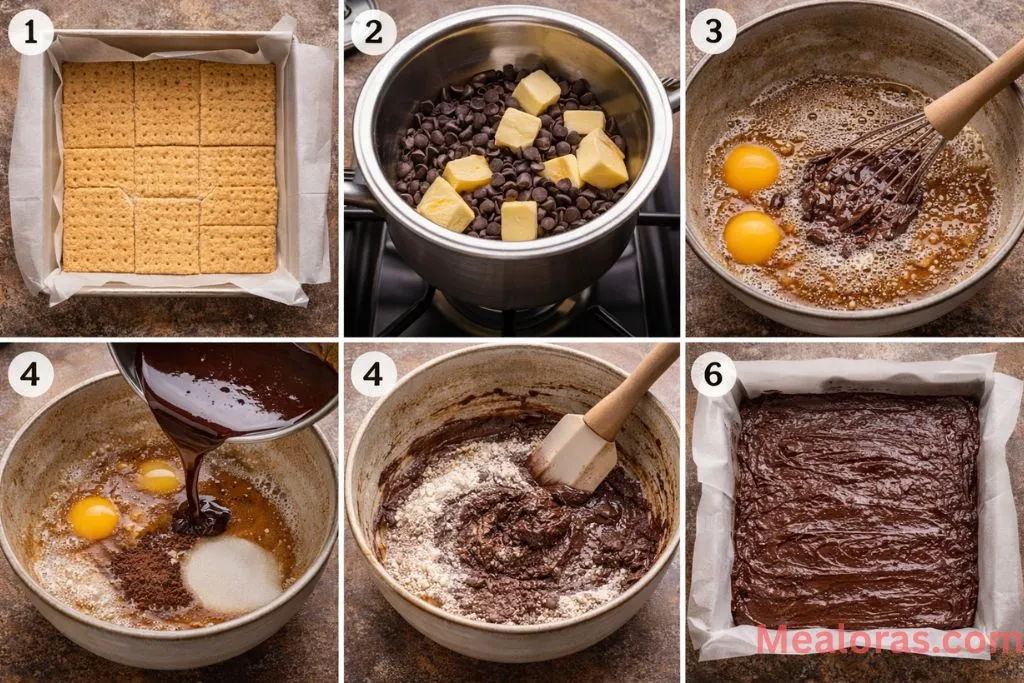
Start by preheating your oven to 350°F (180°C). Line your 8×8 inch square baking pan with parchment paper, leaving a bit of an overhang on the sides. This makes it much easier to lift the brownies out once they are set. Place the graham cracker sheets in a single layer at the bottom of the pan. You may need to break a few pieces to ensure the entire bottom is covered.
2. Melt the Chocolate and Butter
In a heatproof bowl, combine the 10 tablespoons of butter and the first portion of dark chocolate chips (2/3 cup + 1/4 cup). Melt them together using a double boiler or in short bursts in the microwave, stirring until the mixture is completely smooth and glossy.
3. Mix the Sugars and Eggs
In a separate large bowl, whisk together the dark brown sugar, granulated sugar, two whole eggs, the extra egg yolk, and the vanilla extract. Whisk vigorously until the mixture is well combined and slightly pale.
4. Combine Wet Ingredients
Slowly pour the melted chocolate and butter mixture into the egg and sugar mixture. Whisk constantly as you pour to ensure the heat doesn’t cook the eggs. Continue mixing until the batter is uniform and shiny.
5. Add the Dry Ingredients
Sift the all-purpose flour, Dutch-process cocoa powder, espresso powder, and sea salt into the bowl. Use a rubber spatula to gently fold the dry ingredients into the wet batter. Stop as soon as no more streaks of flour are visible. Overmixing at this stage can lead to a cake-like texture, and we want these to stay dense and moist.
6. Bake the Brownie Layer
Pour the brownie batter over the graham crackers in the prepared pan. Spread it out evenly with your spatula. Bake for approximately 25–30 minutes, or until a toothpick inserted into the center comes out with just a few moist crumbs. While the brownies bake, you can start preparing the homemade marshmallow topping.
7. Prepare the Marshmallow Base
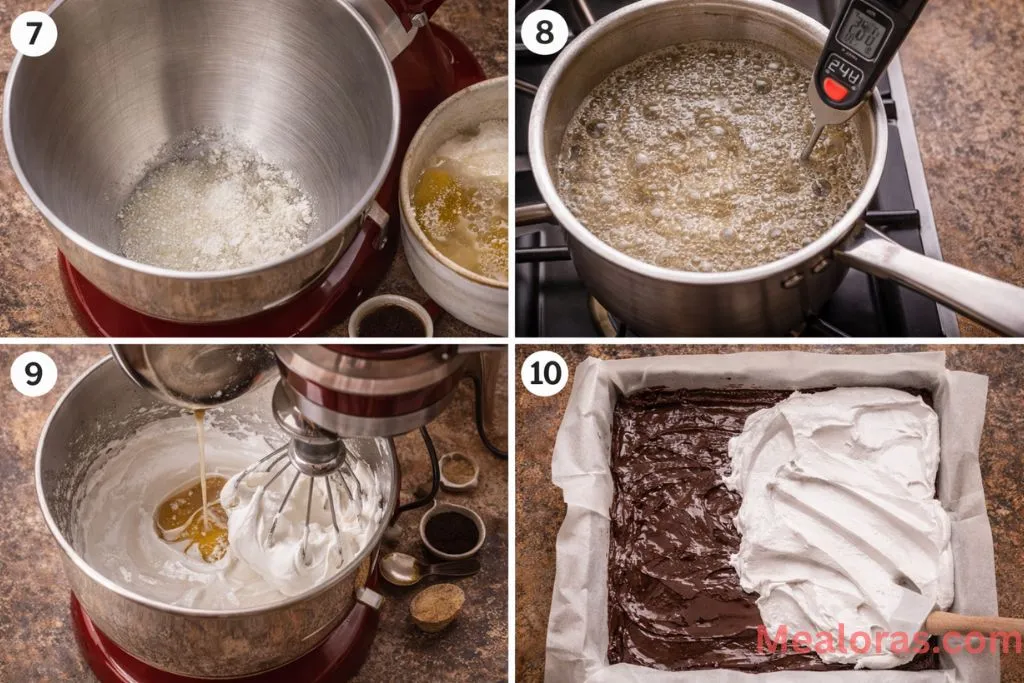
Place the 1/3 cup of water in the bowl of a stand mixer and sprinkle the gelatin powder over it. Let it sit for about 10 minutes to “bloom.” Meanwhile, in a heavy-bottomed saucepan, combine the 1 1/8 cups of sugar, agave nectar, and a splash of water.
8. Boil the Syrup
Heat the sugar mixture over medium heat, stirring until the sugar dissolves. Let it come to a boil and cook for about 10–13 minutes. If you have a candy thermometer, you are looking for a temperature between 240°F and 250°F.
9. Whip the Marshmallow
With the mixer on low speed, slowly stream the hot sugar syrup into the bloomed gelatin. Once all the syrup is added, add the vanilla bean paste and a pinch of salt. Increase the speed to medium-high and whip for about 10–15 minutes. The mixture should become thick, white, and very fluffy.
10. Assemble and Set
When the brownies are cool, melt the 1/2 cup of chopped dark chocolate and spread it in a thin layer over the top. Immediately scrape the fresh marshmallow mixture over the chocolate layer. Use a greased spatula to spread it to the edges. Let the brownies sit for at least 4 hours (or overnight) to allow the marshmallow to set completely.
11. The Final Toast
Once set, you can use a kitchen torch to toast the top of the marshmallow until it is golden brown. If you don’t have a torch, you can briefly place them under a broiler, but watch them very closely as they can burn in seconds!
Tips for Success
To get the cleanest cuts, grease your knife with a little bit of oil or dip it in hot water and wipe it clean between every slice. The marshmallow layer is very sticky, so this step is essential for a beautiful presentation.
If you enjoy recipes with layers of fun ingredients, these fudgy Oreo brownies recipe offer a similar multi-textured experience that is perfect for chocolate lovers.
Variations to Try
- Peanut Butter Twist: Swirl a bit of creamy peanut butter into the brownie batter before baking for a salty-sweet contrast.
- Extra Crunch: Sprinkle crushed graham cracker crumbs on top of the marshmallow before it sets.
- Milk Chocolate Swap: If dark chocolate is too intense, you can use milk chocolate chips for a sweeter, more traditional s’mores flavor.
Storage and Serving
Store your S’mores Brownies from Scratch in an airtight container at room temperature. They will stay fresh and delicious for up to 3–5 days. If you prefer a firmer, even fudgier texture, you can keep them in the refrigerator.
When serving, these are wonderful on their own or paired with a cold glass of milk. They also make a fantastic base for a dessert sundae—just add a scoop of vanilla bean ice cream on top of a slightly warmed brownie.
Frequently Asked Questions
1. Can I use store-bought marshmallow fluff instead? Yes, you can substitute the homemade marshmallow with a jar of marshmallow fluff, though the texture will be softer and less stable.
2. How do I prevent the graham crackers from getting soggy? The graham crackers stay relatively crisp because they are baked under the dense brownie batter, which acts as a barrier.
3. Do I have to use espresso powder? No, it is optional. However, it doesn’t make the brownies taste like coffee; it simply makes the chocolate flavor deeper and richer.
4. Can I make these in a 9×9 pan? Yes, but the layers will be thinner, and you will need to reduce the baking time by a few minutes.
5. How do I know when the brownies are done? The edges should be set, but the center should still have a slight wiggle. A toothpick should come out with moist crumbs, not liquid batter.
6. Can I freeze these brownies? It is not recommended to freeze them once the marshmallow layer is added, as the texture of the marshmallow can change significantly when thawed.
7. What is Dutch-process cocoa powder? It is cocoa powder that has been treated with an alkalizing agent, making it darker and less acidic than natural cocoa powder.
8. Why do I need an extra egg yolk? The extra yolk adds fat and protein, which results in a much fudgier and chewier brownie.
9. My marshmallow didn’t thicken, what happened? Ensure the sugar syrup reached the correct temperature and that you whipped the mixture long enough. It needs time to build structure.
10. Is agave nectar necessary for the marshmallows? The agave (or corn syrup) prevents the sugar from crystallizing, ensuring a smooth and stretchy marshmallow texture.
Conclusion
These S’mores Brownies from Scratch are a guaranteed crowd-pleaser that combines the best parts of a campfire treat with a gourmet baked good. The contrast between the dark chocolate and the light, toasted marshmallow makes every square feel like a special occasion. Since they are made entirely from scratch, you have full control over the quality of the ingredients, resulting in a superior flavor that box mixes simply can’t match.
If you enjoyed this recipe, please feel free to share it with your friends and family. It is a wonderful way to bring a little bit of sweetness to any gathering or a simple night in.

S’mores Brownies from Scratch
Ingredients
- Graham Cracker Layer
- 4 –5 honey graham cracker sheets
- Brownie Batter
- 10 tablespoons unsalted butter
- 2/3 cup + 1/4 cup dark chocolate chips divided
- 1/2 cup dark brown sugar packed
- 1/2 cup granulated sugar
- 2 large eggs
- 1 large egg yolk
- 2 teaspoons vanilla extract
- 2/3 cup + 1 tablespoon all-purpose flour
- 1/4 cup unsweetened Dutch-process cocoa powder
- 1 teaspoon espresso powder optional
- 1/4 teaspoon fine sea salt
- 1/2 cup chopped dark chocolate for topping
- Marshmallow Topping
- 1 1/8 cups granulated sugar
- 1/3 cup water for syrup
- 4 1/2 teaspoons gelatin powder
- 1/4 cup + 1 tablespoon agave nectar
- 1 teaspoon vanilla bean paste
- A pinch of salt
Instructions
- Preheat the oven and line a square baking pan with parchment paper before covering the bottom with a single layer of graham cracker sheets.
- Melt the butter and the first portion of chocolate chips together until the mixture is completely smooth and glossy.
- Whisk the sugars, eggs, egg yolk, and vanilla in a separate bowl until the mixture is pale and well combined.
- Slowly stream the melted chocolate into the egg mixture while whisking constantly to keep the eggs from cooking.
- Sift in the flour, cocoa powder, espresso powder, and salt, then gently fold the dry ingredients into the batter until just combined.
- Pour the finished batter over the crackers and bake until a toothpick comes out with only a few moist crumbs.
- Bloom the gelatin in water while heating the sugar, agave, and additional water in a saucepan until it reaches a boil and thickens.
- Slowly pour the hot syrup into the gelatin while whipping at high speed until the mixture becomes thick, white, and fluffy.
- Spread a thin layer of melted chopped chocolate over the cooled brownies before topping with the fresh marshmallow mixture.
- Allow the layers to set for at least four hours at room temperature to ensure the marshmallow is stable enough to slice.
- Toast the top of the marshmallow layer with a kitchen torch or briefly under a broiler for a golden, charred finish.
Notes
• Store at room temperature in an airtight container for up to five days.
• Do not overmix the brownie batter to ensure the texture stays fudgy rather than cake-like.

Mealoras your go-to for simple, flavorful recipes! From quick weeknight dinners to sweet treats and family favorites, we make cooking easy, fun, and delicious for everyone in the kitchen.